1. Login:
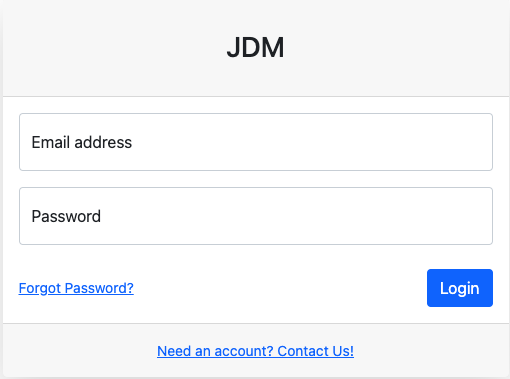
Login page appears to be like this. Enter your credentials for accessing the application.
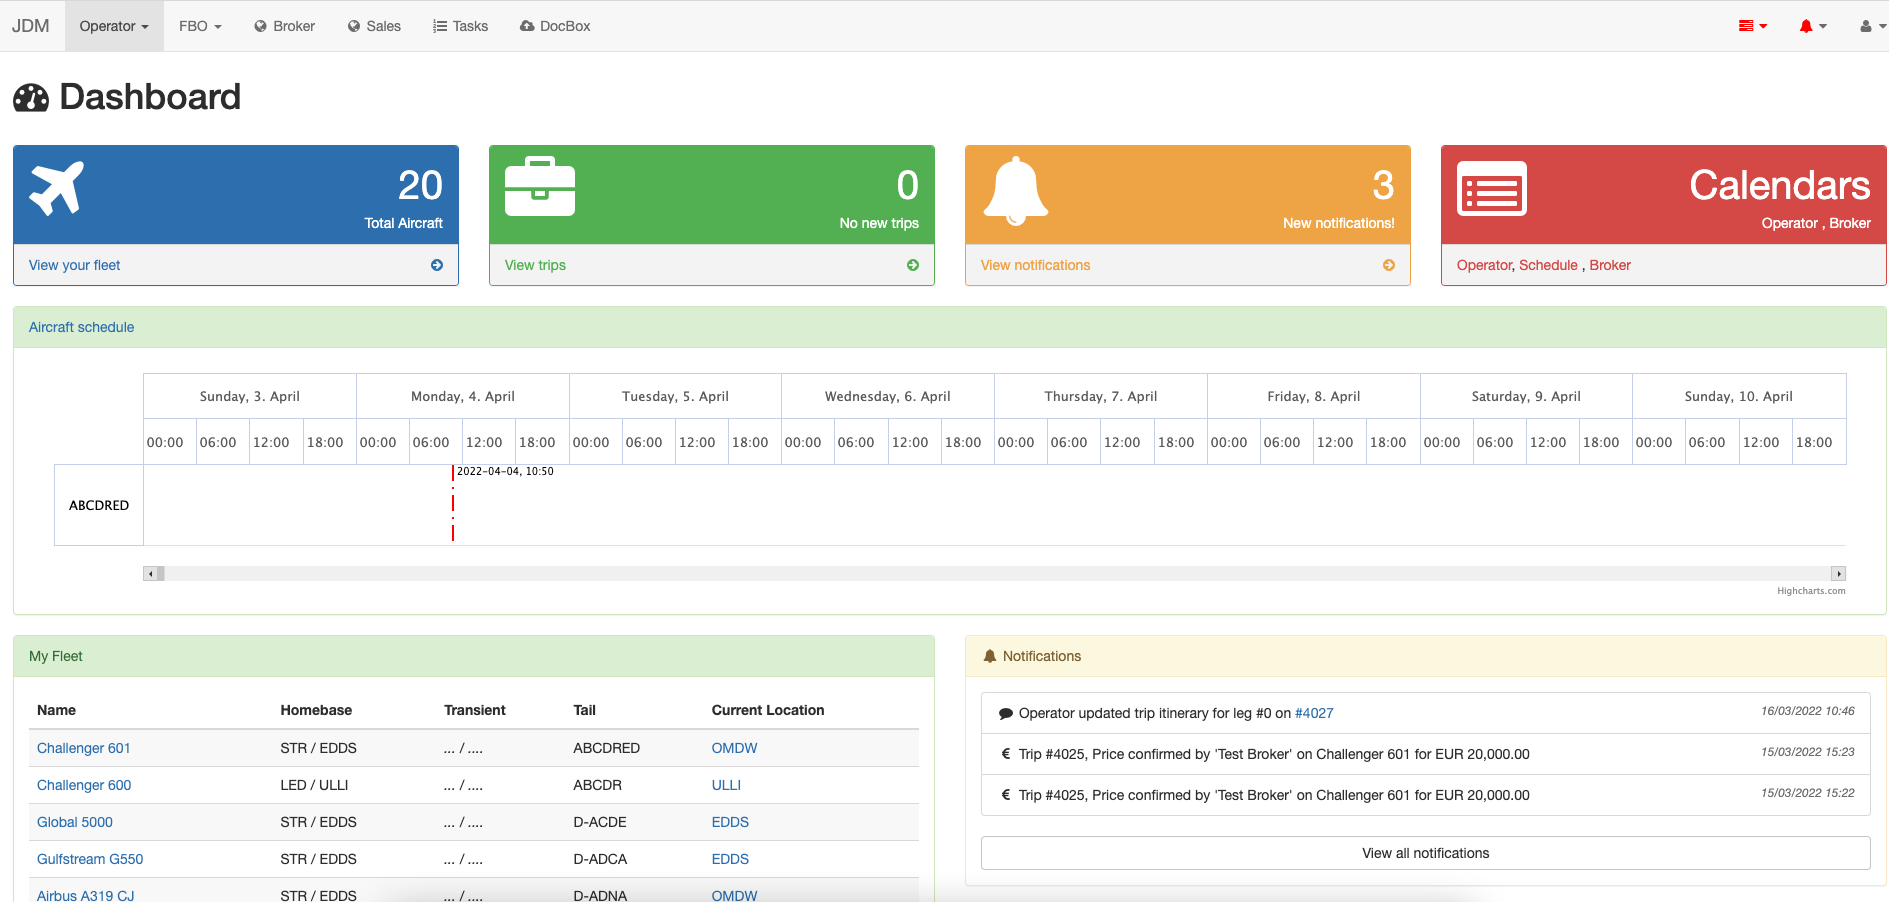
Login credentials bring you up to the JDM dashboard.
Login page appears to be like this. Enter your credentials for accessing the application.
Login credentials bring you up to the JDM dashboard.
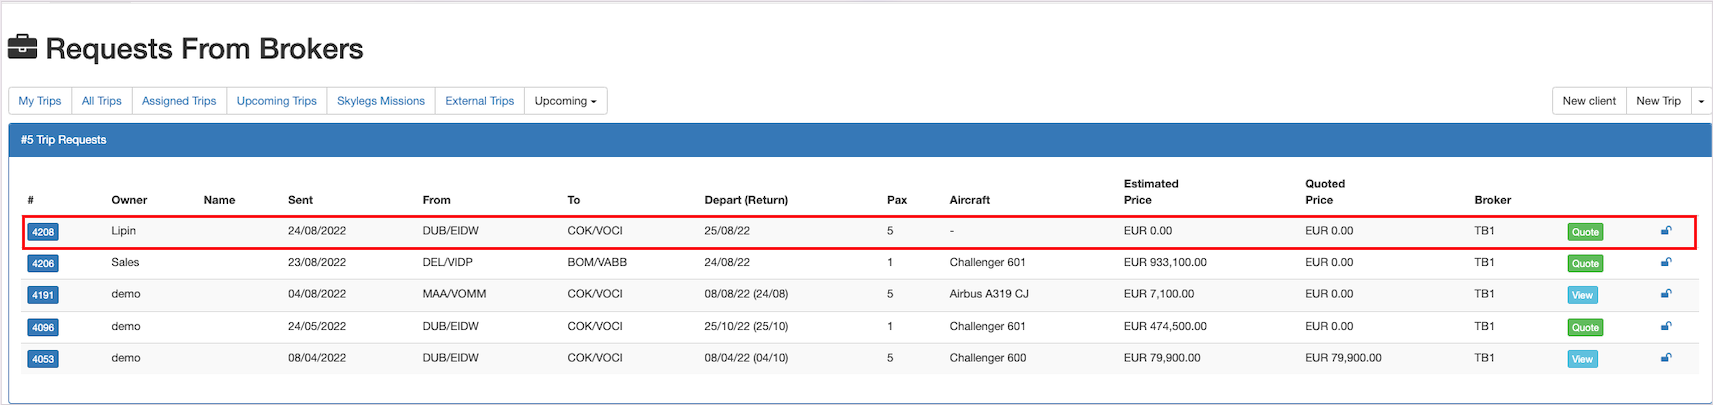
Sales module displays all the upcoming trips, all trips, tripbox requests, open trips, and calendar view.
A new trip can be created by clicking on the New Trip button on the top right most corner.


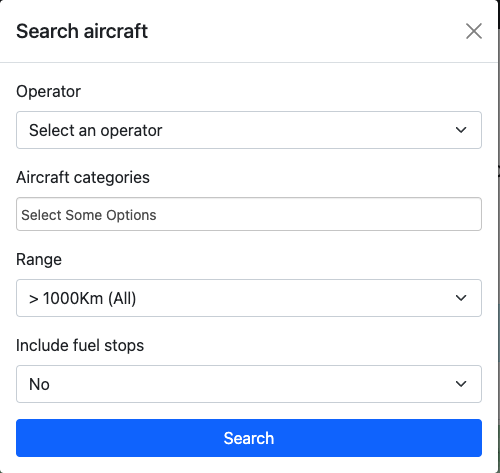
An aircraft is added to the trip by clicking on the Search button and selecting the corresponding type of aircraft.


Add the appropriate aircraft for the trip by clicking on the Add button.

Now, click on the operator to overwrite the price and hit theOverwrite Price button(1). Now make the aircraft visible
by clicking on the  icon(2). Now, click on the Documents button and assign client to the trip.

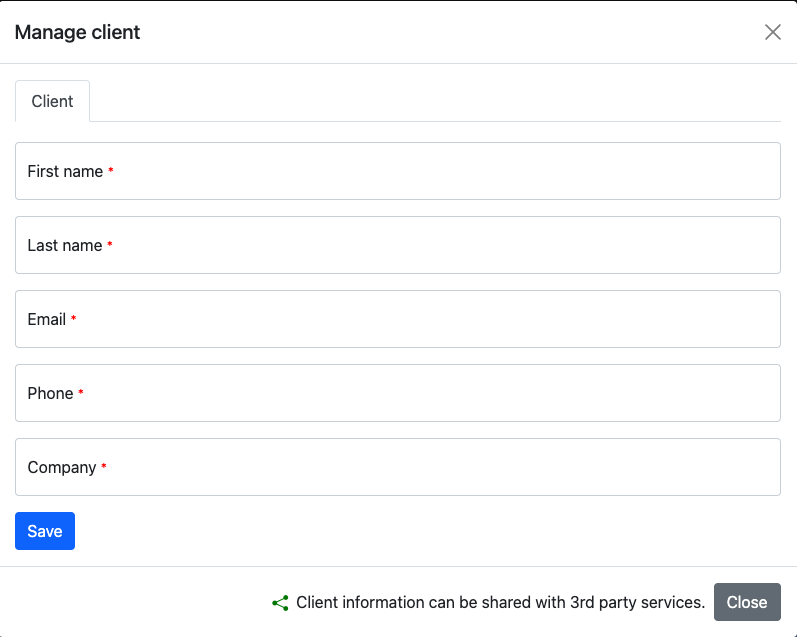
Save the client details and go the Documents again and click on the Quote button.

Now, click on the Book button for adding aircraft to the trip.
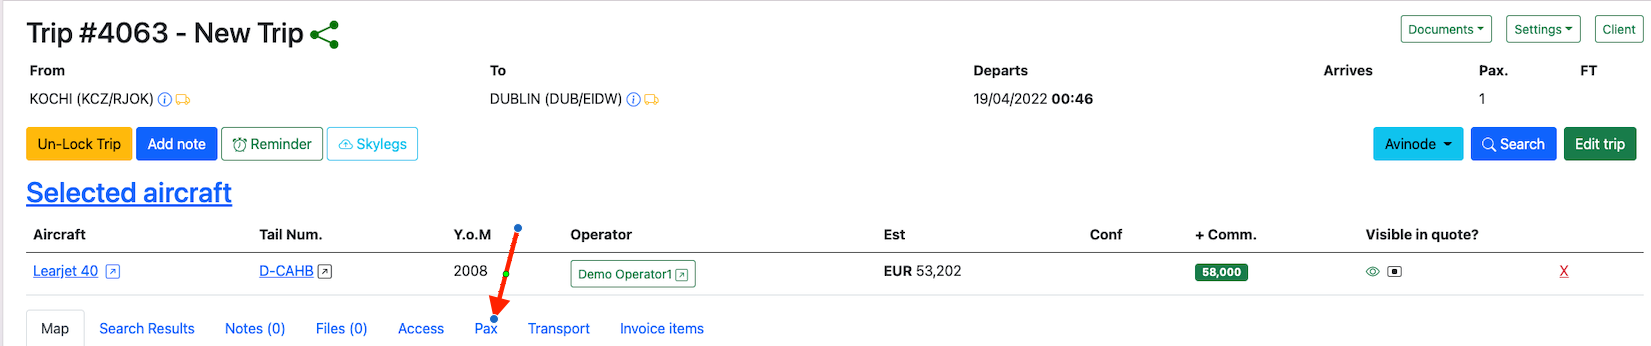
Passengers can be added to trip by clicking on the Pax button.
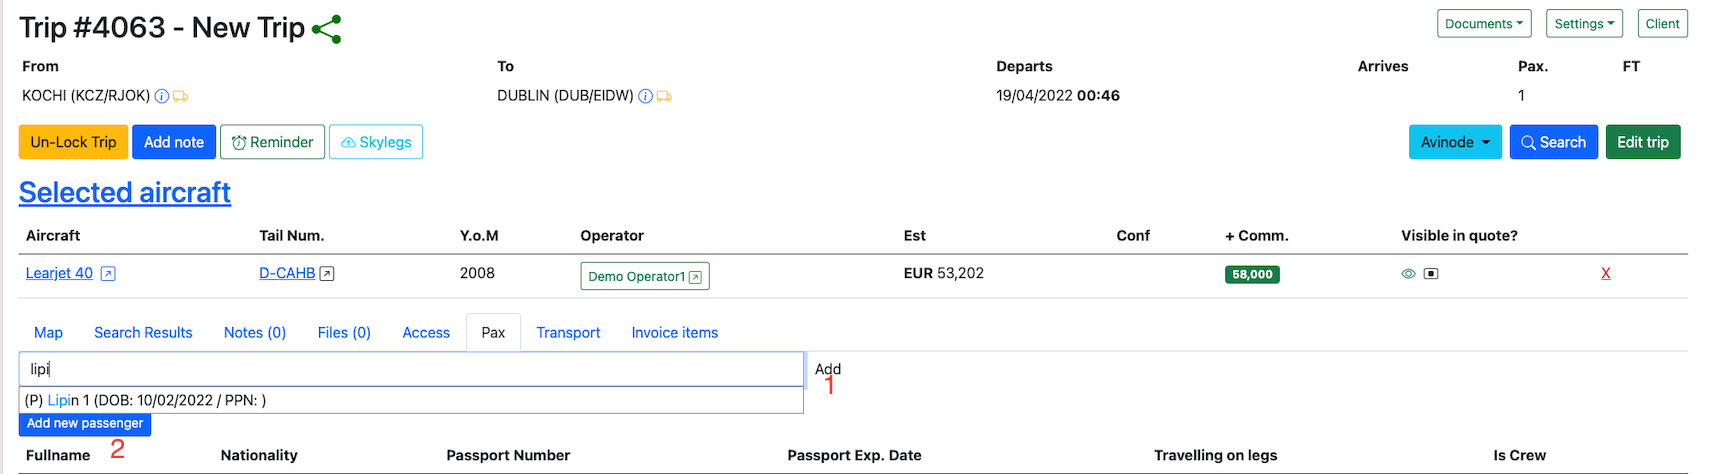
A new passenger can be created by clicking on the Add New Passenger button(1). An existing client can be searched from the database and can be added to a trip by clicking on the Add button(2).
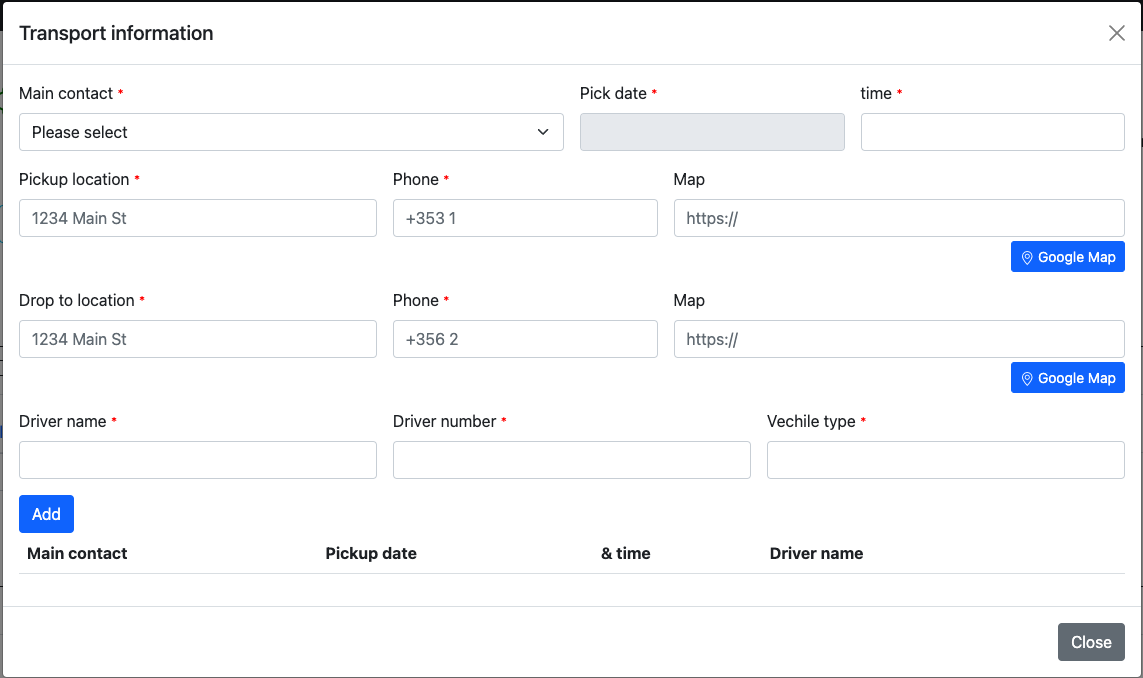
Transport for the Pax from the airports is being managed in this section. Global Transport Management can be accessed by clicking on the  button on the trip legs.

A note can be added to trips by clicking on the Add Notebutton.

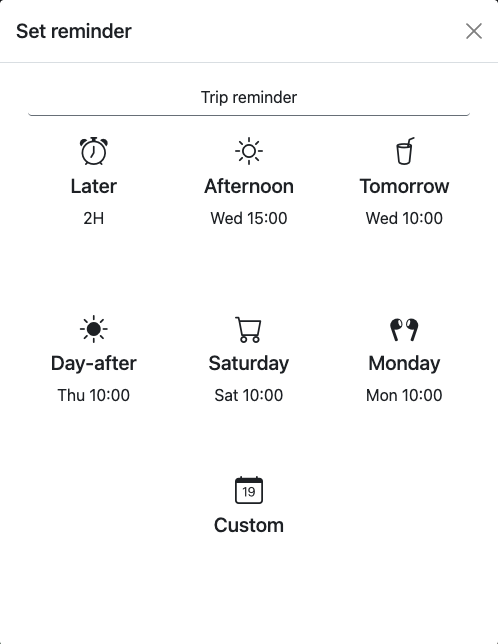
Reminders on trips are added by clicking on the Reminder button.

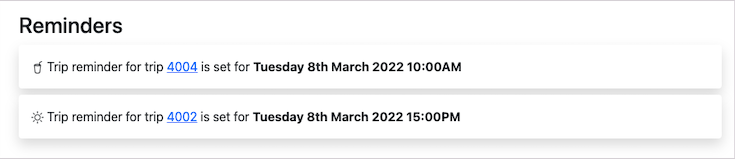
All the trip reminders can be viewed by clicking on the  button on the top right most corner.

Trip can be managed on Skylegs by clicking on the Skylegsbutton.

A user can search for aircrafts on Avinode through JDM, with avinode login credentials.

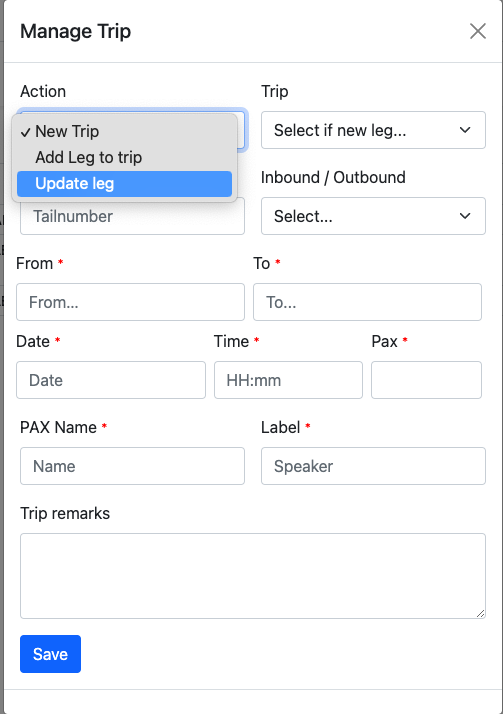
A trip can be modified by clicking on the Edit Trip: button.

A new leg can be added by clicking on the Add Leg button(1). Legs can be deleted by clicking on the  button(2). Leg order can be reset by clicking on the
 button.

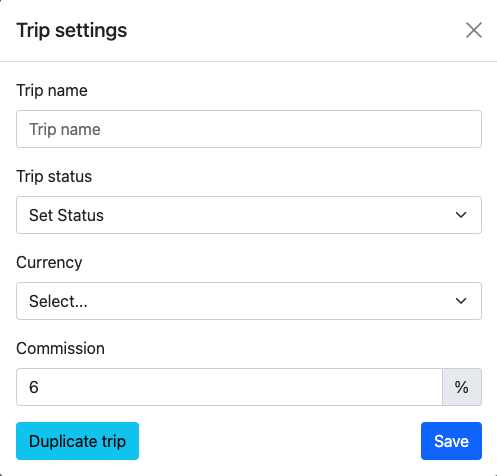
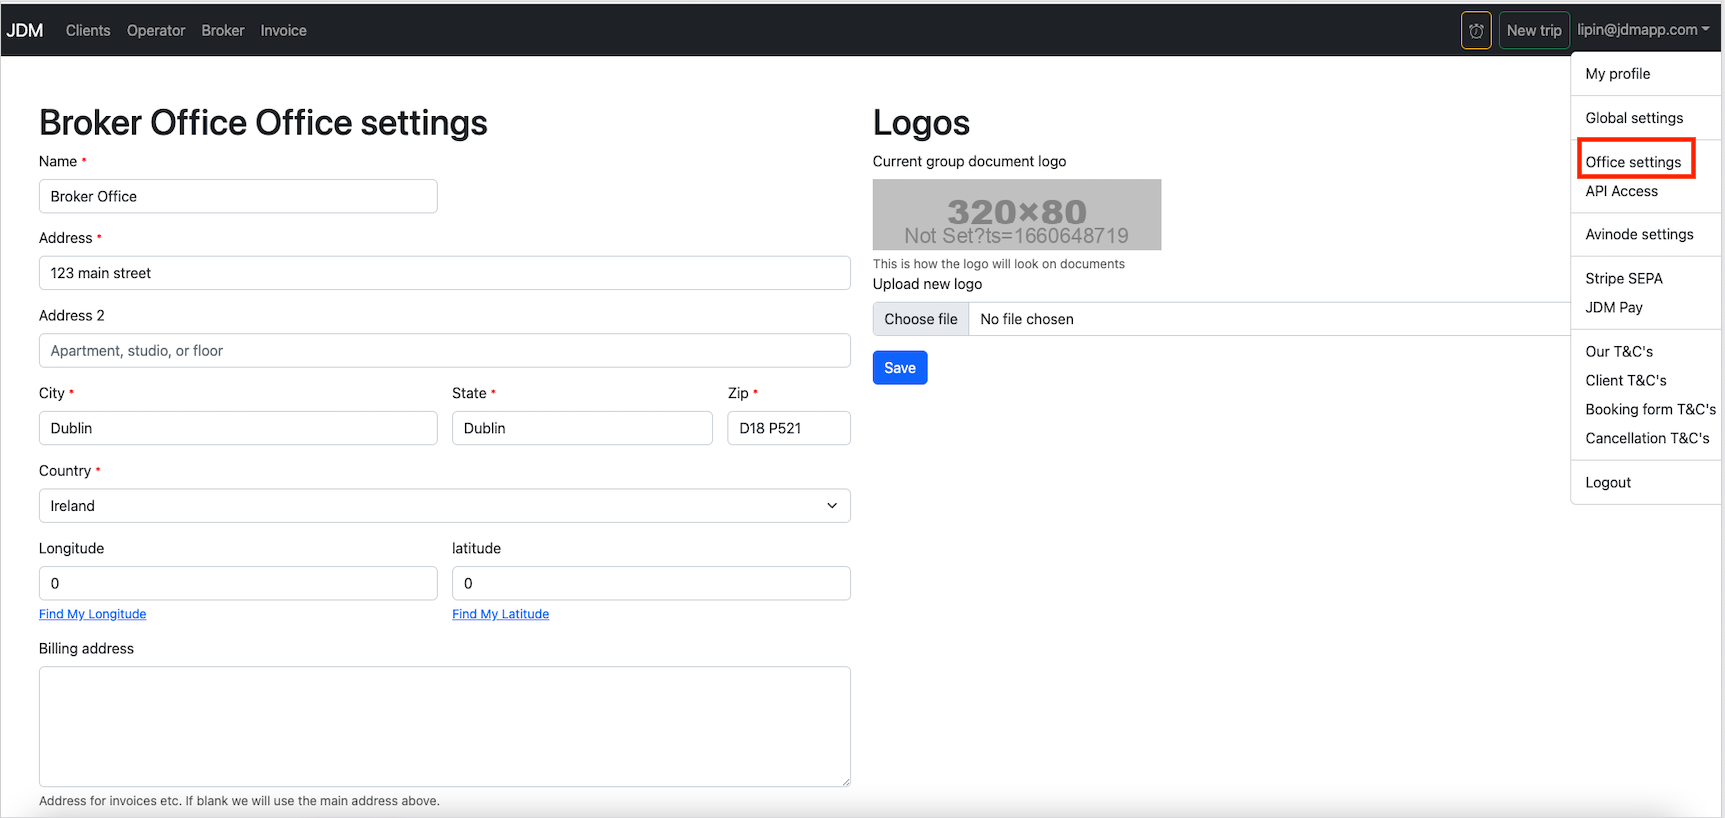
Trip settings can be added from the settings button on the top right hand corner.

Finance settings are added from the

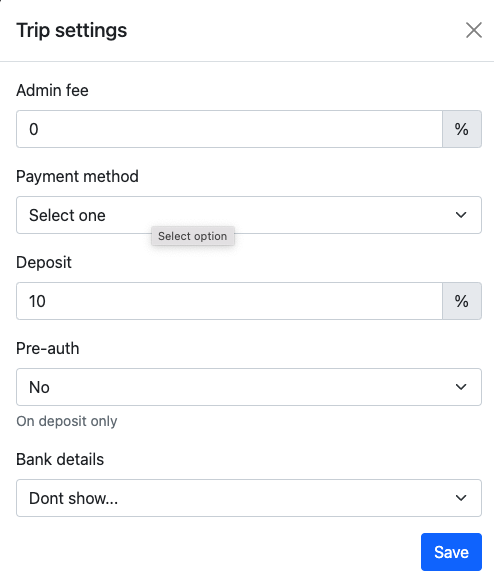
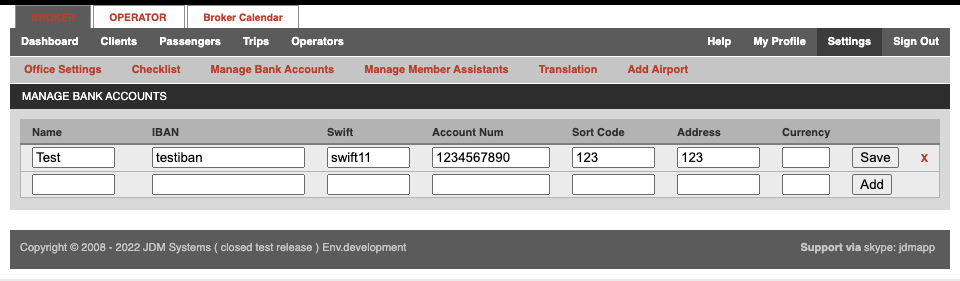
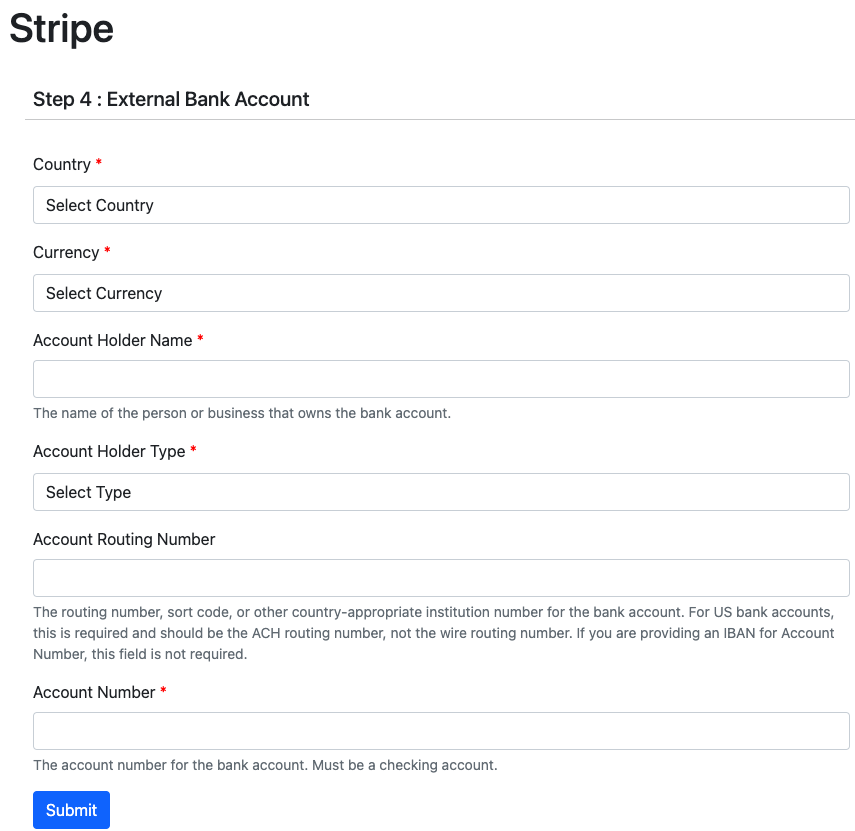
Bank details are added from the Settingsbutton.

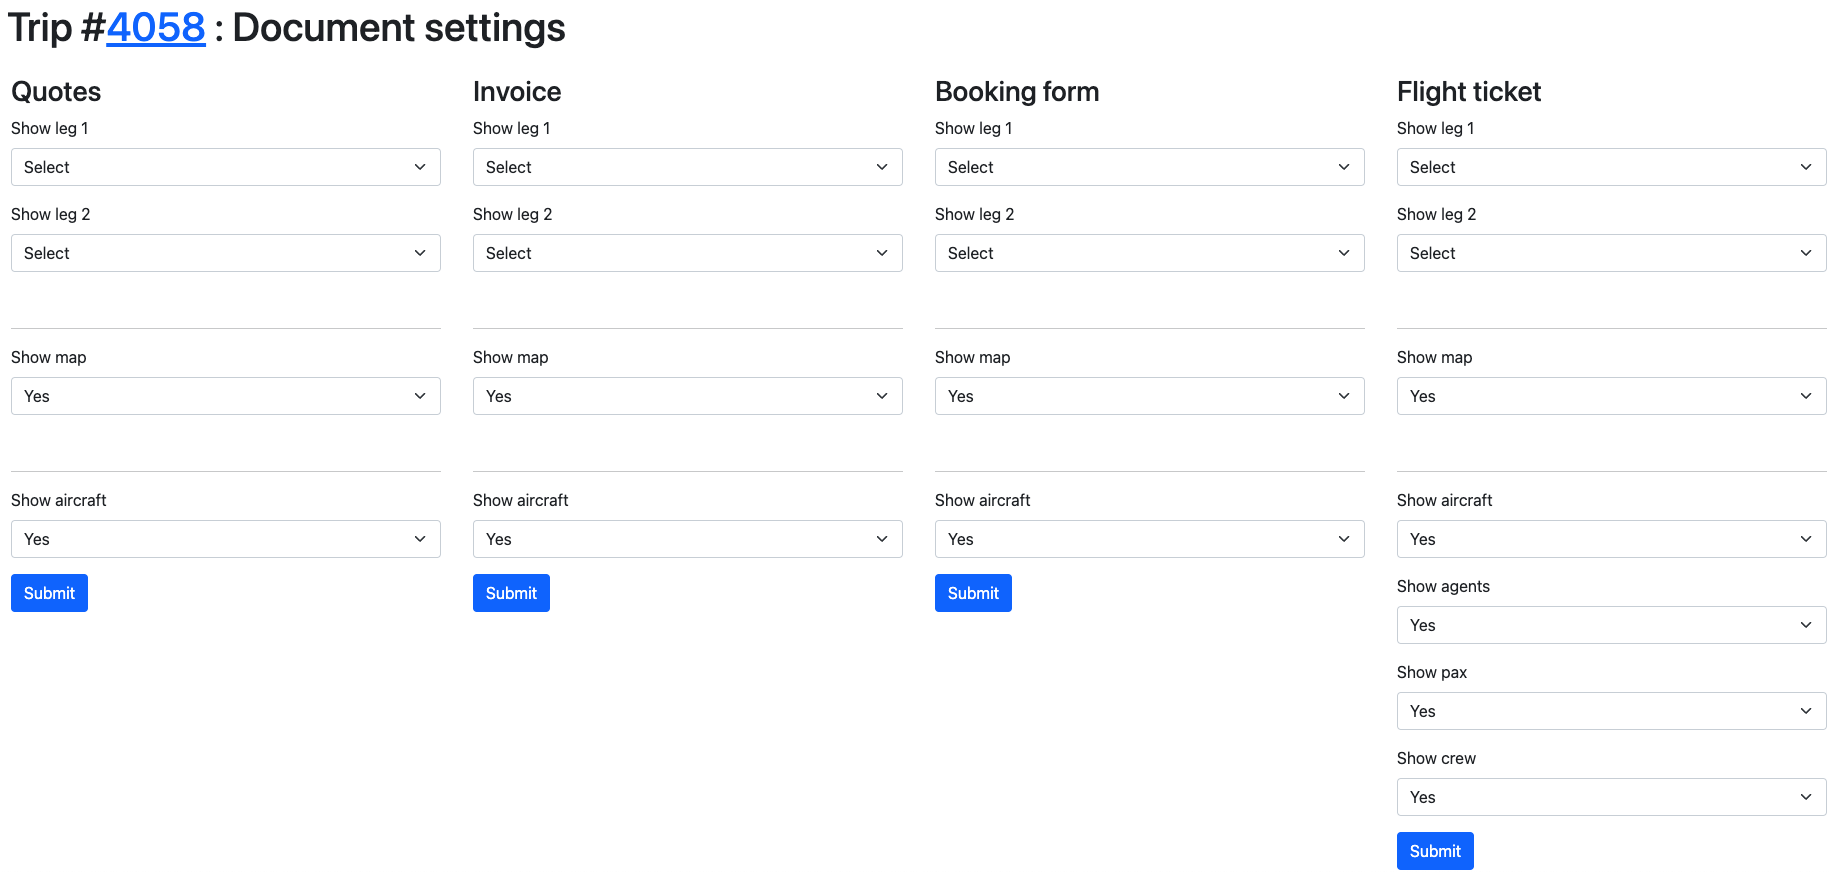
Document settings are added from the Documentsbutton on the right top corner.

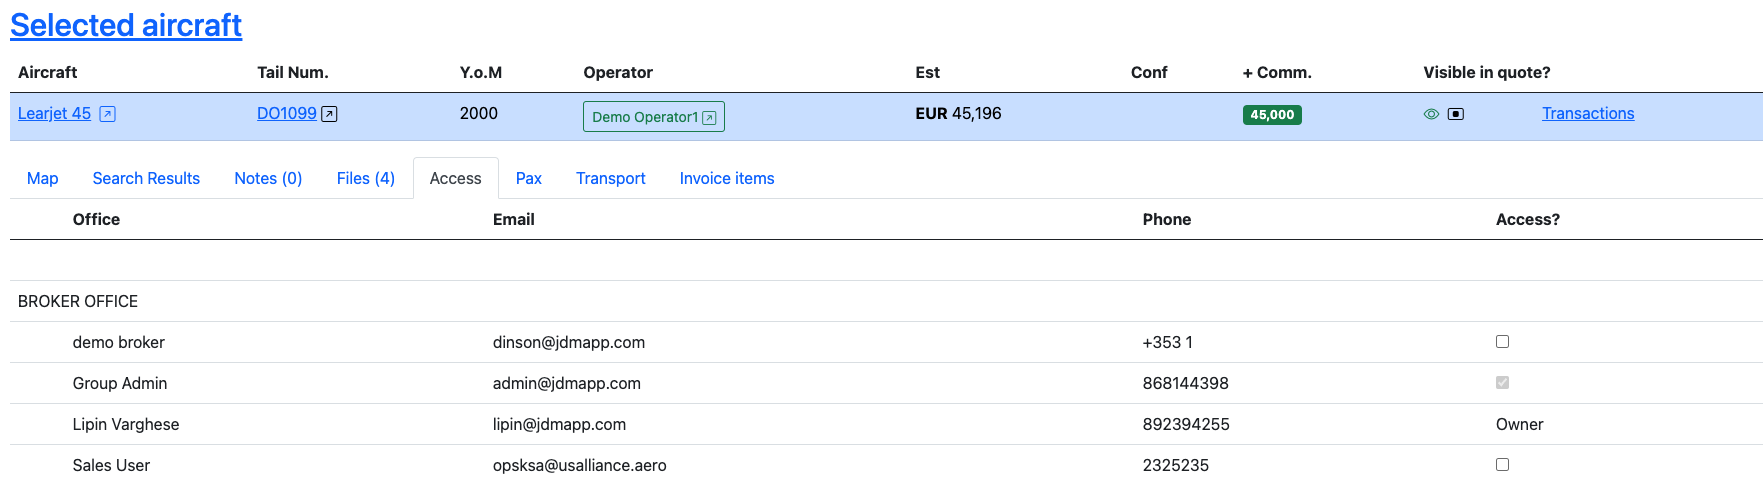
Access button displays the users that have access to the worksheet.

Payment processing as an agent has the following steps,
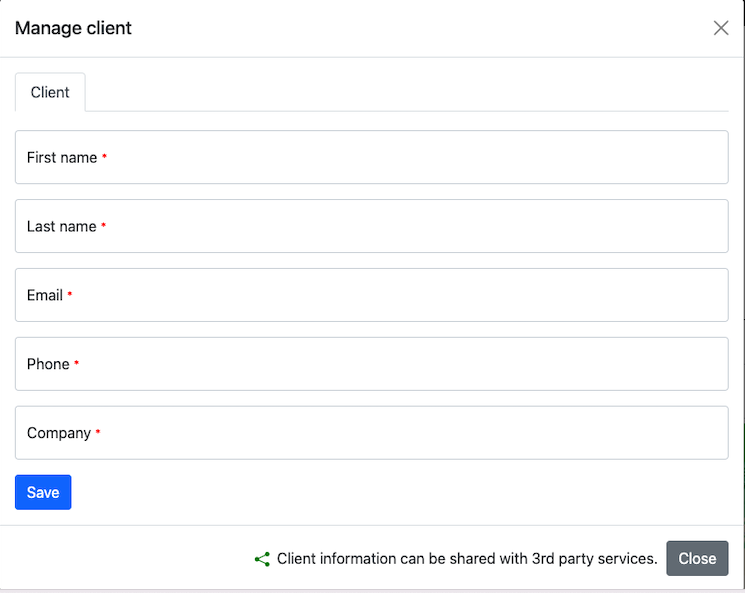
Once a trip has been created, then the next is to assign a client to the trip. Click on the Documentsbutton and selectAssign Clientto add a client to the trip.

Assign a quote to the trip by clicking on theDocuments button and selecting Quote.

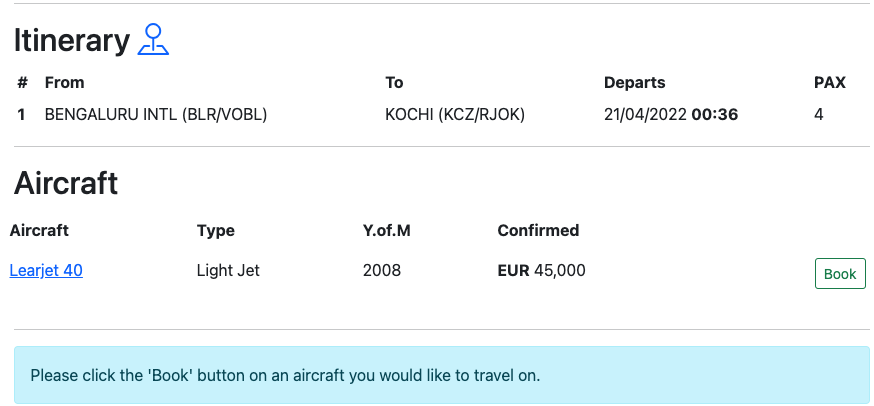
Click on the Book button to assign the aircraft for the trip.
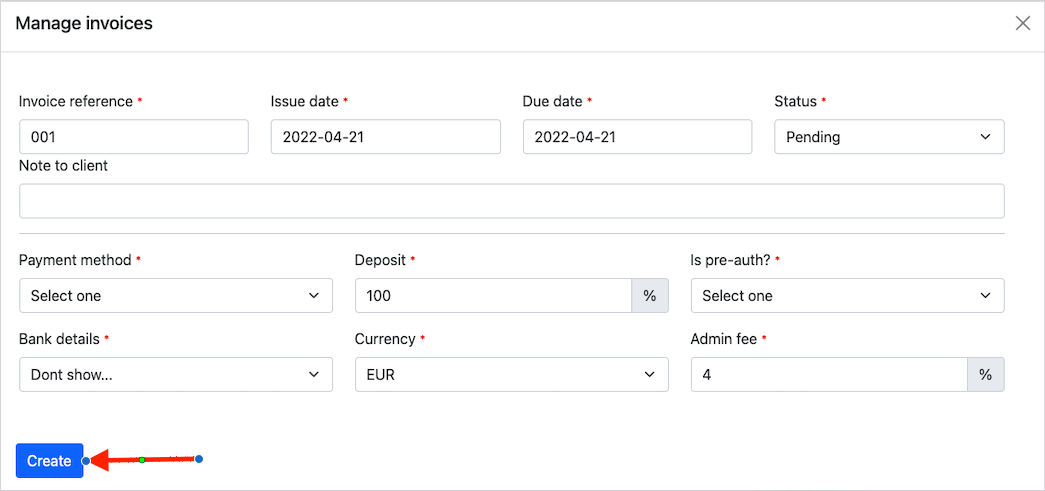
Click on the Documents button and select Manage invoices.

All you have to do is to fill up the details and click on the Create button.
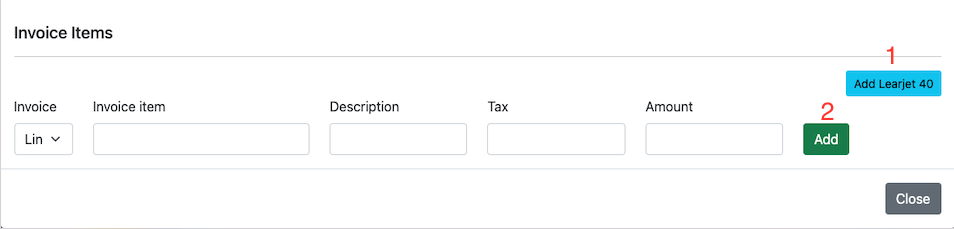
Now, add aircraft to the invoice(1) and click on the Add button.
To make payment on the invoice, select the Invoices by clicking on the Documents button.


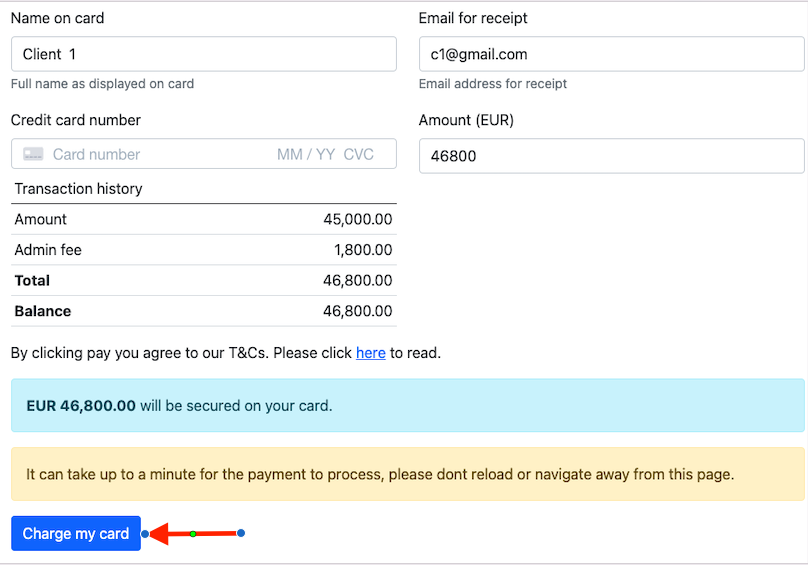
Click on the Transactions button for capturing the payment. Now refresh the page for redirecting you to the Transactions window.


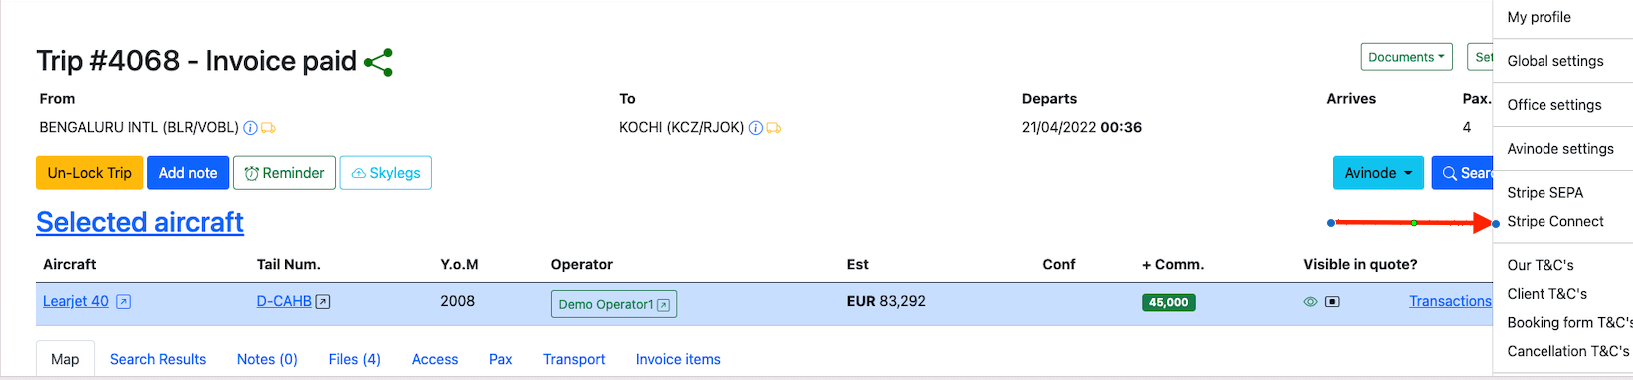
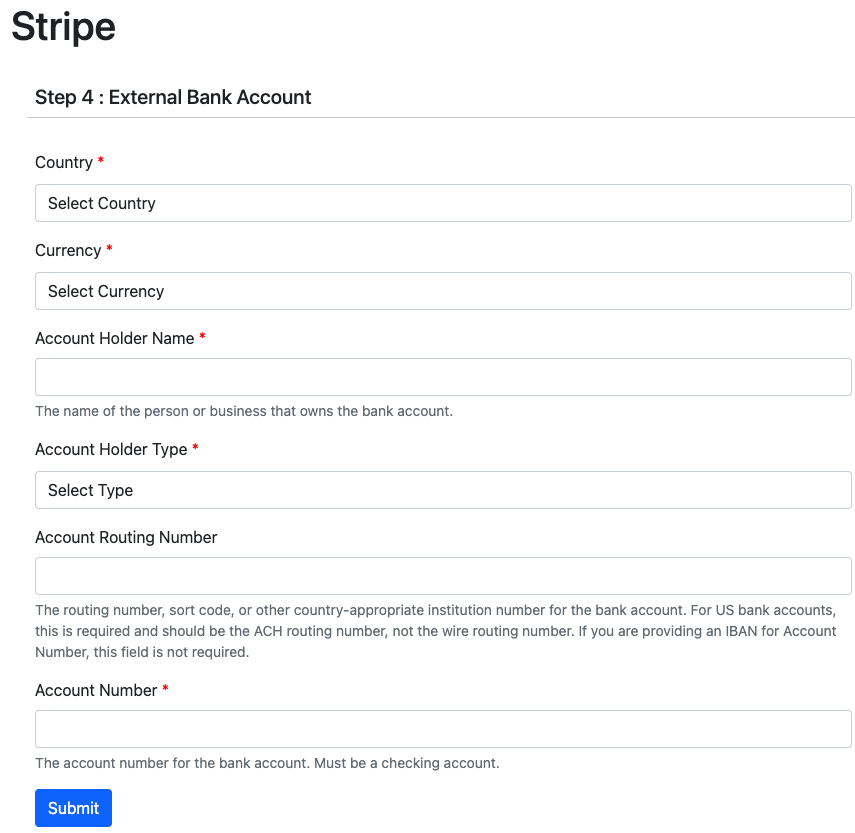
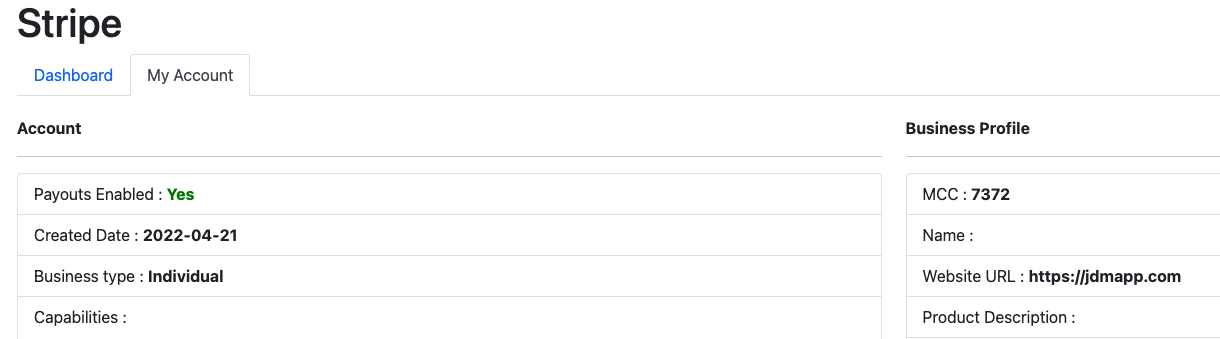
Stripe accounts can be set up for a company and an individual.
Stripe account can be created for a company by selecting the Stripe Connect from the user.
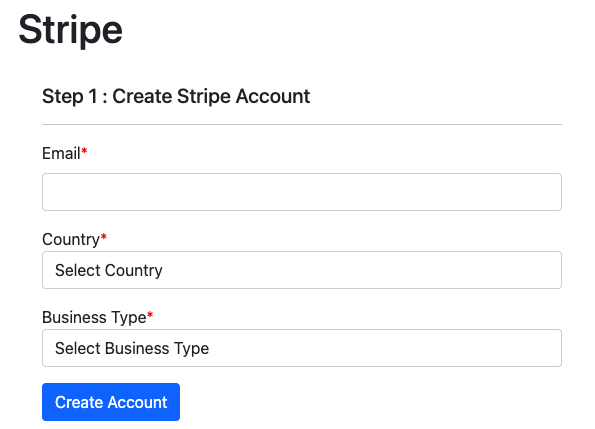
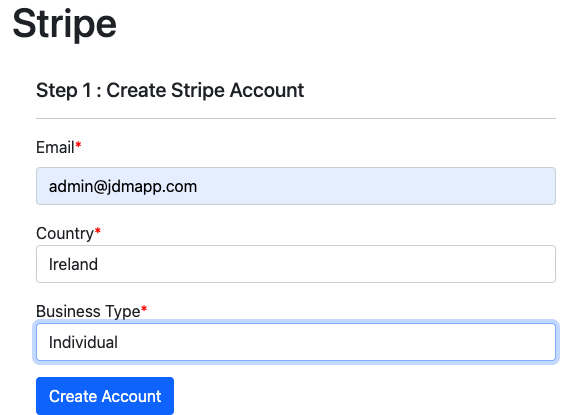
Now, fill up the details and click on the Create button
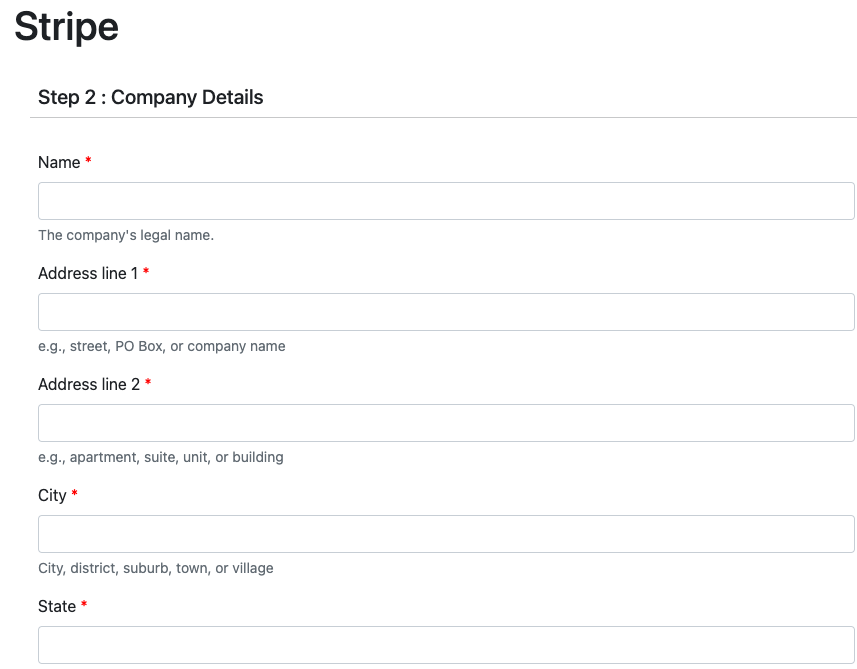
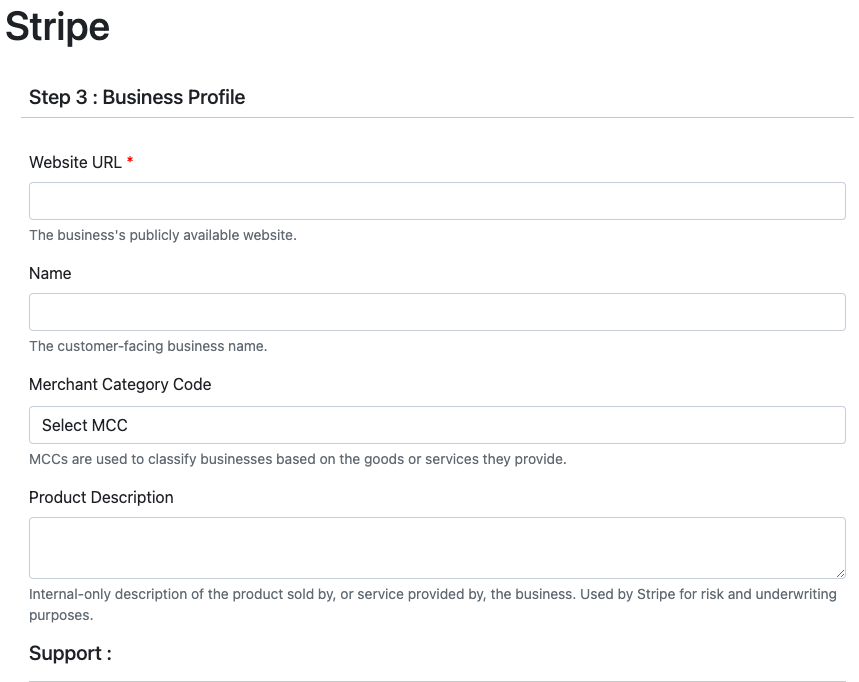
Upload all the requested documents in JPG, PNG or PDF format and the file size has to be a maximum of 10MB.
Now, the account is ready and takes you to the dashboard.
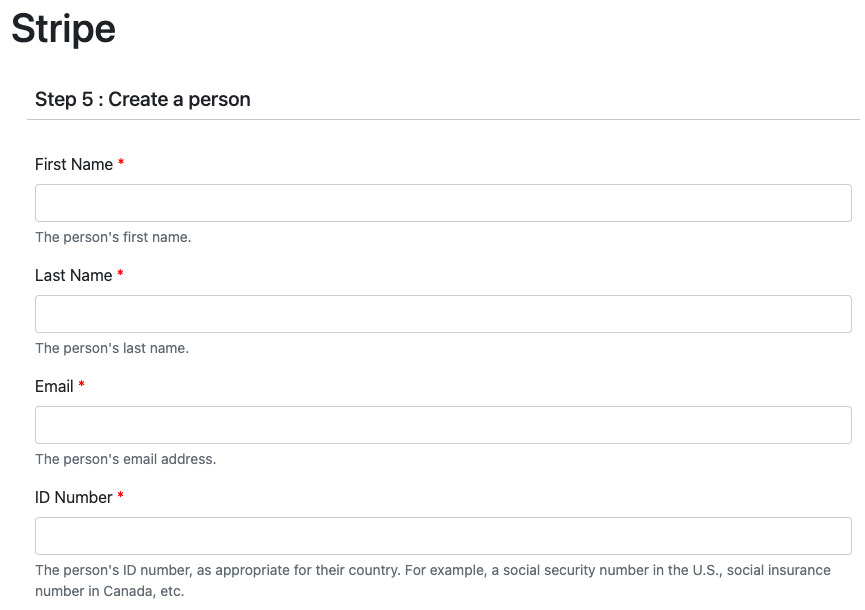
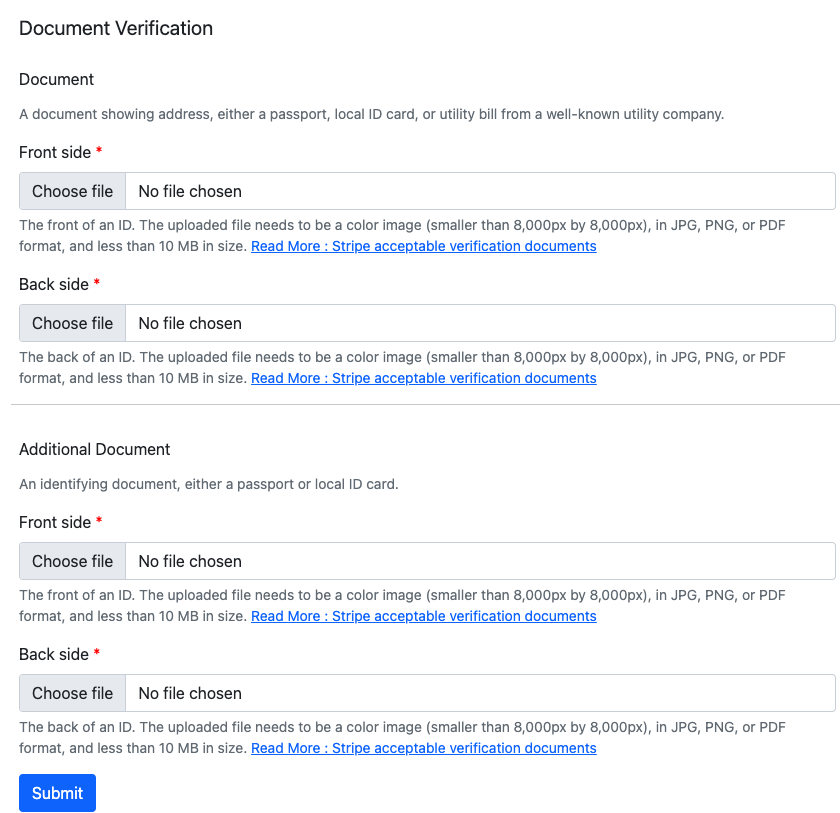
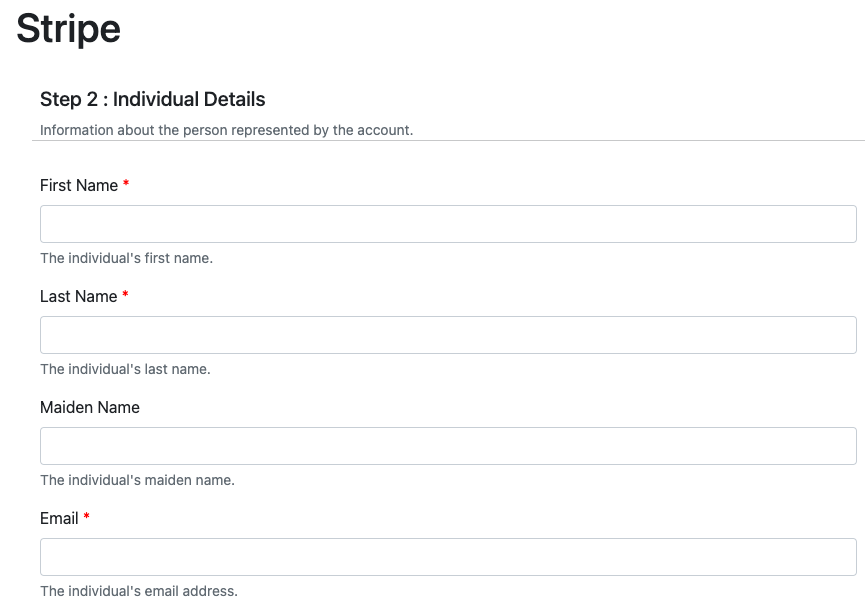
Stripe account can be created for an individual by selecting the Stripe Connect from the user
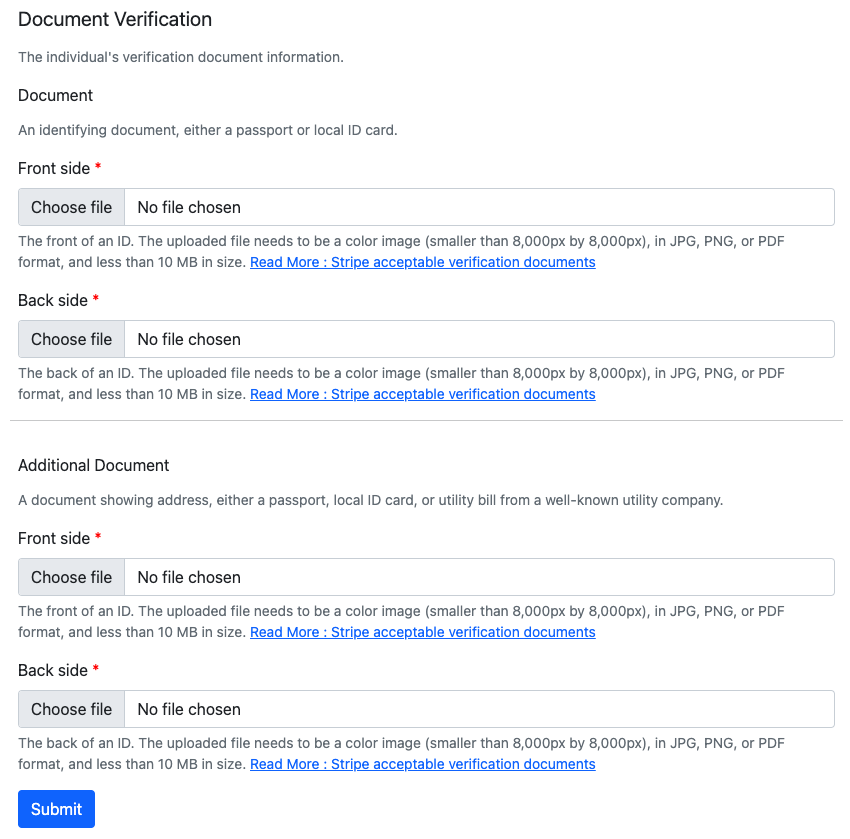
Upload the required documents on a JPG, PNG or PDF formats and the file size has to be of maximum 10 MB in size.

Enter the details and click on the submit button. It will take you to the individual Stripe dashboard.
Boiler templates for the to-do system can be imported from the office settings
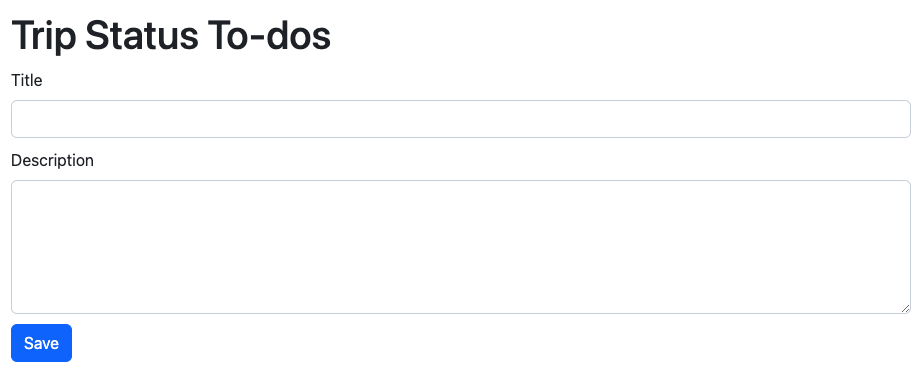
To-dos can be added to a trip by using then To-dos button in the trip dashboard.

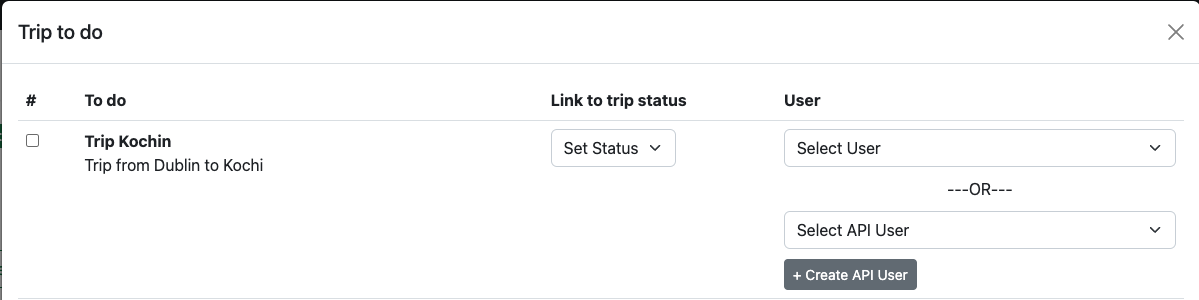
A new API user can be created by clicking on the+ Create API User button.
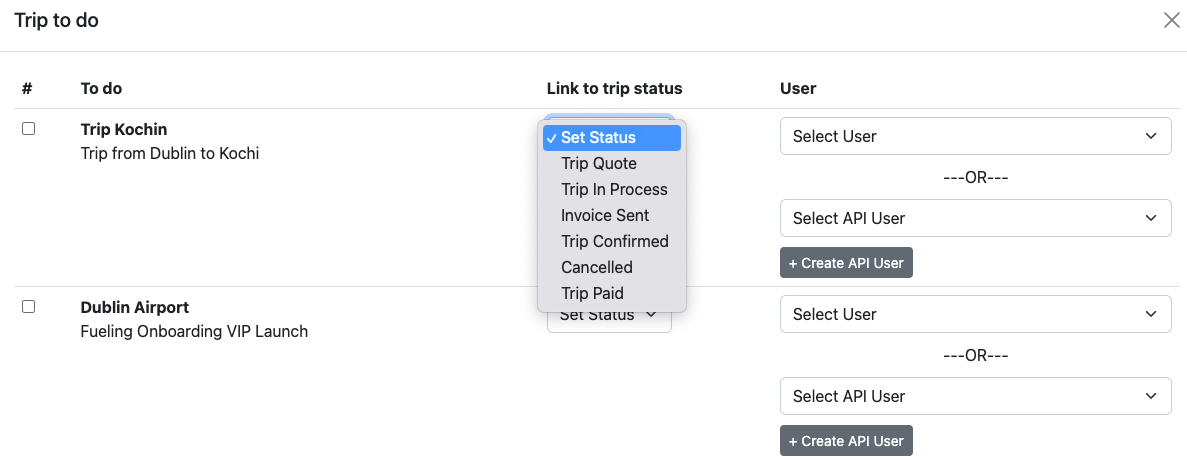
A trip status can be added to a trip from the Link to trip status menu in the trip to do list.
Once a trip status has been assigned to a trip, it can't be changed unless all the to-dos in the list has been completed.
Select the to-dos by clicking on the checkbox on the left hand side and click on theImport button for importing the to-dos into the trip.
Trips are listed on the to-dos dashboard based on thr trip status and each trip status has assigned an indication color.
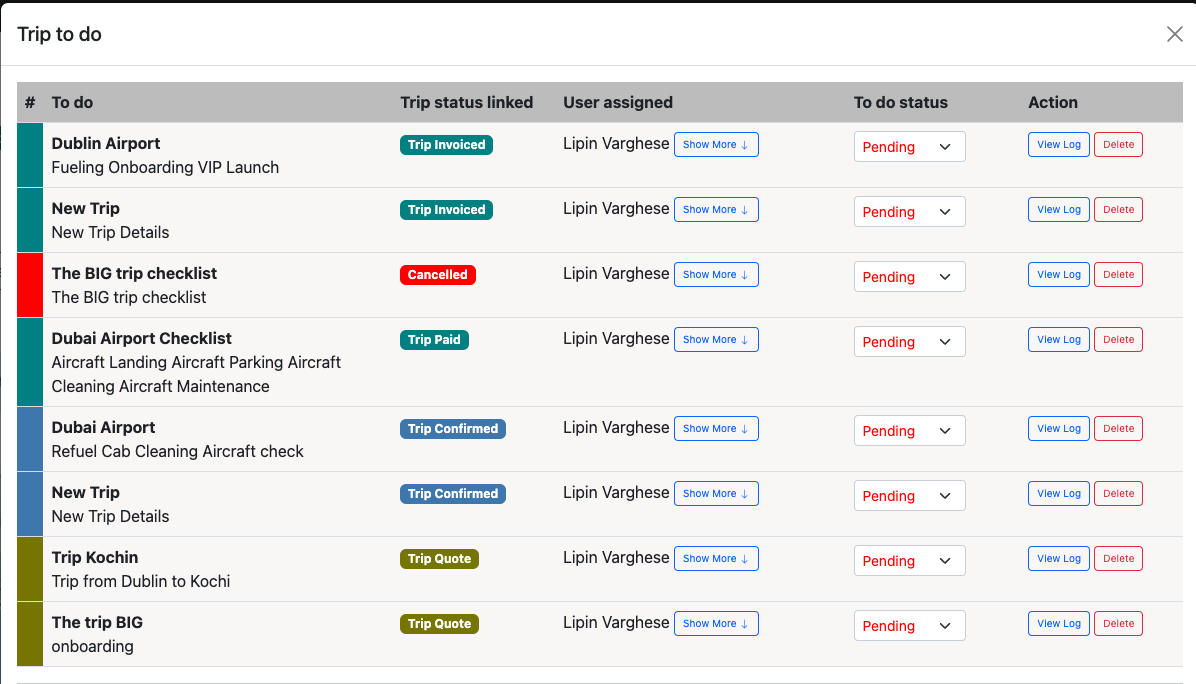
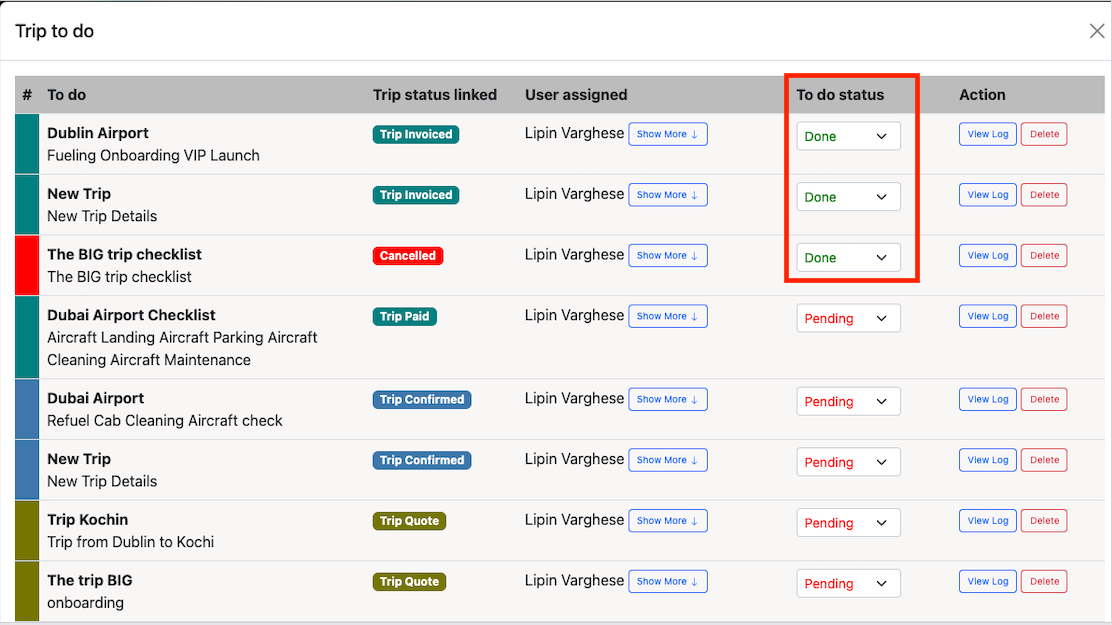
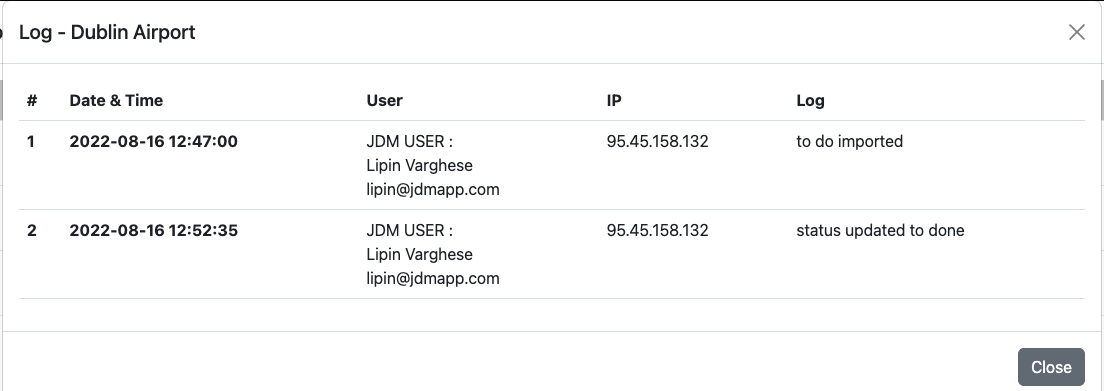
Once all the to-dos are done, trip status can be changed down to done. All the actions against a to-do is logged and can be viewed on the view log section.

You can use the Delete button to remove a to-do from the list.
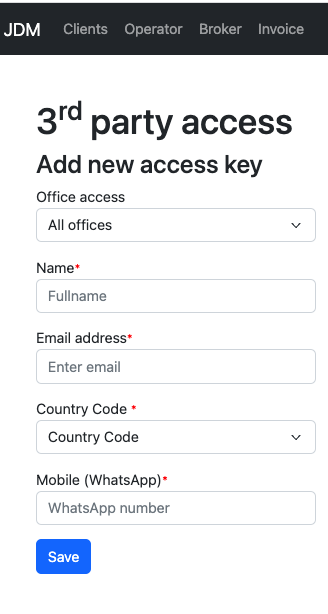
Third party access keys can be used for an external person to create and manage trips in JDM.
Access keys can be added from the settings menu.
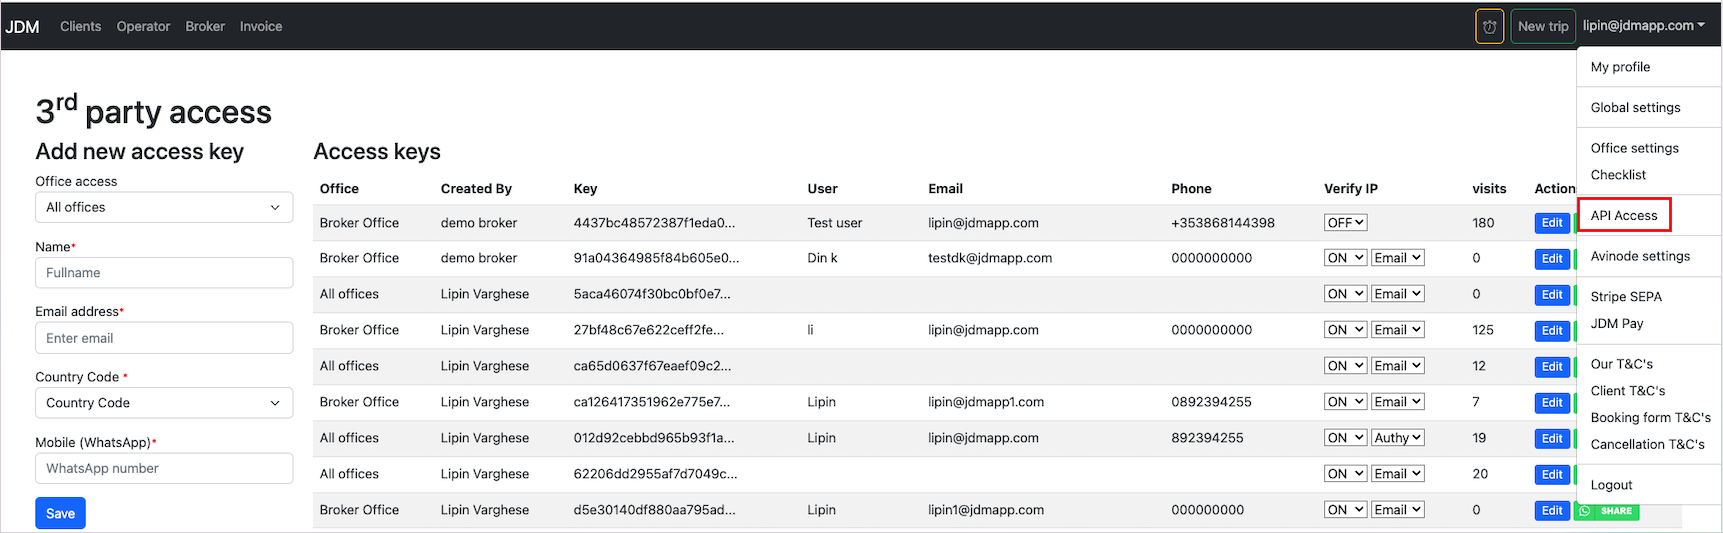
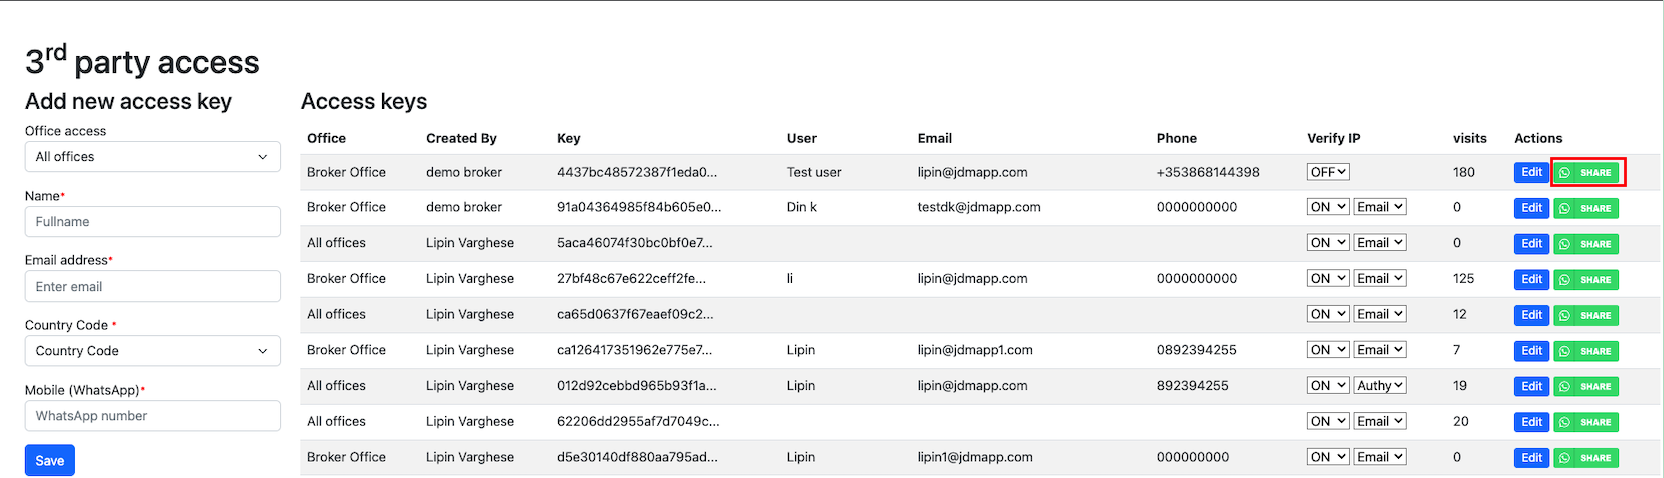
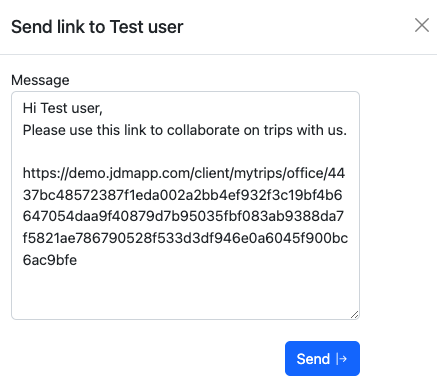
A registered user can share the access keys over whatsapp and an external person can create and manage trips on External Trips Dashboard. Click on the share button with the whatsapp icon on the right hand side.
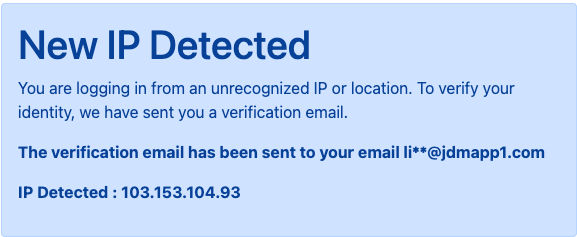
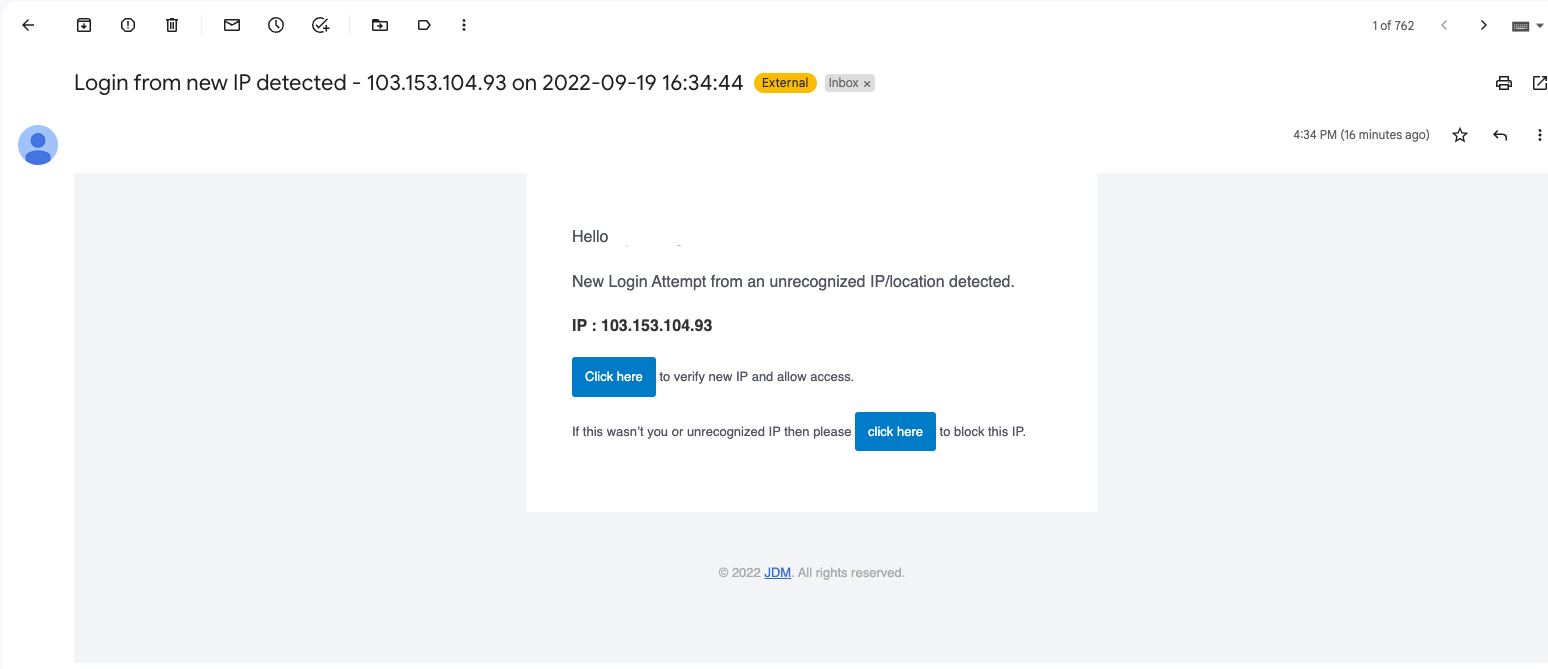
As a part of security features, IP verification is enabled. User has to allow access for the external user for accessing and managing trips.

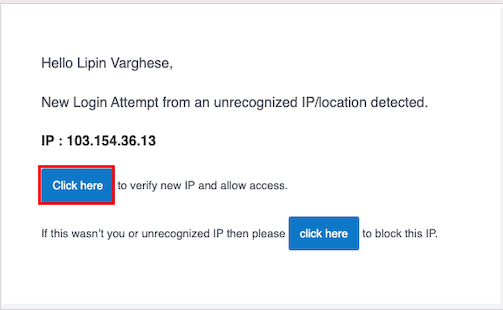
A user can deny unauthorized access from the IP verification email.
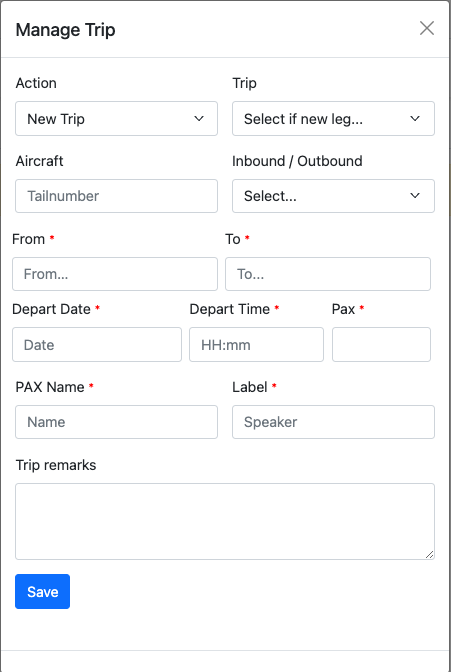
A new trip can be created on external dashboard by clicking on theNew Trip/leg button.

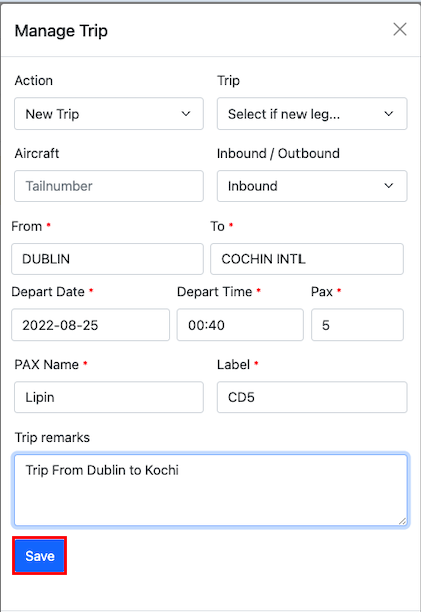
All you have to do is to click on the Save button to create a new external trip.

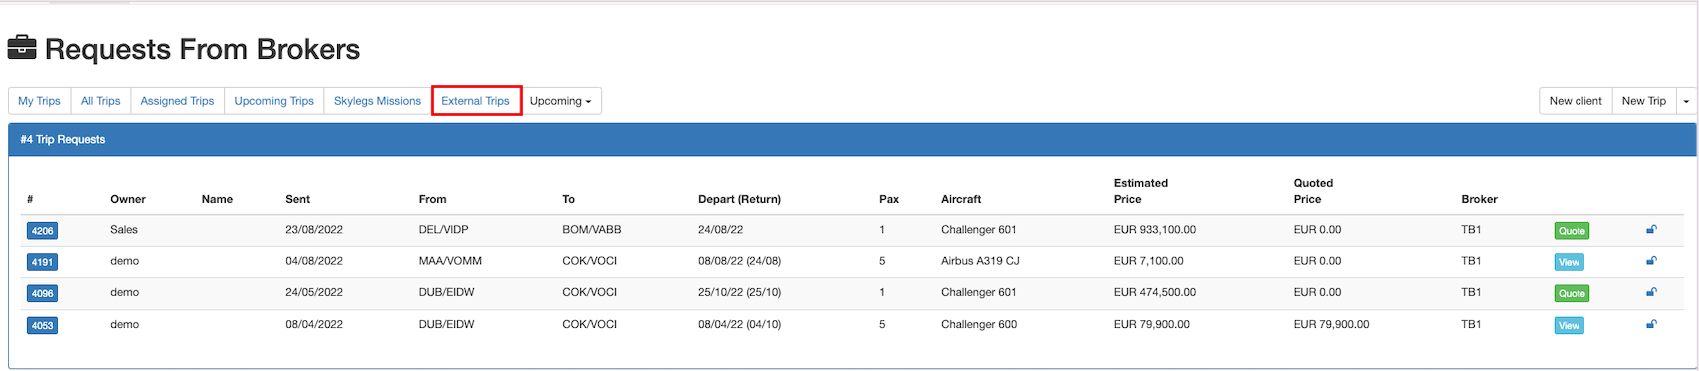
Now, the trip has been created on the external trip dashboard, and the trip has to be approved in JDM to create the trip in JDM. Go to Operator--> Trips--> External Trips to create trip in JDM.


Now click on the Create Trip button to create and manage external trip in JDM.


Now, the external trip has been created in JDM. Click on the My Trips button to view the exyternal trip created in JDM.

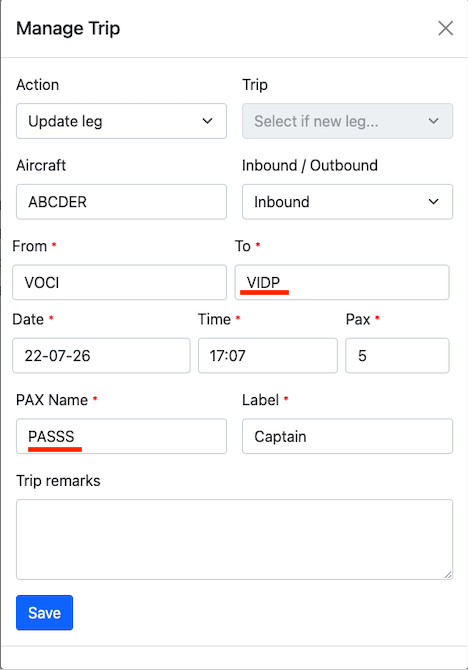
An existing leg can be updated by clicking on the Trip/Leg and select theUpdate Leg option from the action menu.
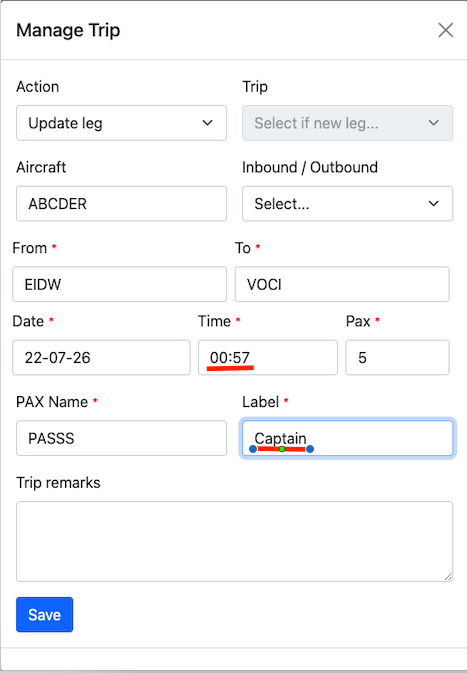
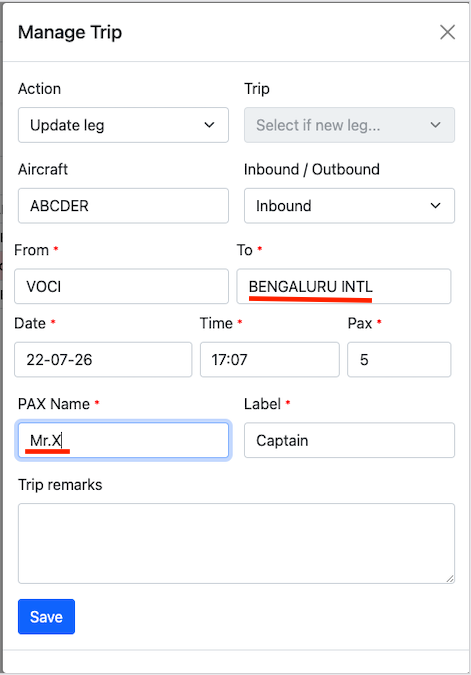
Now, The trip leg has been updated and is highlighted.

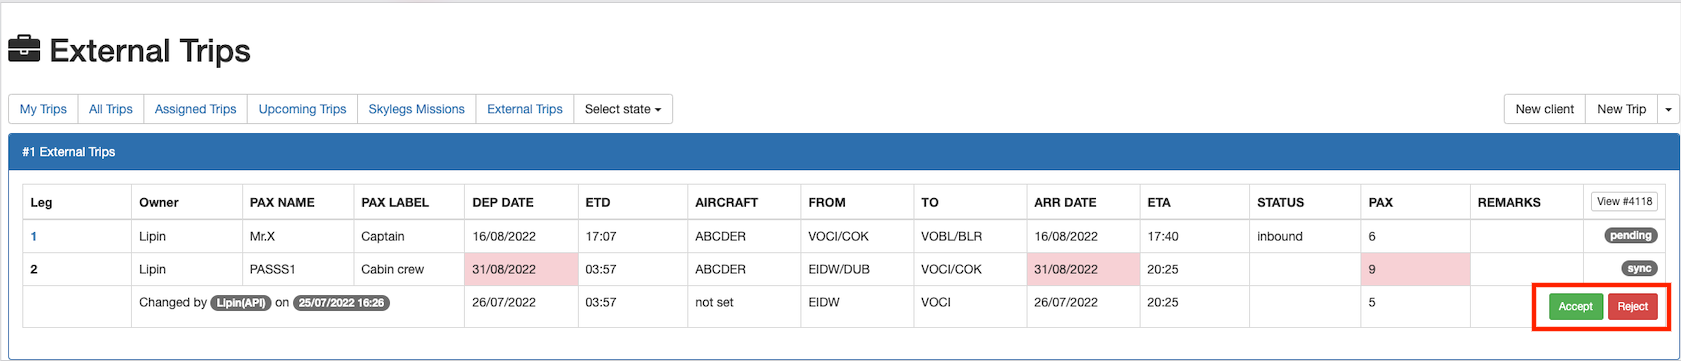
The JDM user receives an Accept Reject pop-up on the external trips dashboard.
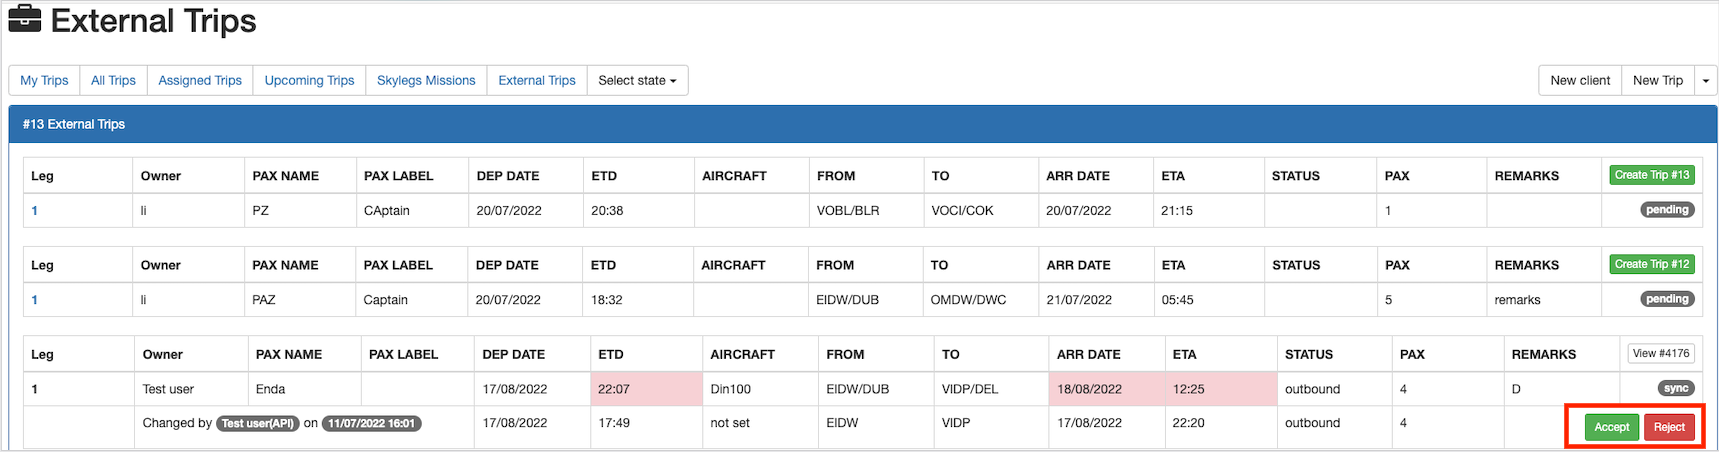
The leg will be updated on JDM, if the JDM user accepts the changes.
An external trip leg can be updated on JDM. This time, the API user has to approve the changes which have been made by the JDM user.

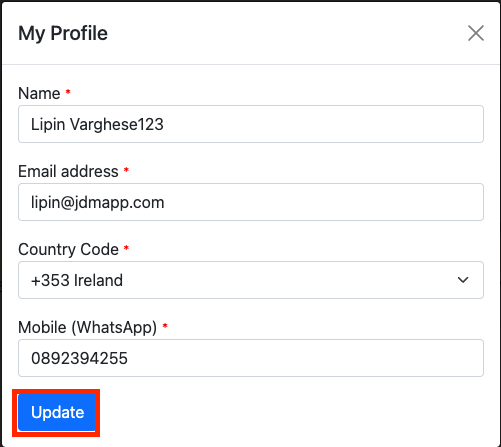
An external user can create a profile on the external dashboard by clicking on the My Profile button.


Now, make changes to the user profile and click on the Update button to update the user profile.
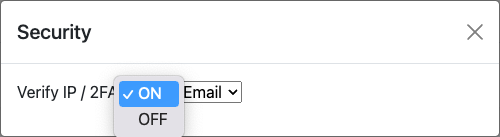
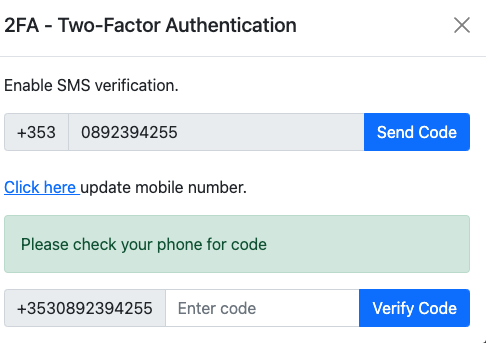
Email verification or 2FA security can be added to the external dashboard to identify unauthorized IP access. Click on the Security button to add the 2FA or email verification.

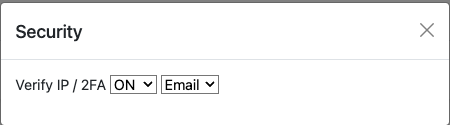
Now, change the security method to 2FA for the Two-factor authentication.
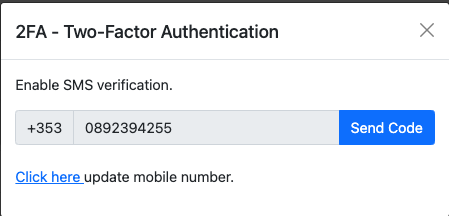
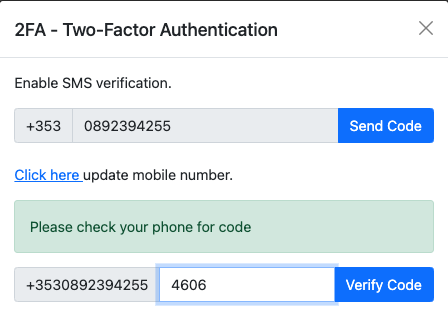
Extra layer security is added to the external access API url for verifying the IP. Two factor authentication can be added either by Email or authy app. Each time the user access the external trip, it has to be authorised by 2FA.
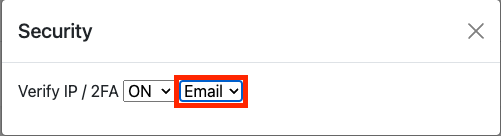
User has the option to ON/OFF the verification.


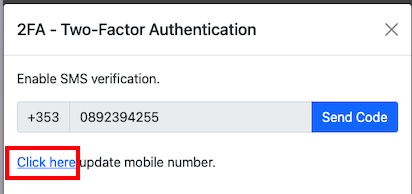

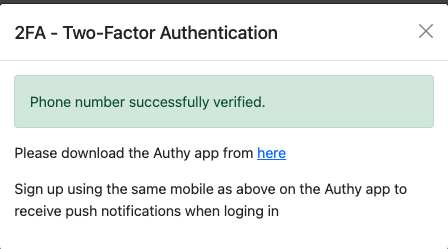
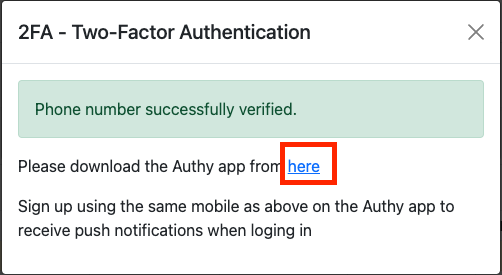
Authy App can be downloaded from the the successfull registration of the mobile number.
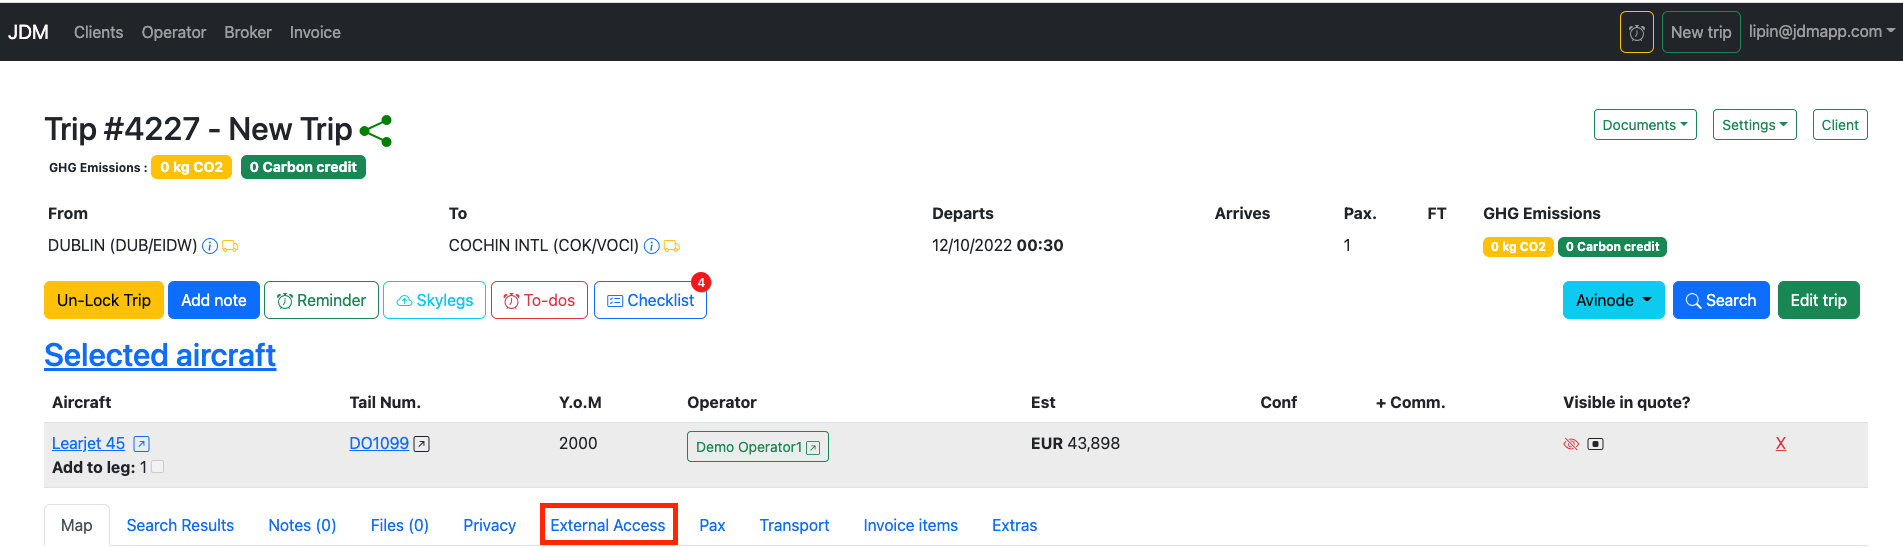
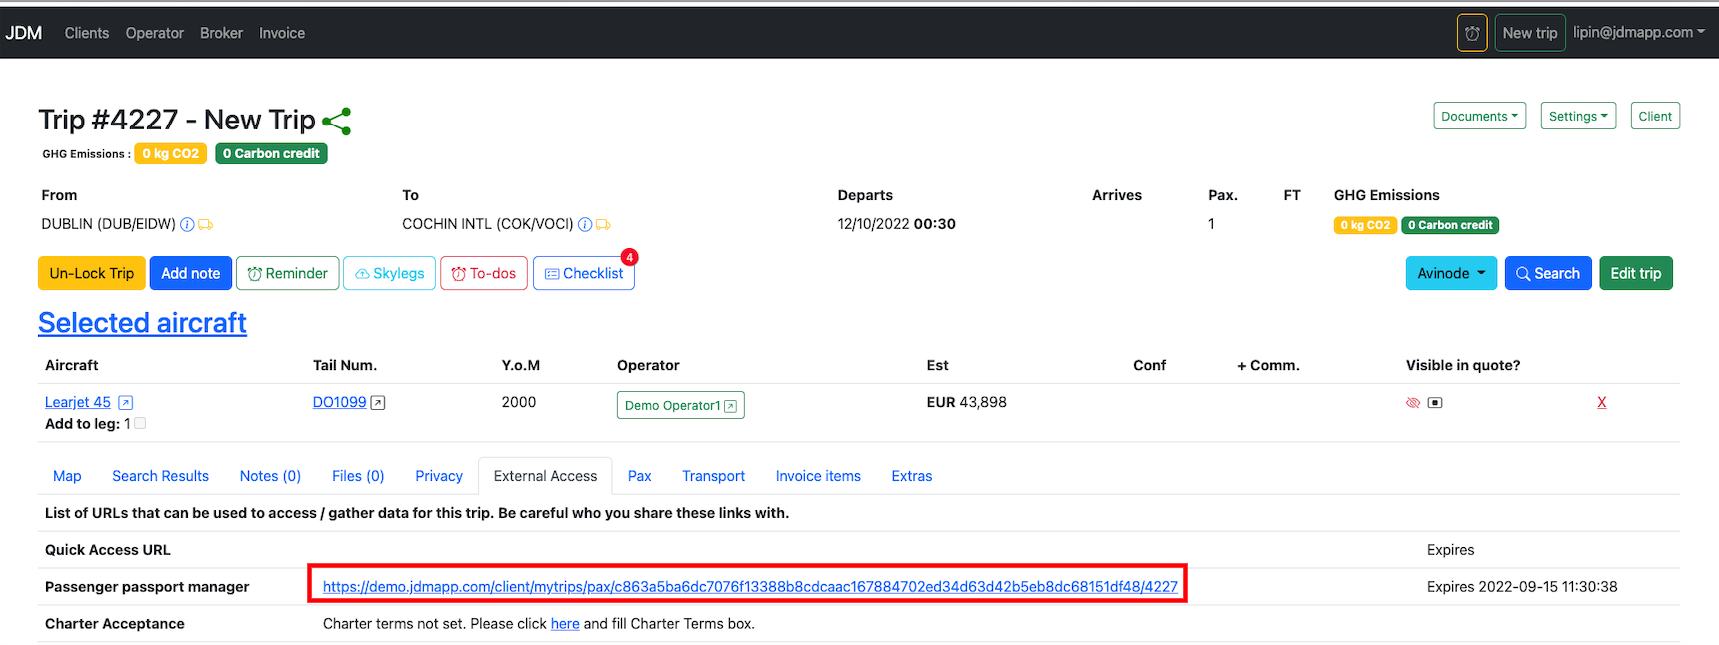
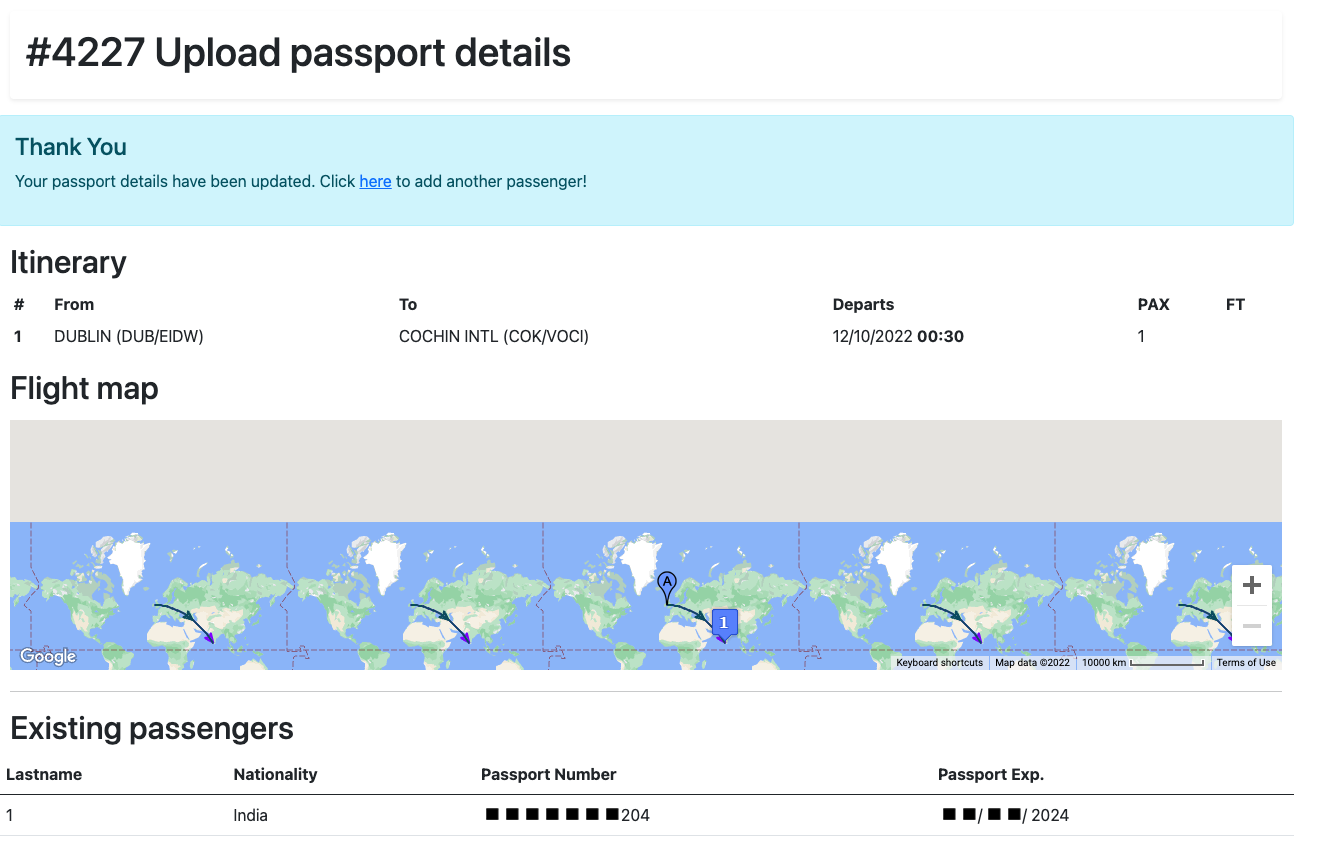
An external person can add passengers to a trip and can bulk import passenger passport information to JDM. Access for an external person is generated from the External Accessbutton. Also you can find out here the access url as well

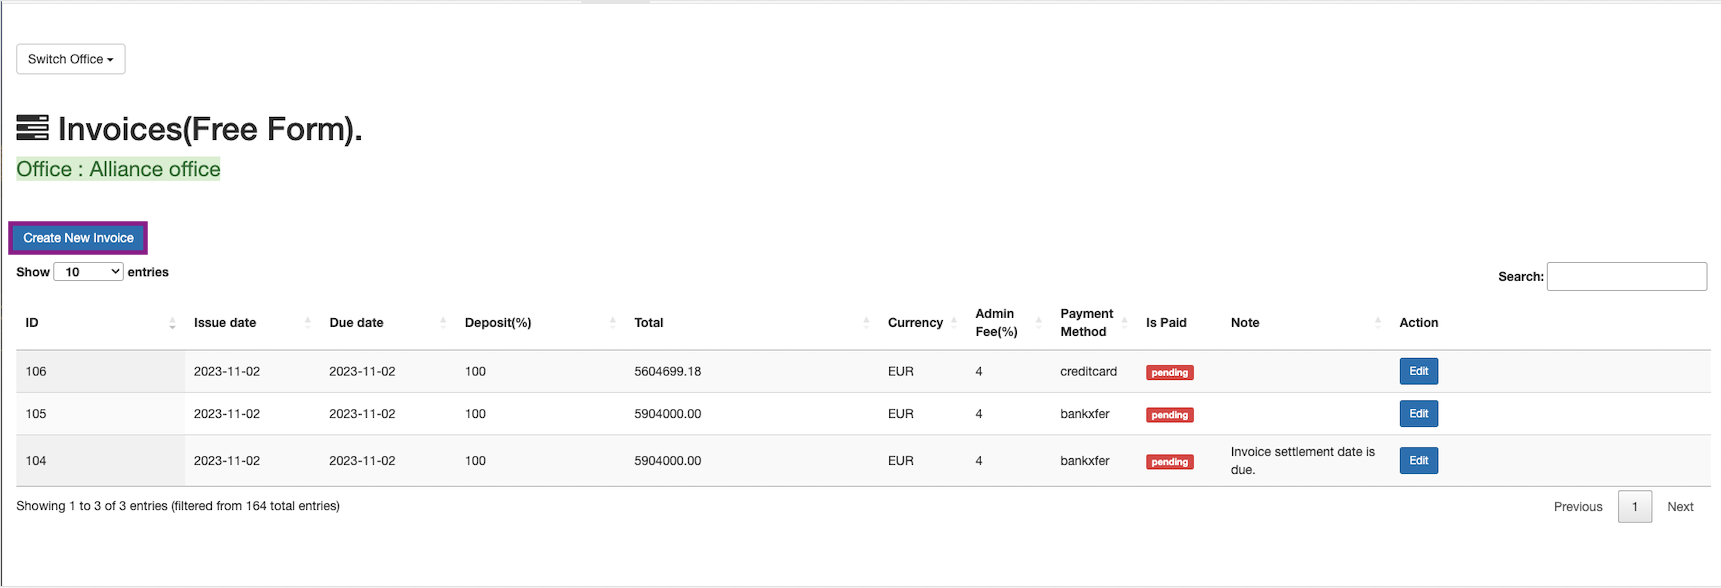
The quick invoice can be accessed from the header menu in the Sales module.
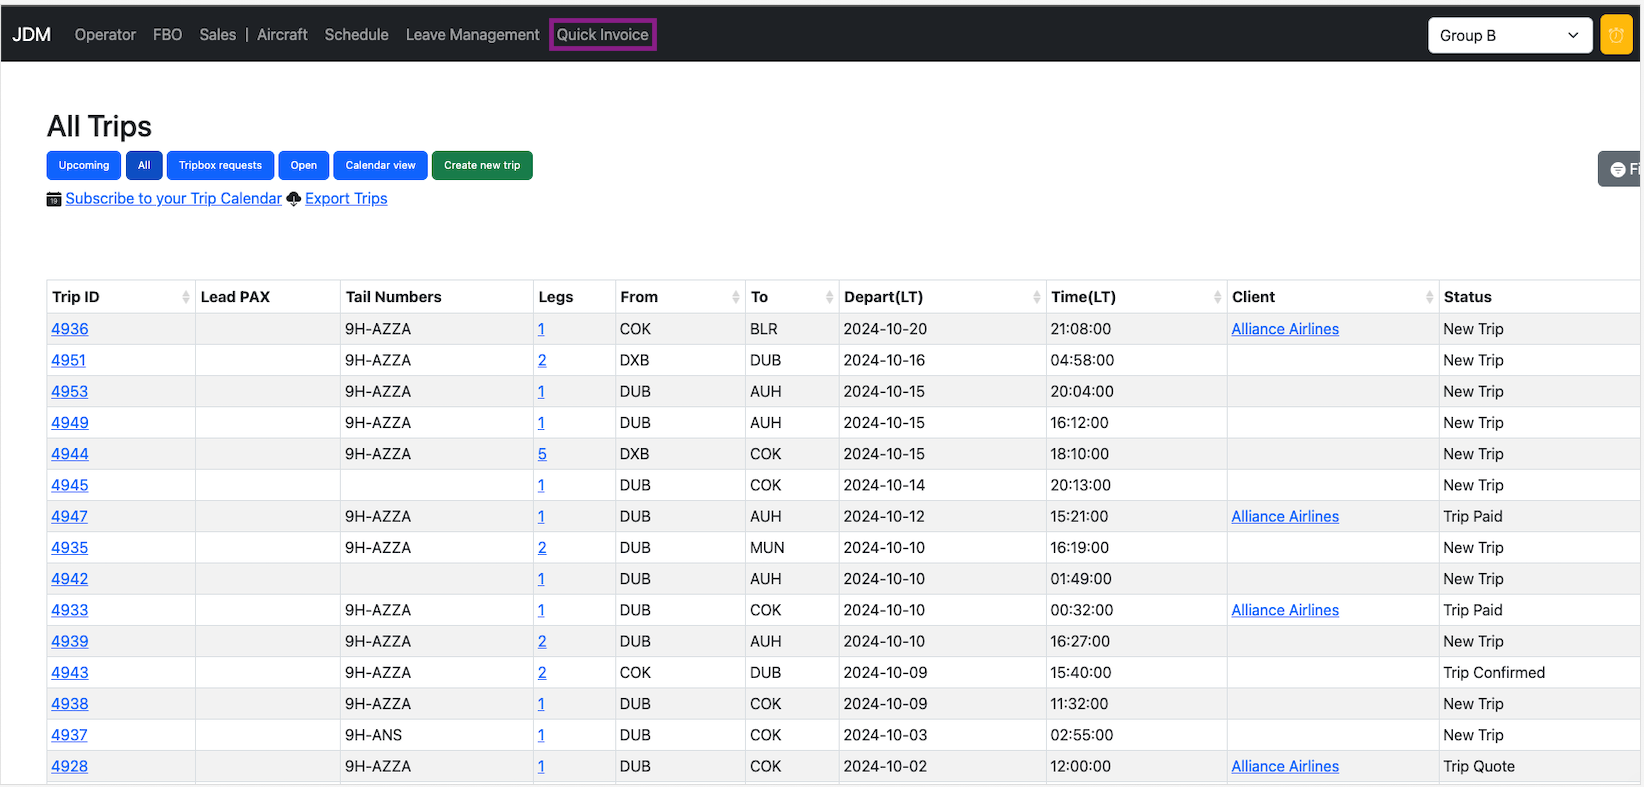
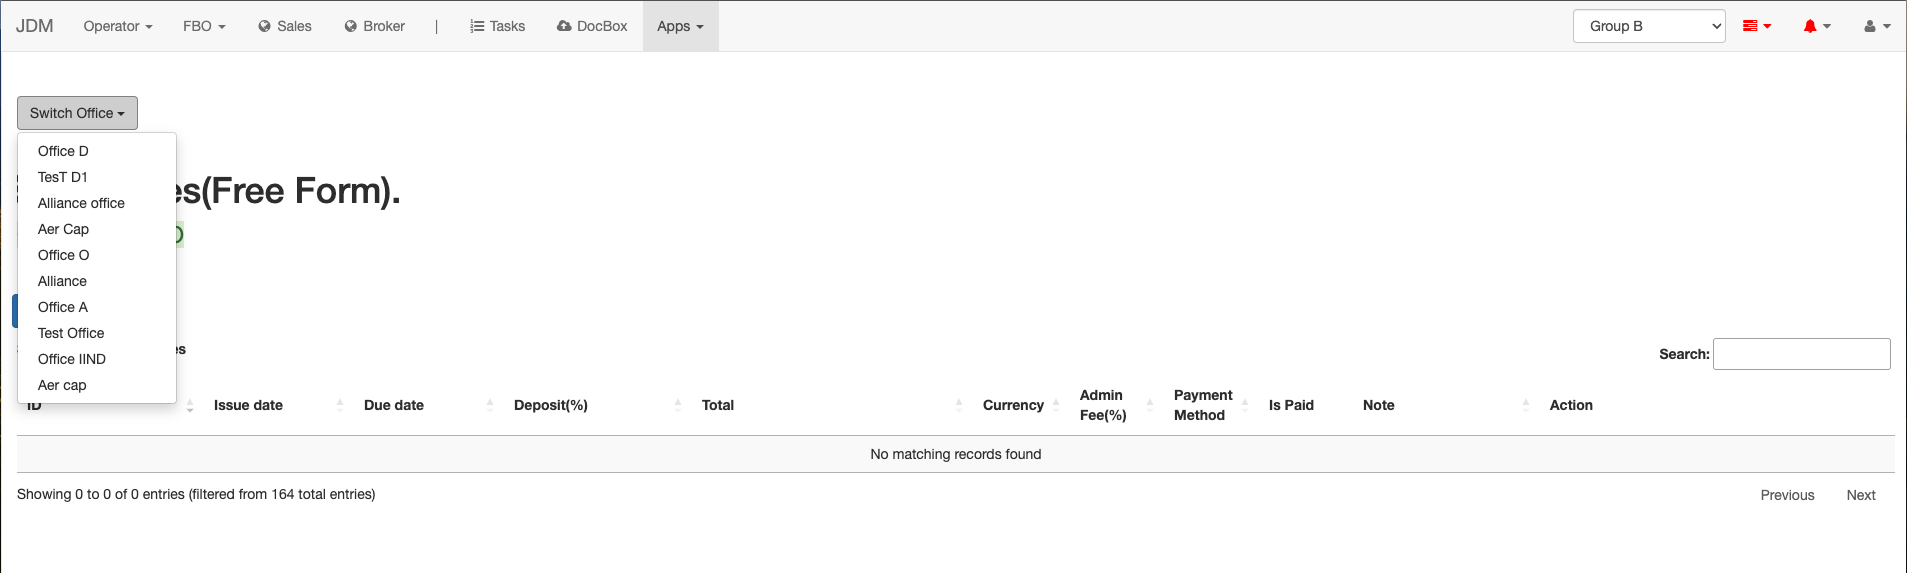
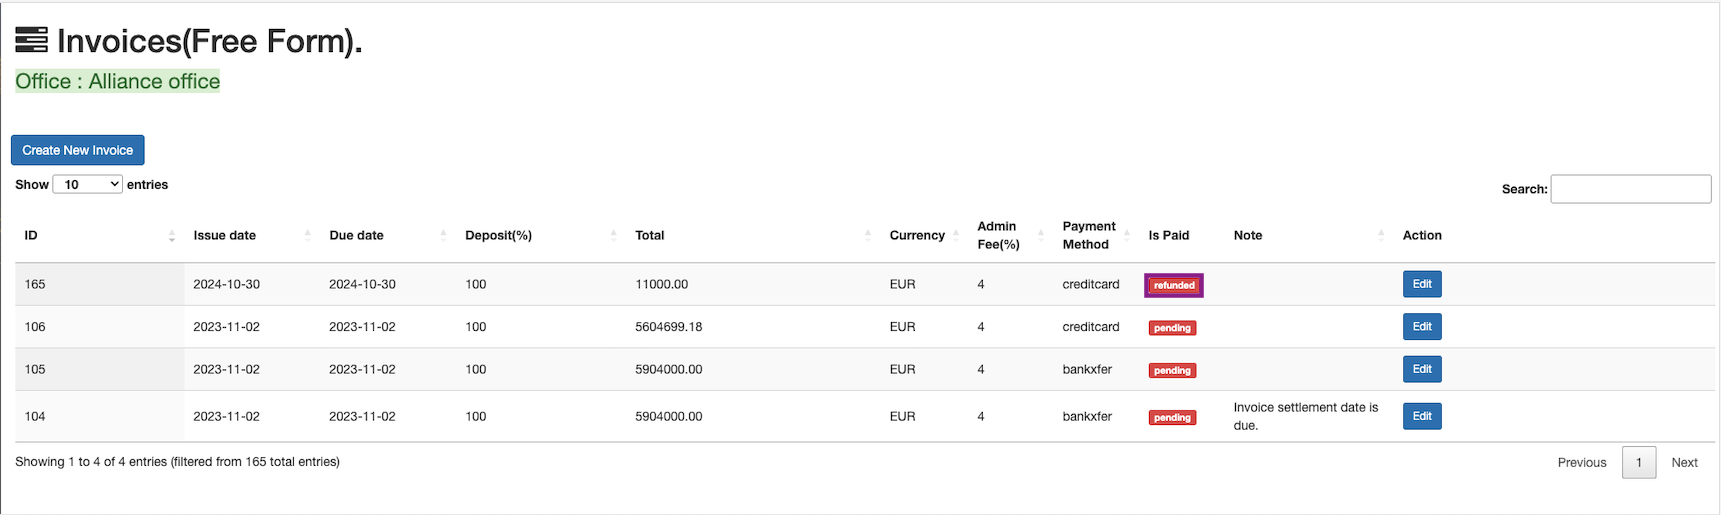
The invoices are against the offices. Users can select the office from the dropdown.The payments made will be reflected into the offices stripe account or, group’s default stripe account.
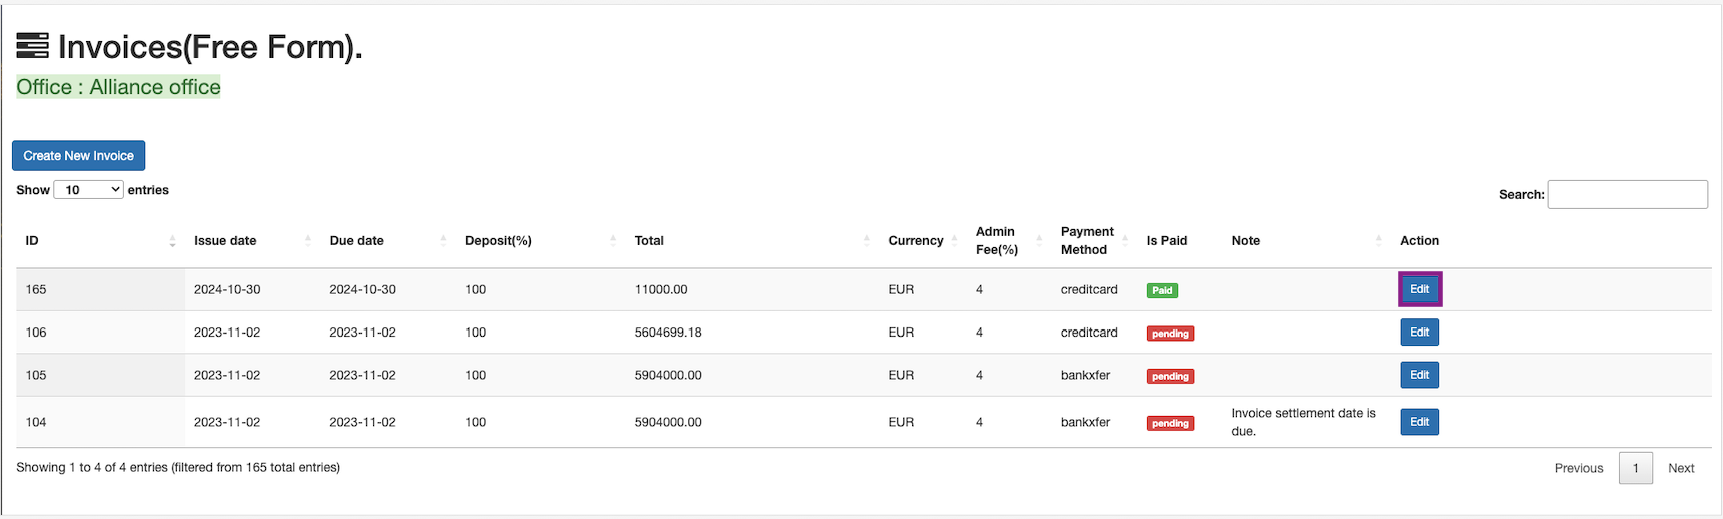
All the invoices are listed down in the table with the invoice id, payment status and edit actions.

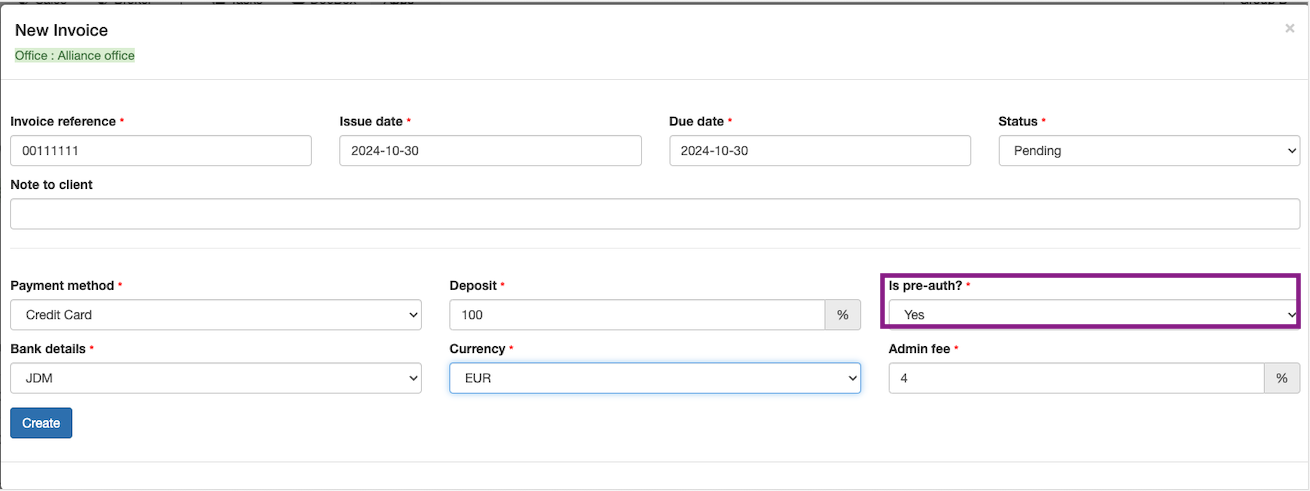
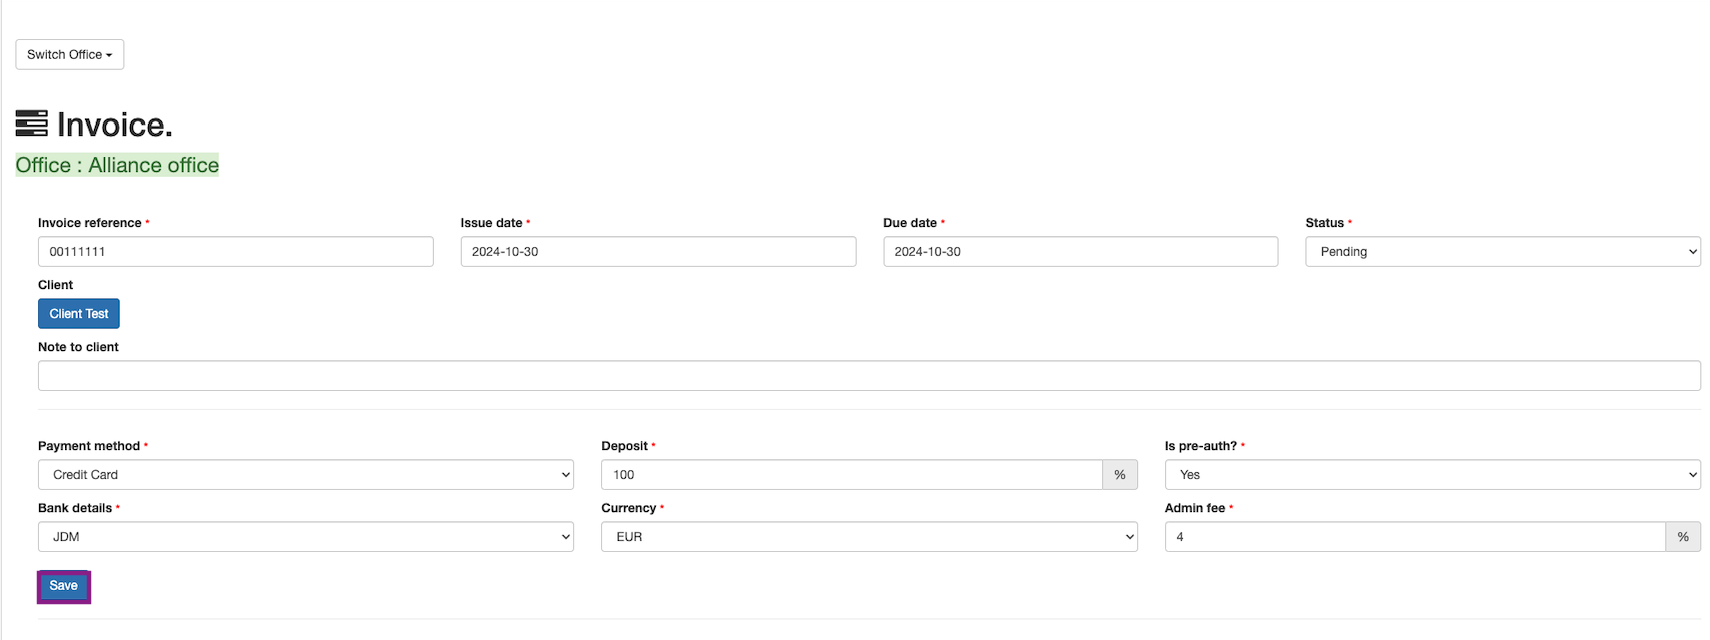
A new invoice can be created by clicking on the Create New Invoice button on the top left hand corner.
An invoice can be created with pre-auth and without pre-auth.
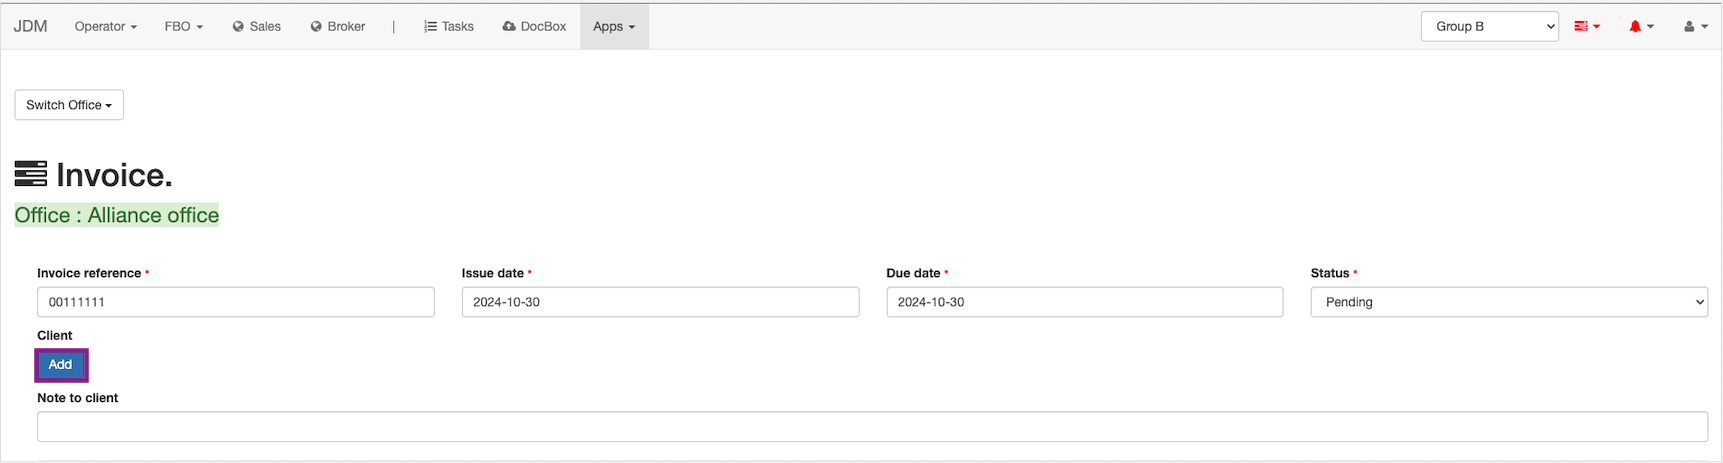
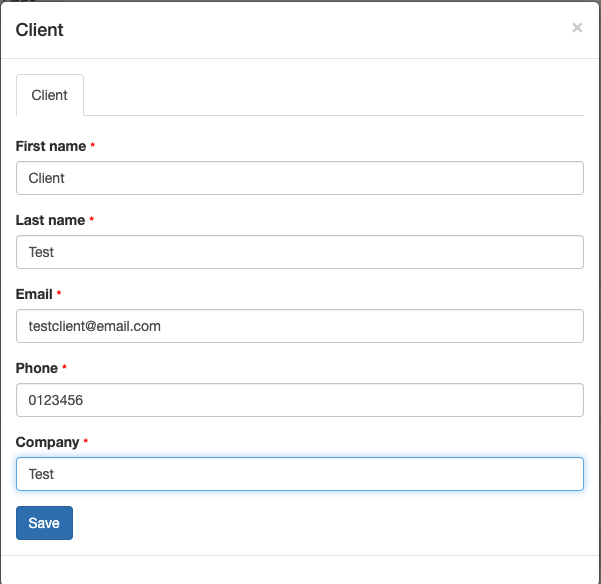
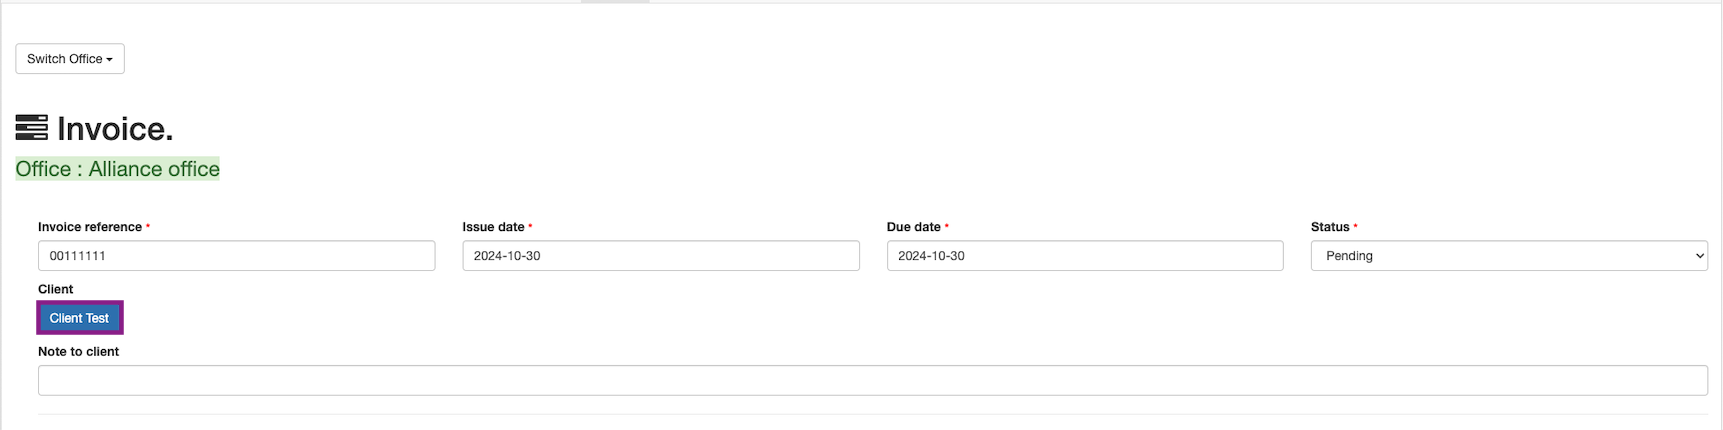
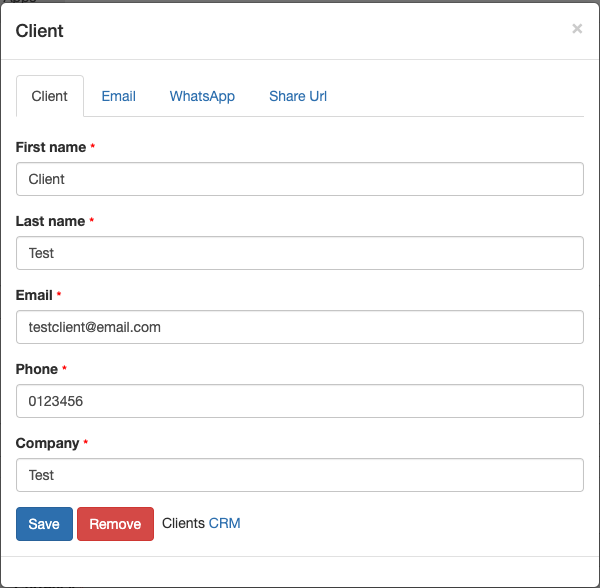
Now, the client has to be added to the invoice.
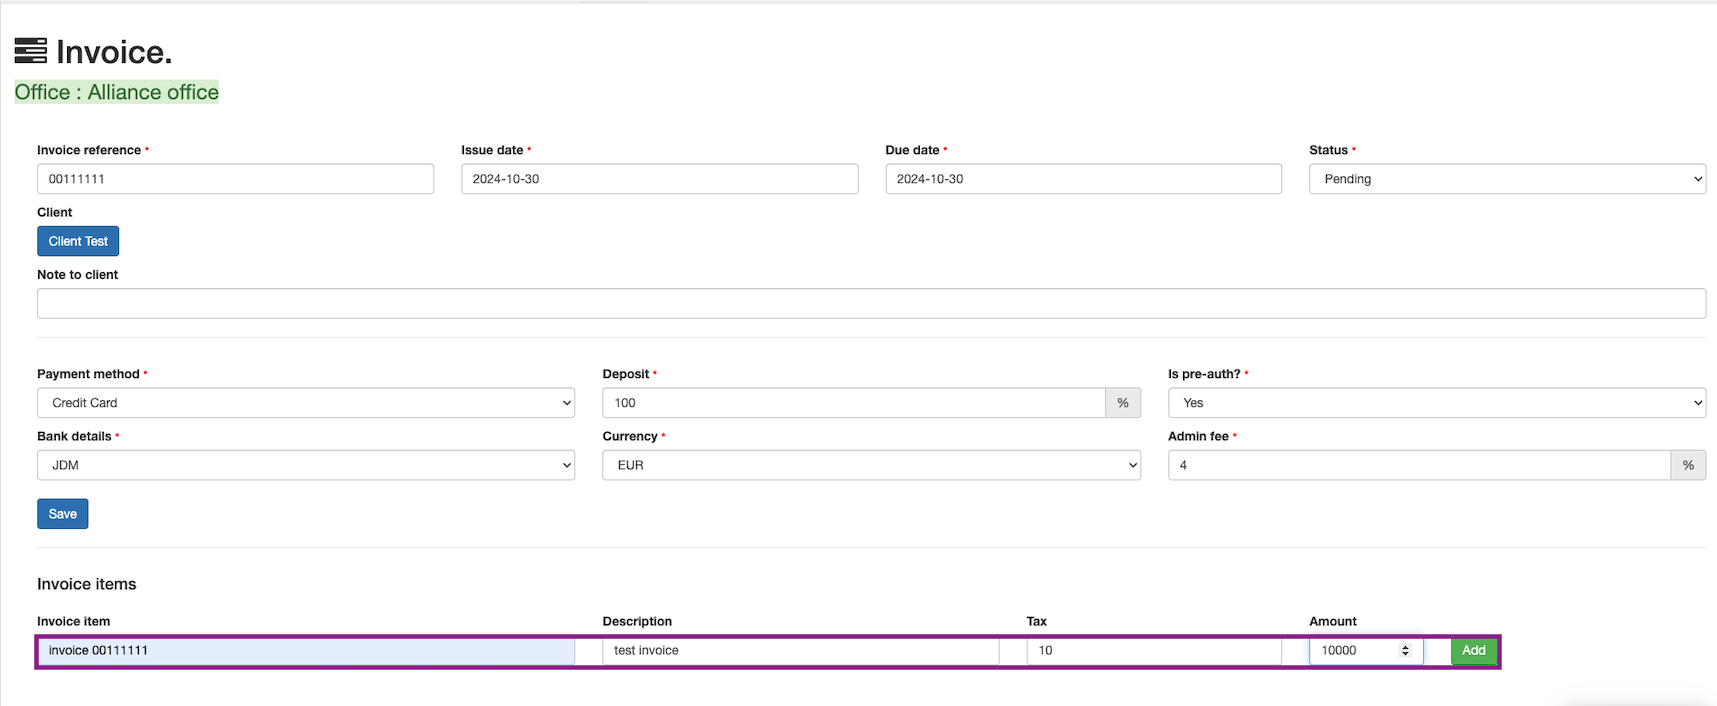
Now, the invoice has to be saved.
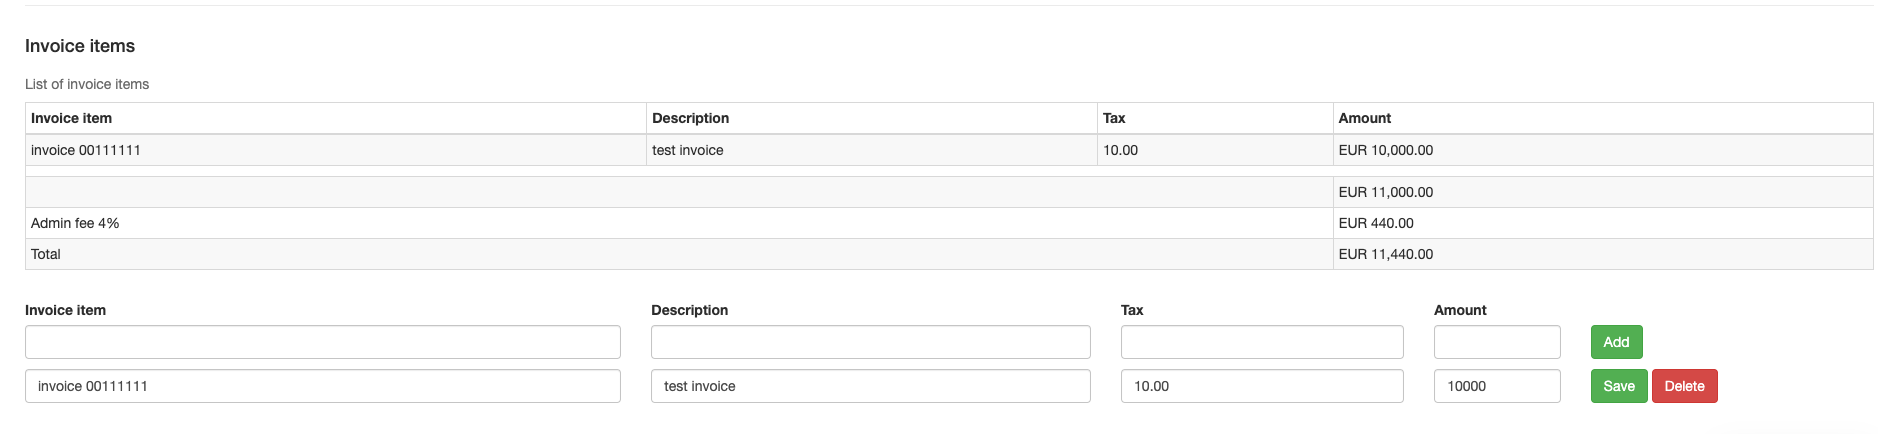
Now, the invoice item has to be created.
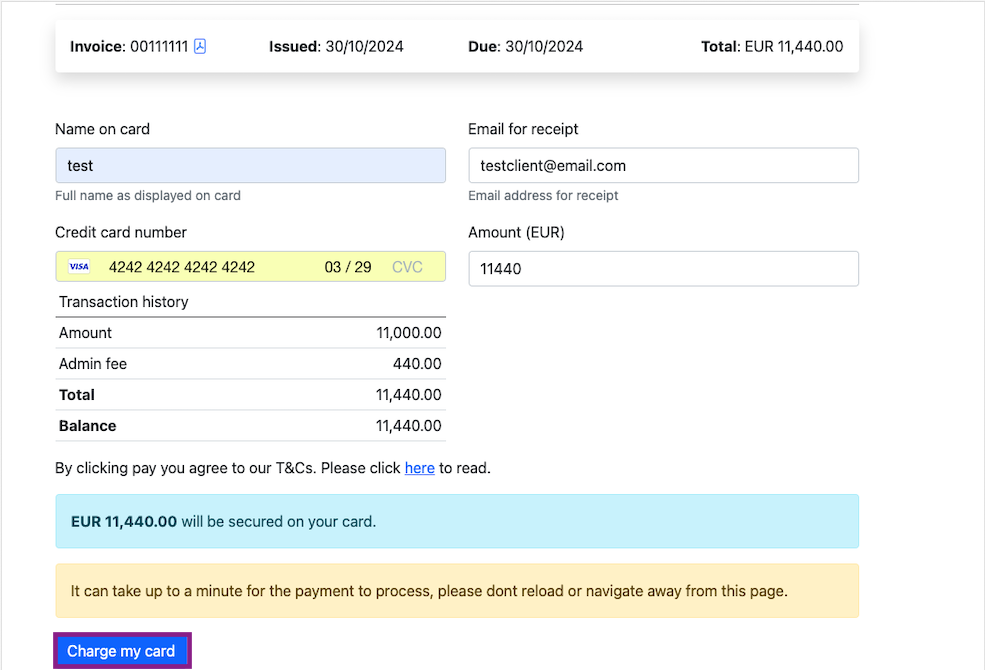
Now, to share the invoice with the client, click on the client button.
The invoice can be shared over email, whatsapp and the url can be shared. Once the payment is done, it will reflect on the invoices.
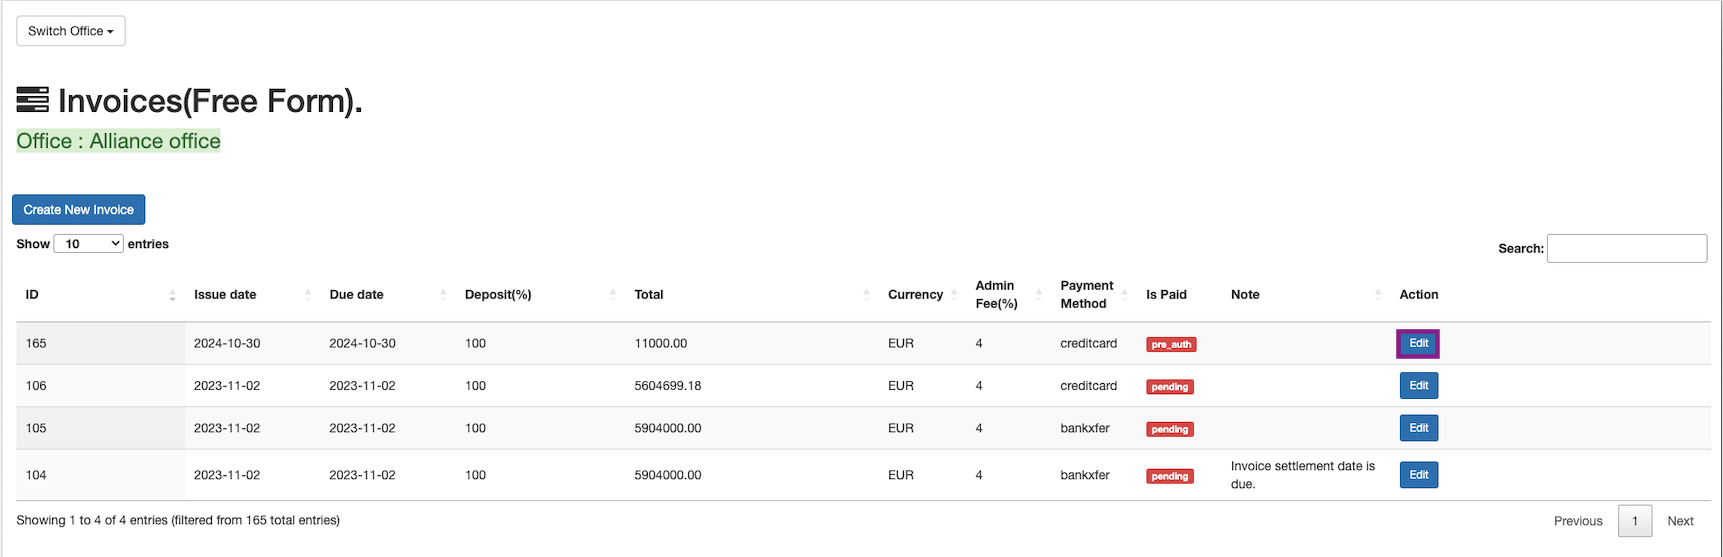
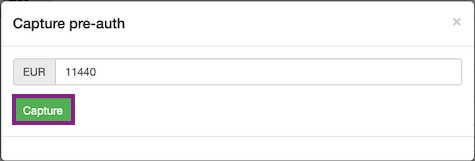
Now the invoice is created and the invoice payment status is pre_auth. The payment can be captured by clicking on theEdit button in the Action column.
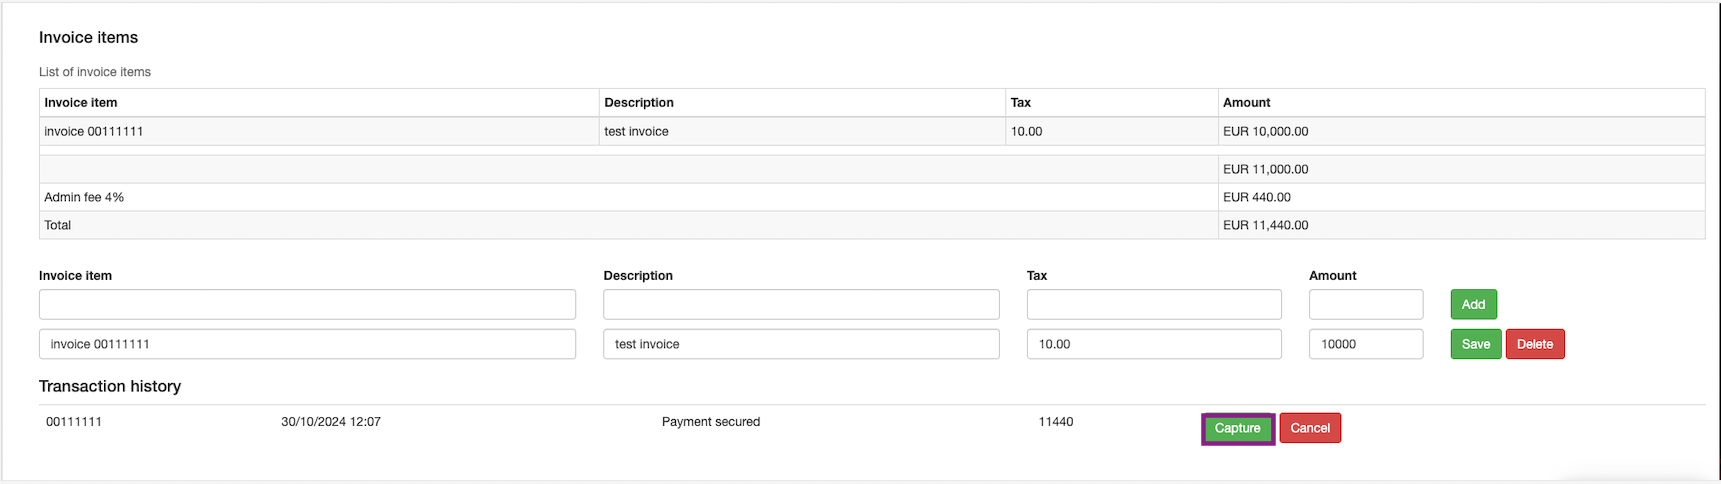
The payment can be captured by clicking on the Capture button in the transaction history.
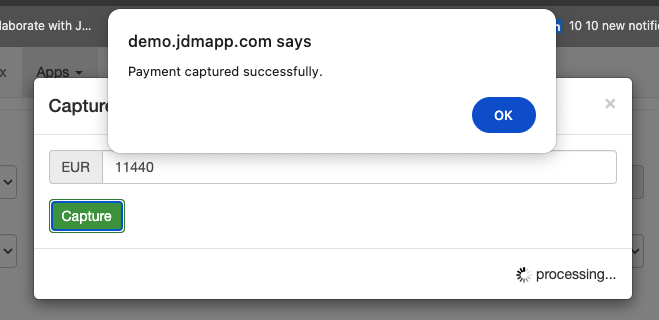
The status of the invoice will be Paid in the Is paid column now.

If the invoice needs to be refunded, it can be done by clicking on the Edit button in the Actions.
The invoice can be refunded, by clicking on the Refund button in the transaction history.
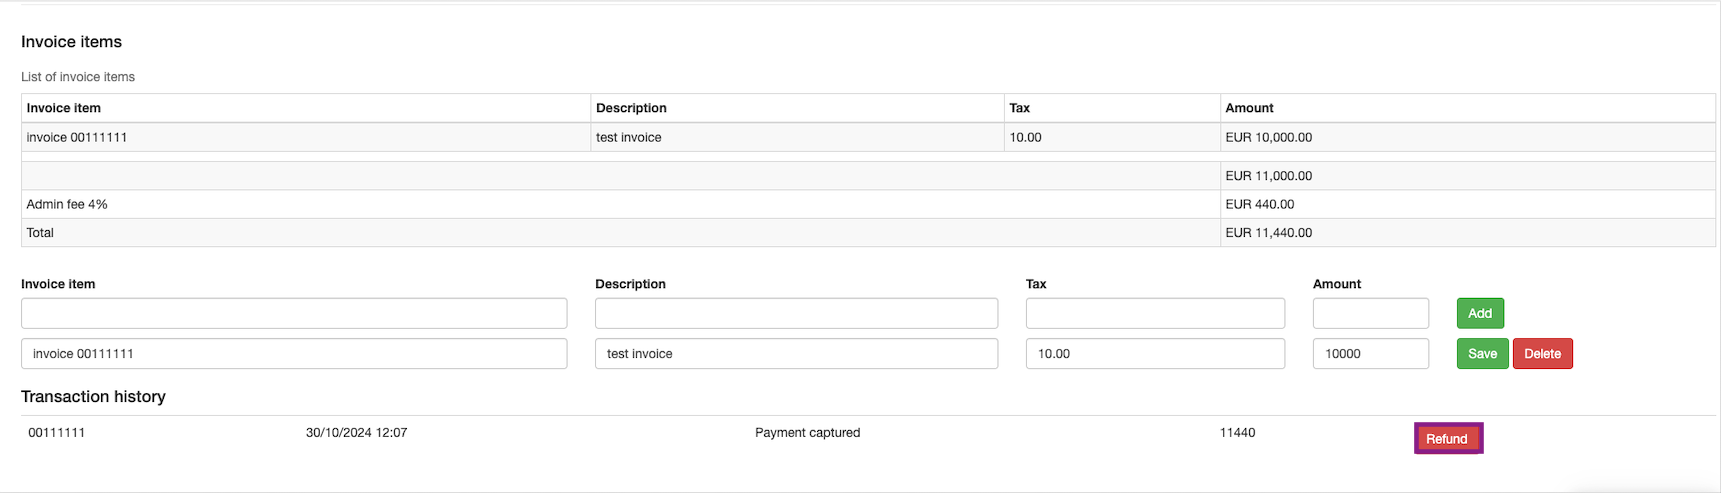
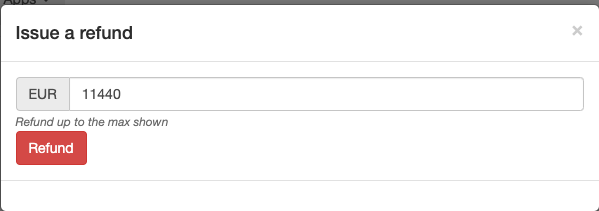
Now, the invoice has been refunded.
An invoice created without pre-auth, will be directly reflected, without capturing the payment.