1. LOGIN:
Login page appears to be like this. Enter your credentials for accessing the application.
Login credentials bring you up to the JDM dashboard.
1. LOGIN:
Login page appears to be like this. Enter your credentials for accessing the application.
Login credentials bring you up to the JDM dashboard.
2. OPERATOR MODULE:
Operator module is mainly designed for fleet management and trip requests.
Operator module has 5 sub modules:
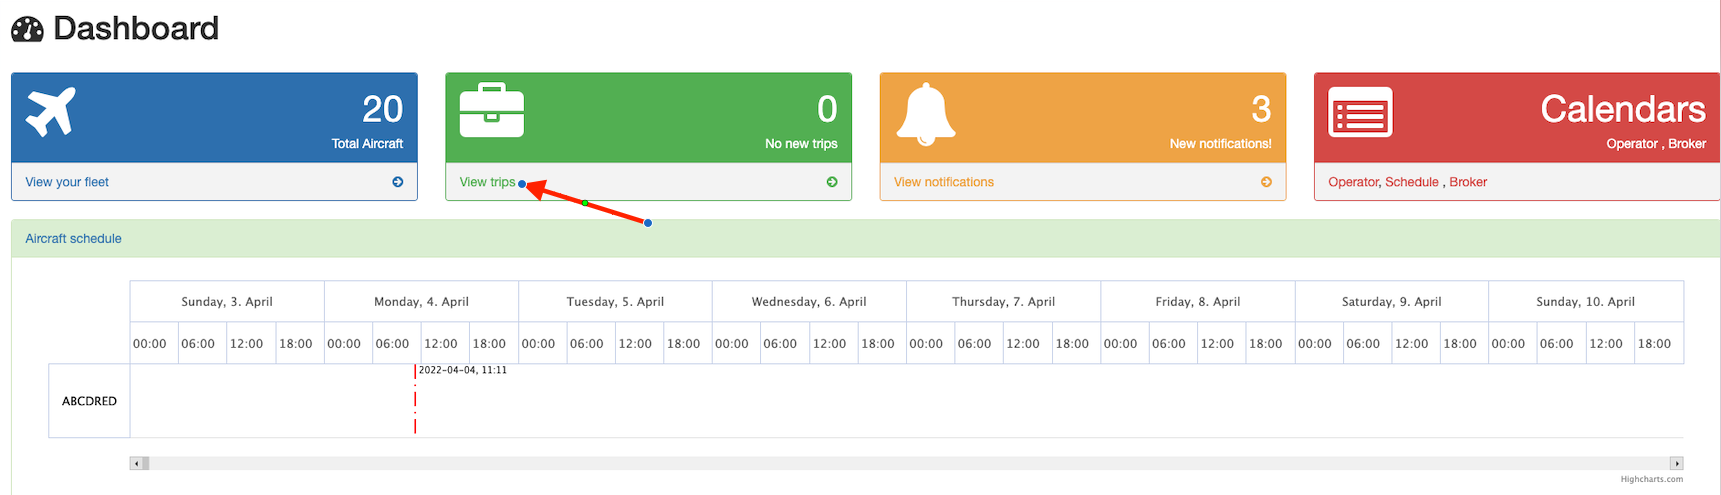
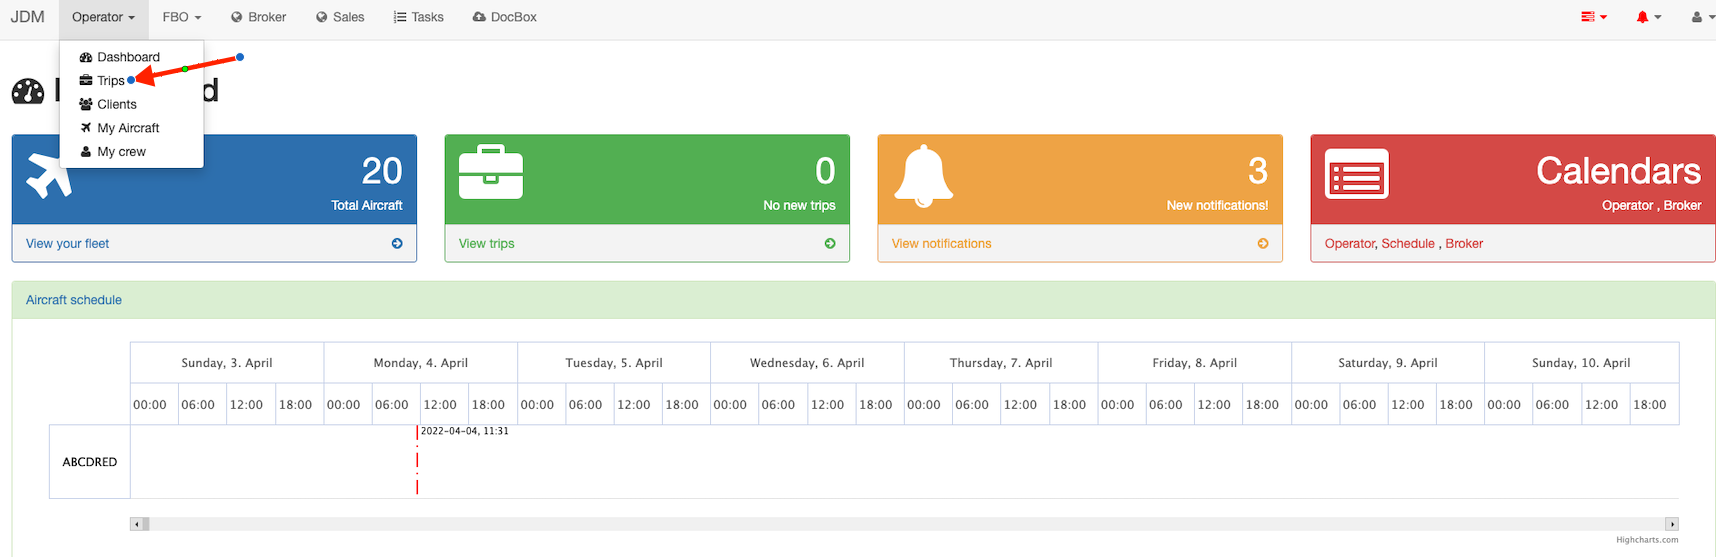
Dashboard is designed for qiuck access to the operator features.
Operators can view and access the fleet and identify the exact locations of the aircrafts.
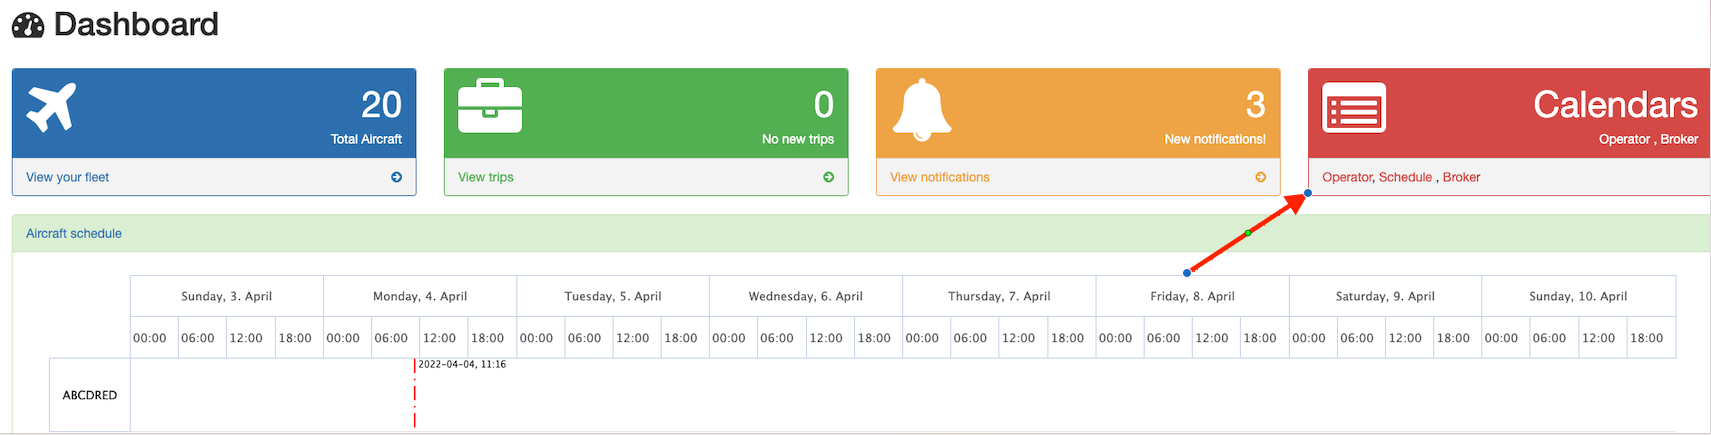
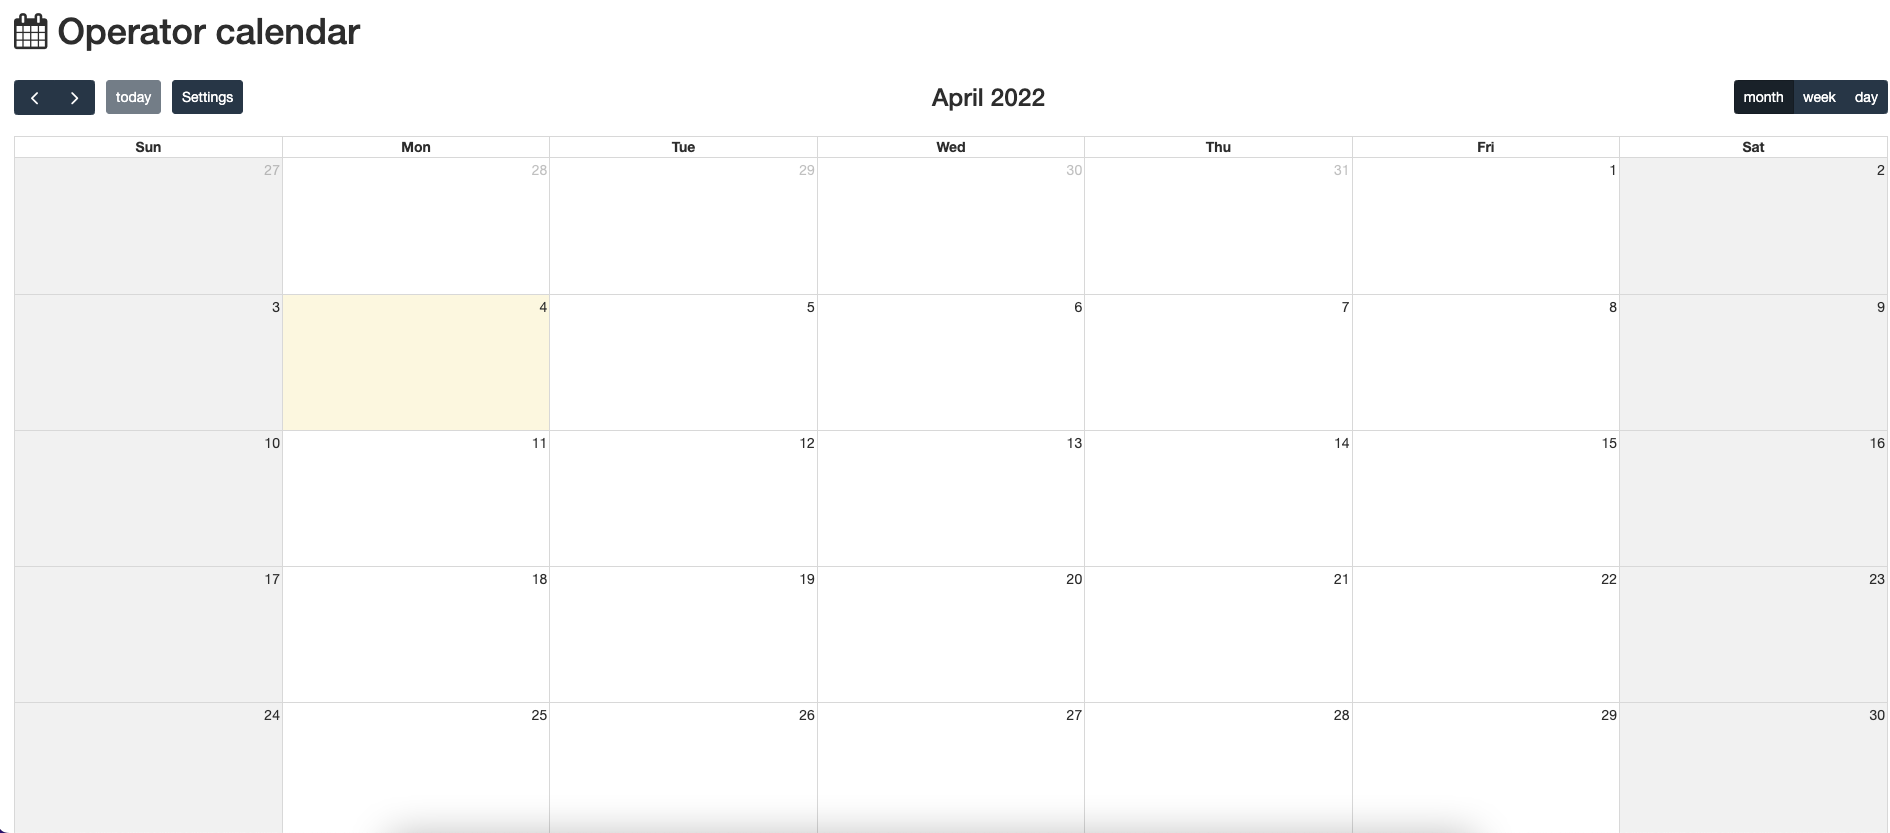
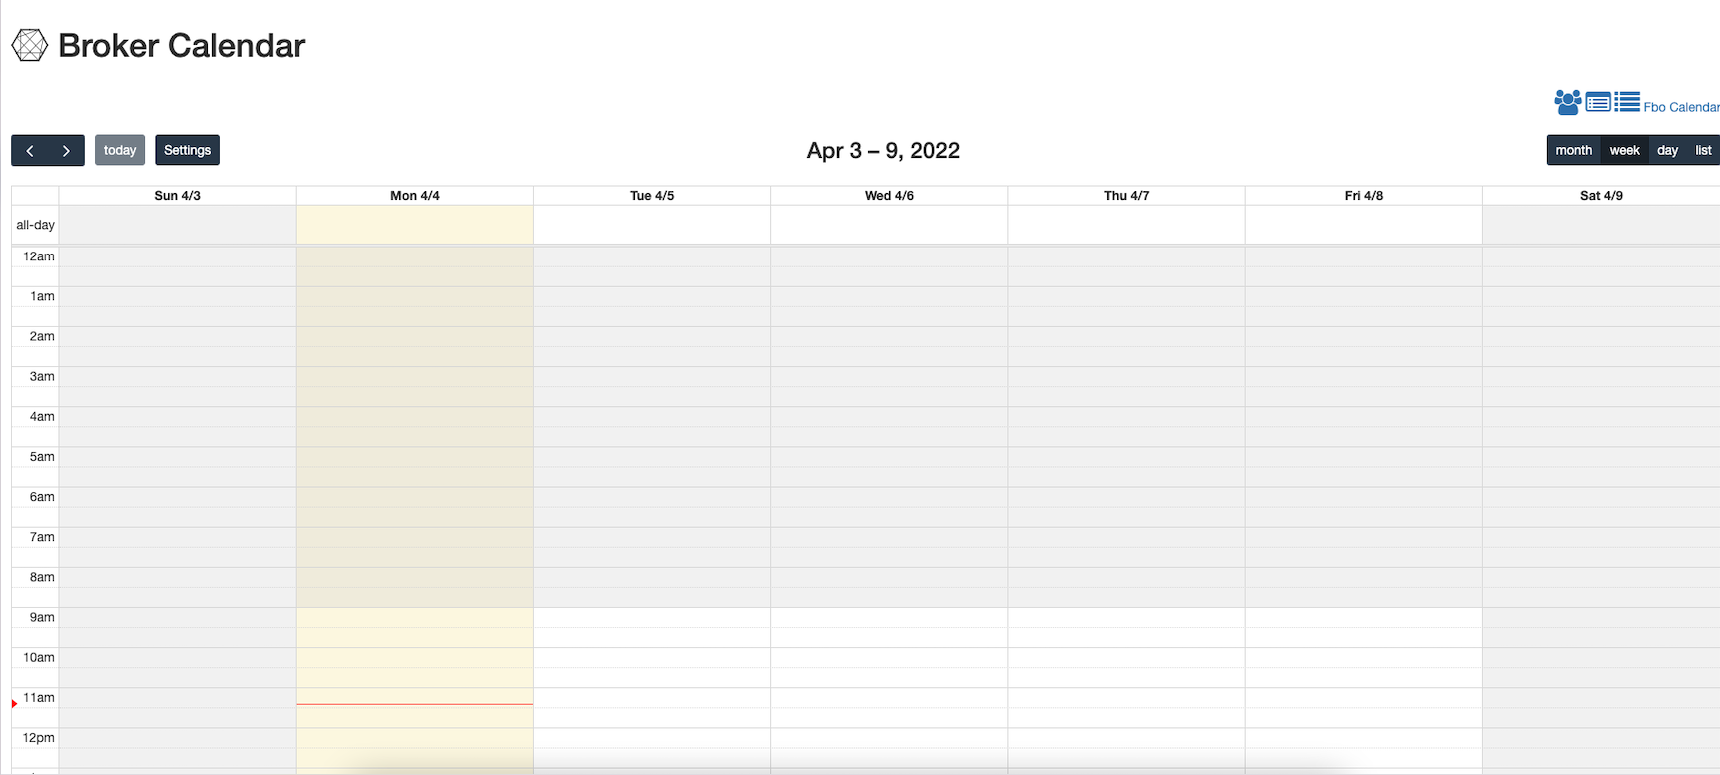
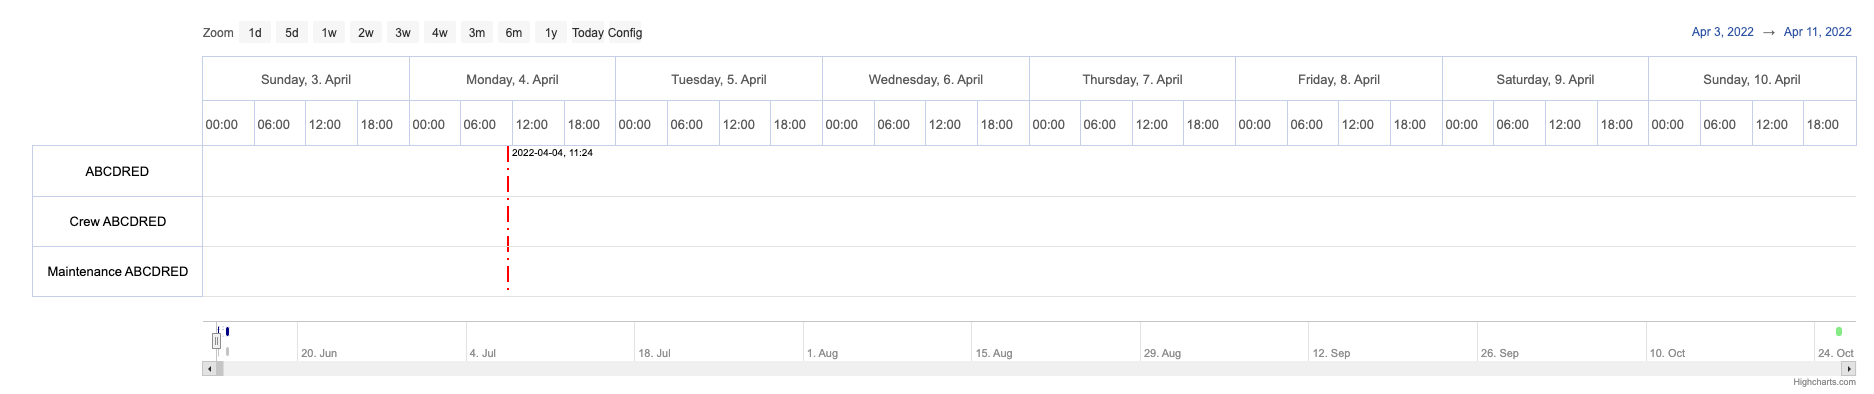
Enables operators and brokers a view of the schedules.
Trips module is designed for tracking all the trips information. A new trip, new client, and quote on a trip can be performed on this module.

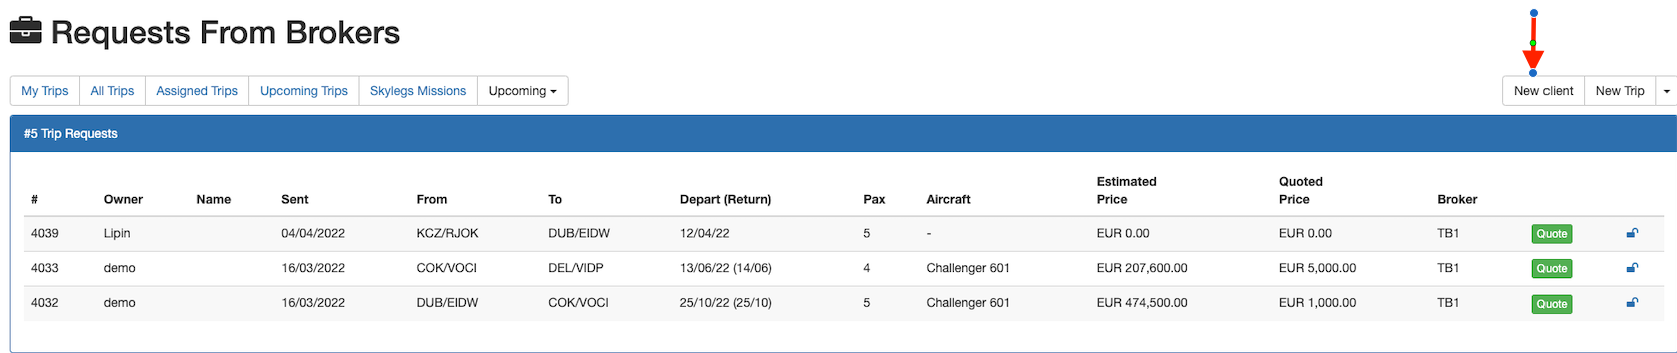
This section explains how to add a new trip. A new trip can be created as an operator, as a broker and as a sales person.

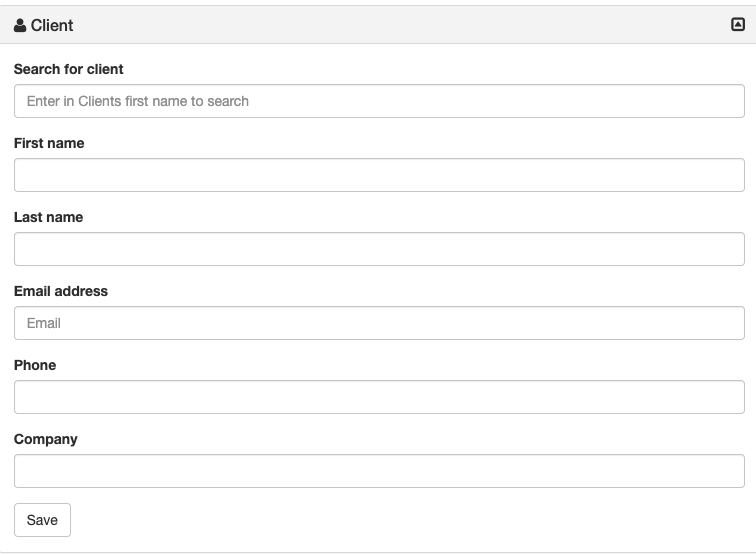
A new client can be added by clicking on the New Client button on the right most corner.
It brings you up to the client details form. All you need to do is to fill in the client information.
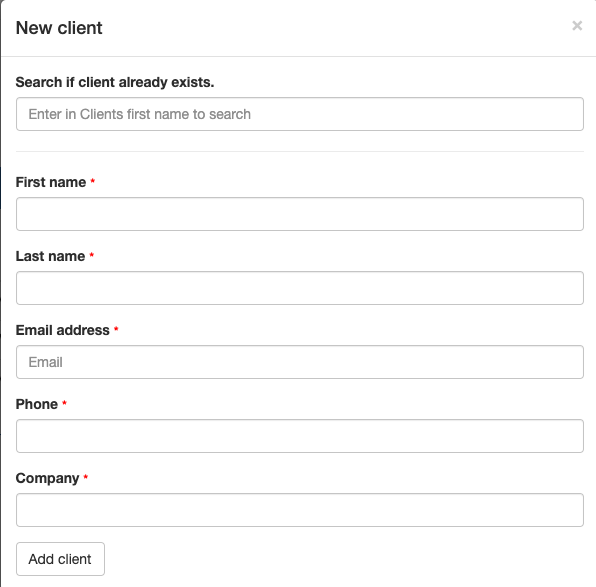
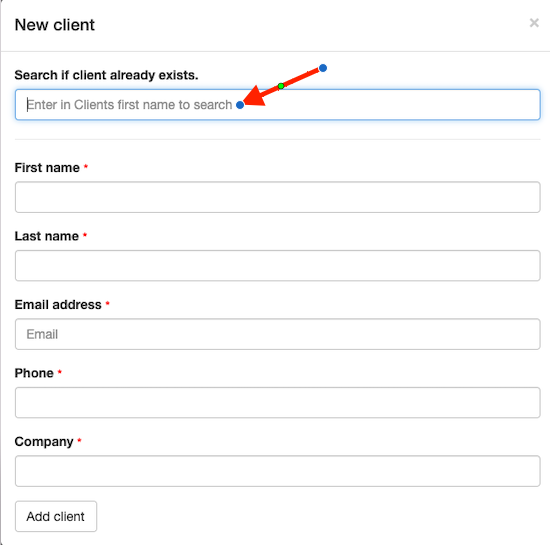
If there's any existing clients, you can search and add them to the existing trip.
Click on the New Trip button on top of the screen to create a new trip.

All you have to do now is fill in your trip details and hit the Addbutton.

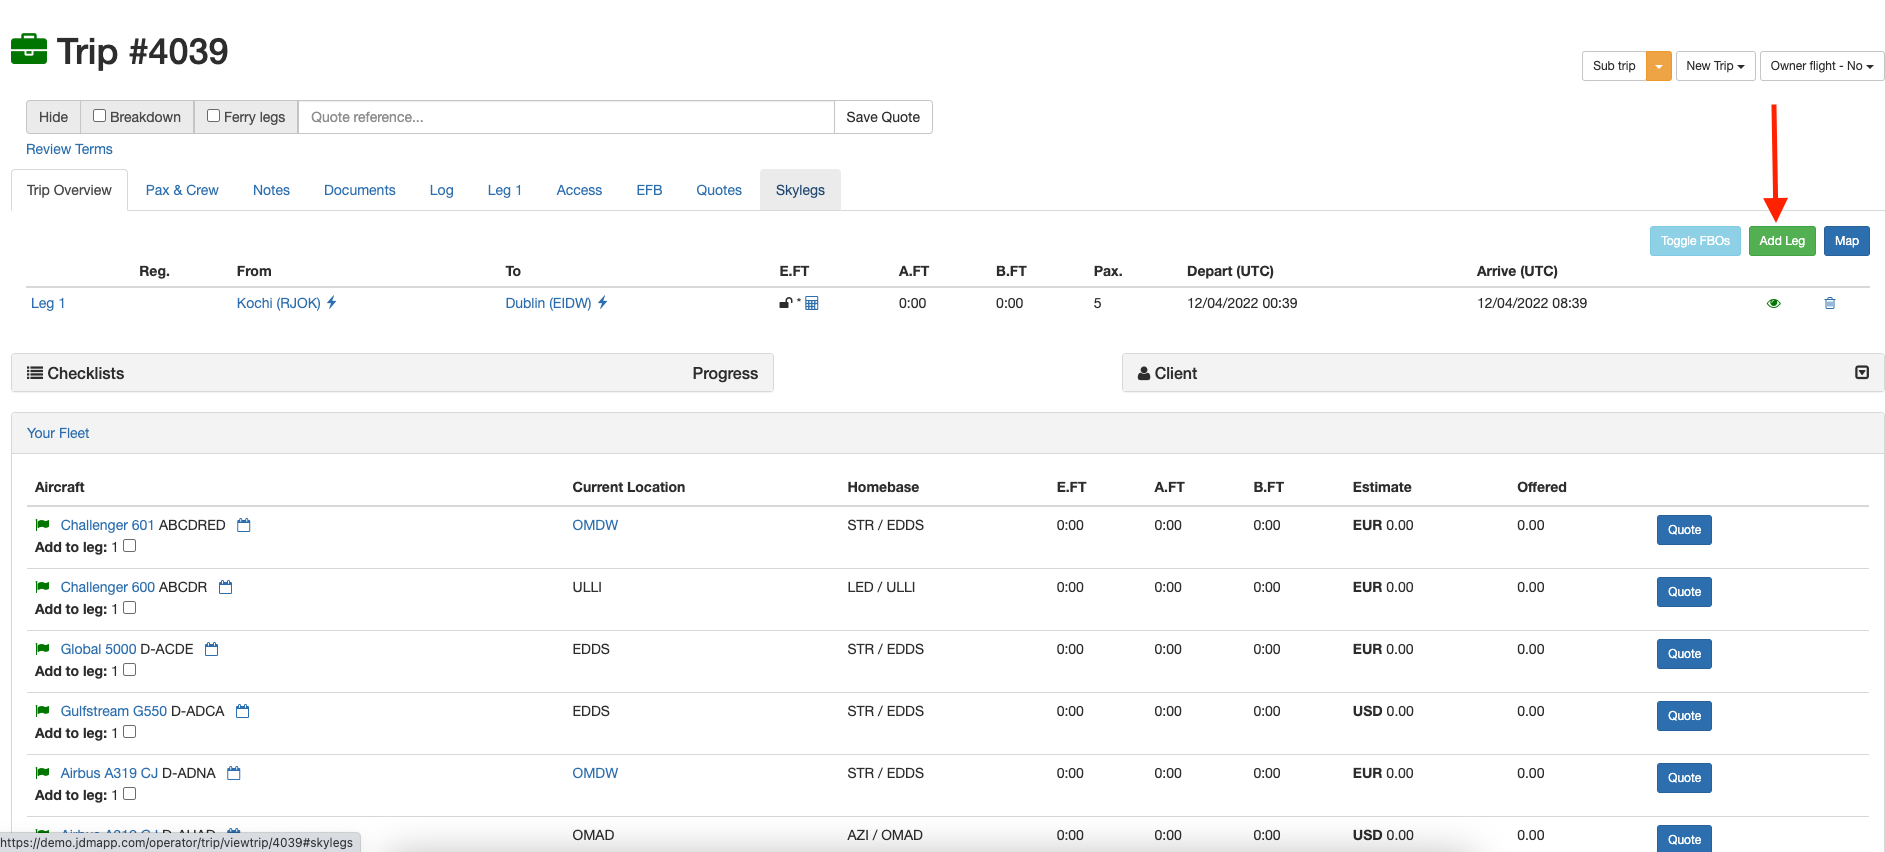
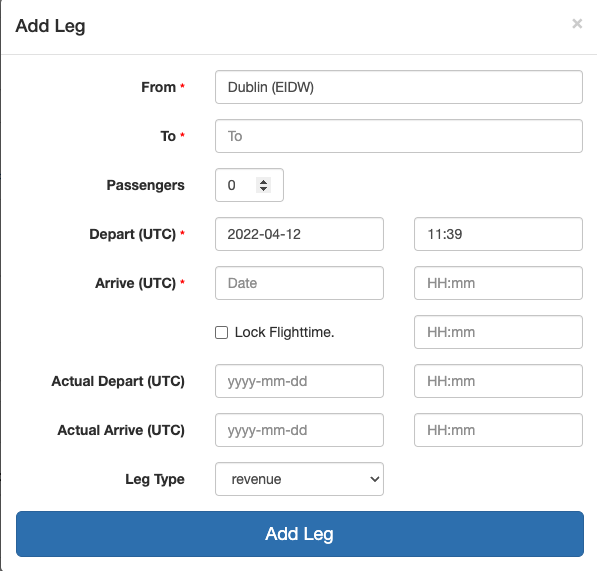
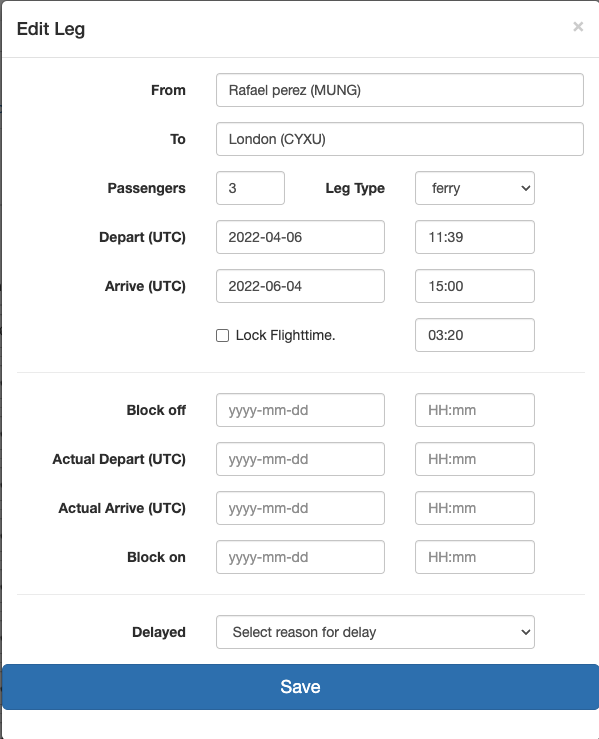
This section describes how to add a leg to a trip. Click on the Add Legbutton on the right side of the screen to add a new leg.
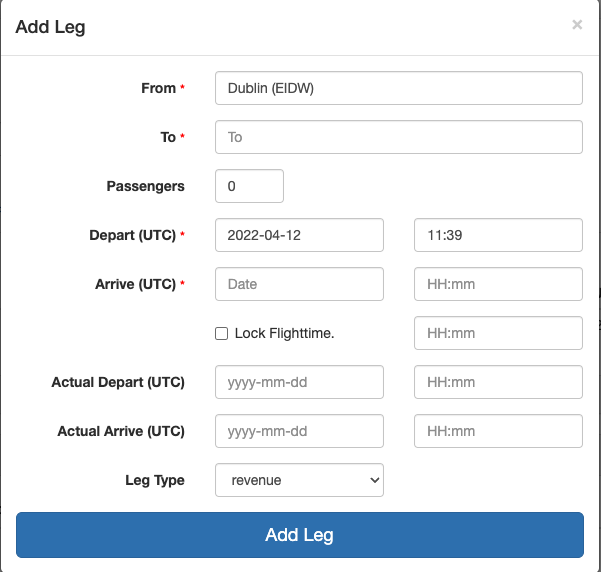
Now, fill in the trip details. The Lock Flighttime checkbox calculates the ti,e of arrival and won't allow you to change thr time after it has been checked.
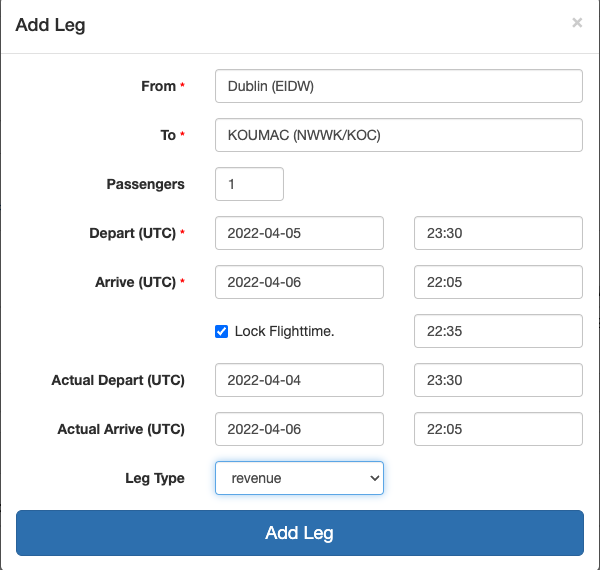
Now finish adding the leg by clicking the Add Legbutton. Once a notification comes up confirming the leg has been added, close the Add Legwith the xon the top of the right of the popup.
The trip overview menu displays a number of important elements to the trip and buttons to edit parts ogf the trip.
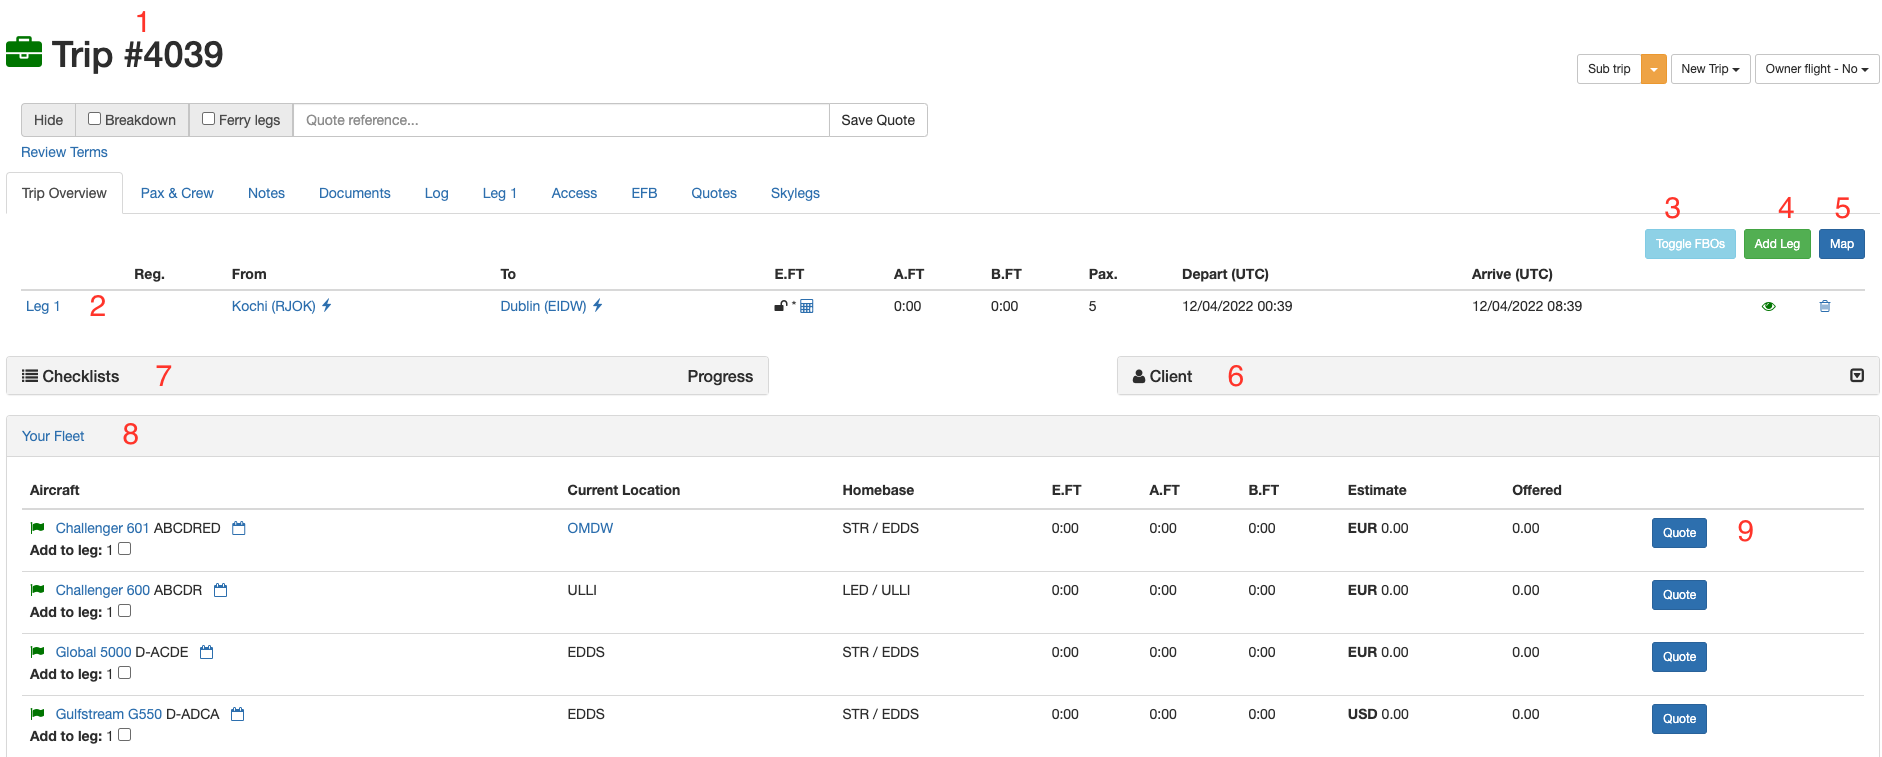
1. This displays the trip number
2. This displays the legs of your trips. You can click on each one if you wish to view or manage the Leg
3. The Toggle FBObutton will hide and show your FBOs on the trip overview.
4. This button is used to add extra legs to the trip.
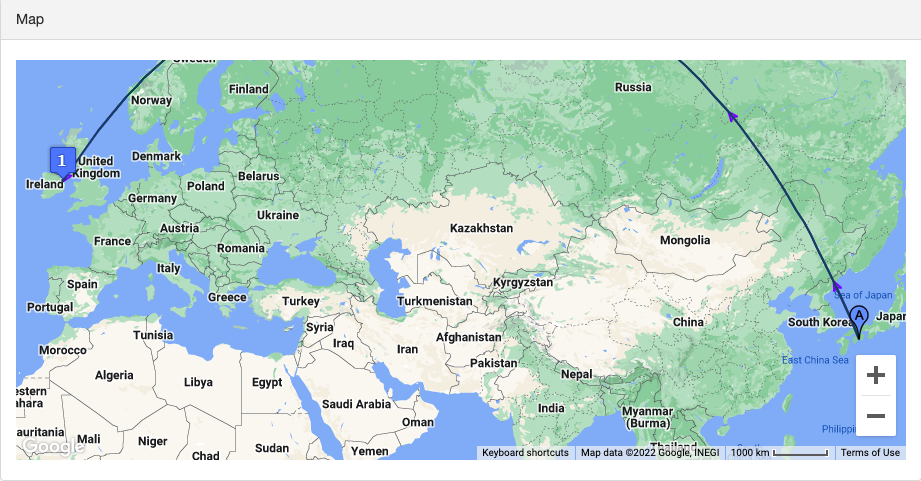
5.The map appears at the bottom of the page and it displays the the full trip visually.
6. TheClientbutton is to add /assign clients for current trip. you can either assign an existing client or create a new client for the trip.
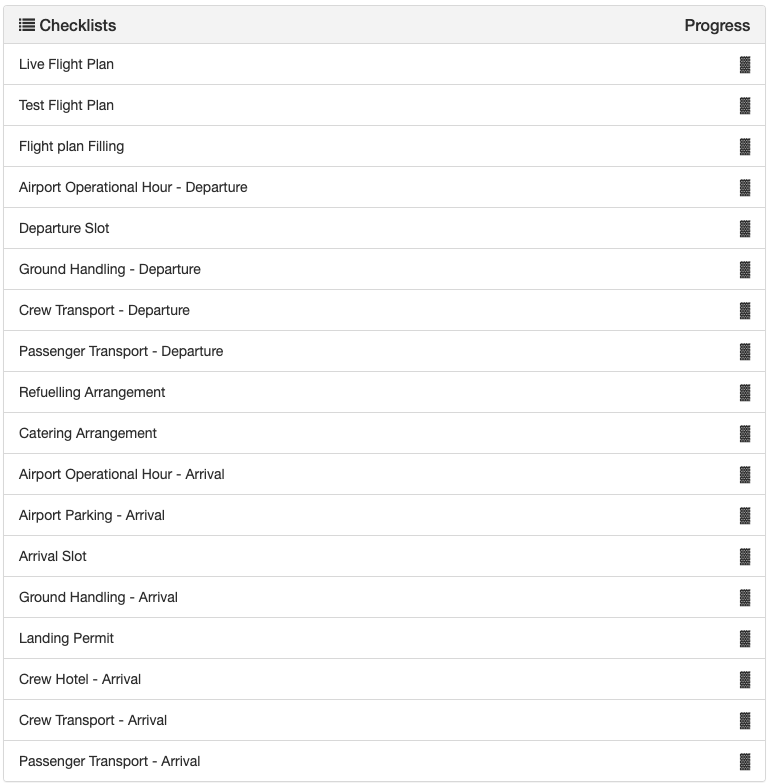
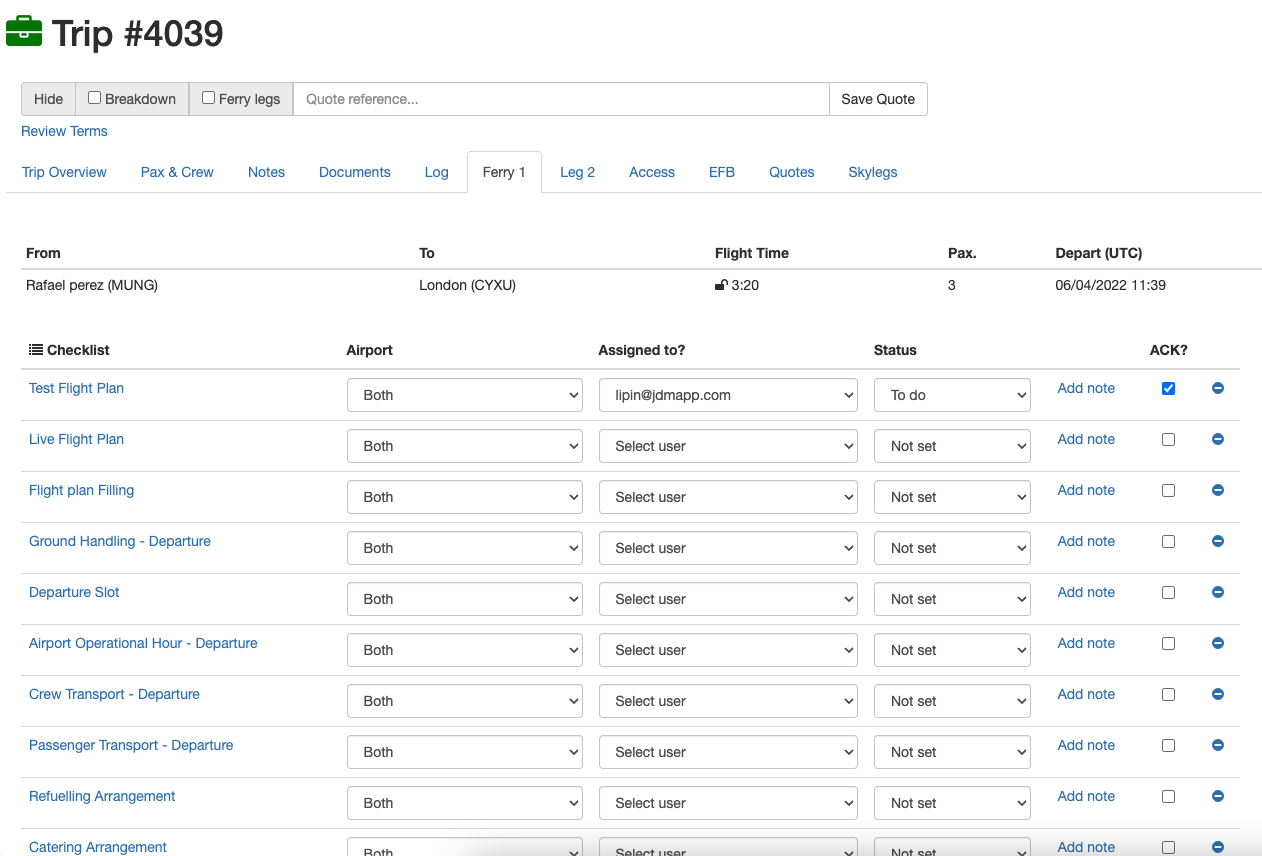
7. This is the checklist for the current trip.
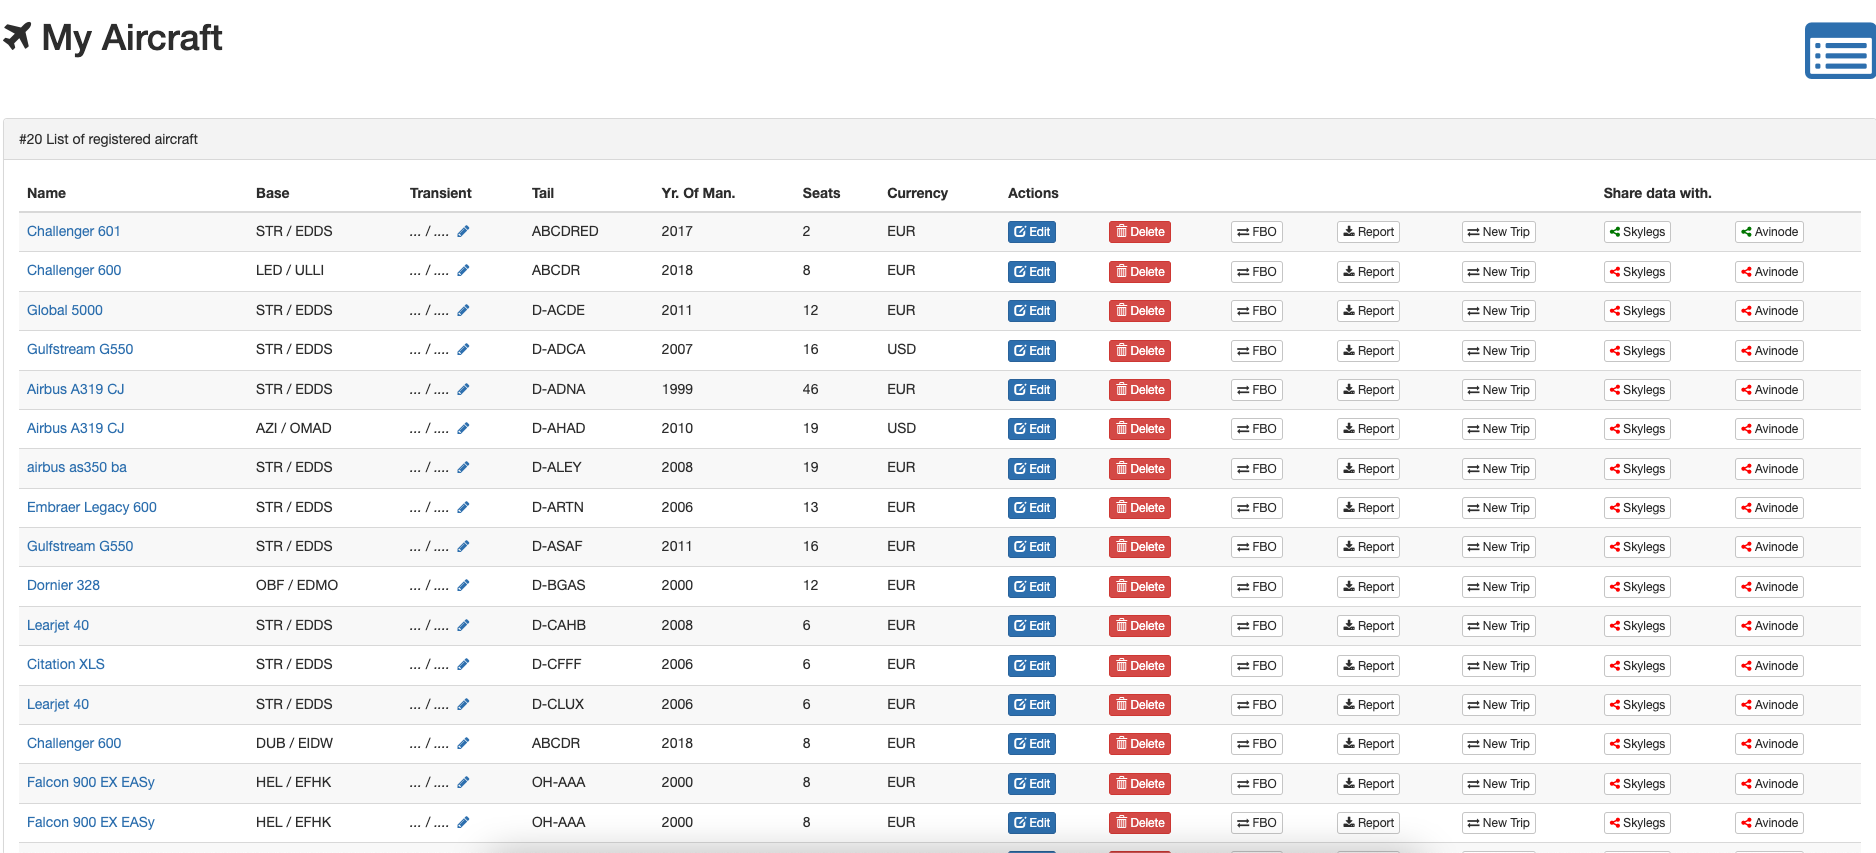
8. Your Fleetdispalys the aircrafts owned and all other data related to to the aircraft. Aircrafts can be added, removed, and modified here. it also allows you to share the data with Skylegs and Avinode
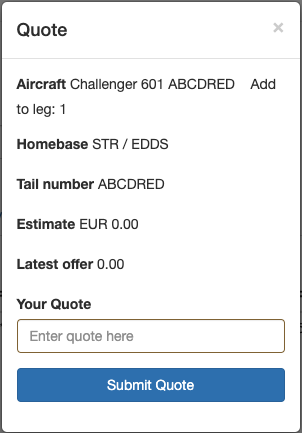
9. The Quote button is for the operators to quote the trip. Separate quotes can be made for each and every aircrafts on the fleet for the trip.
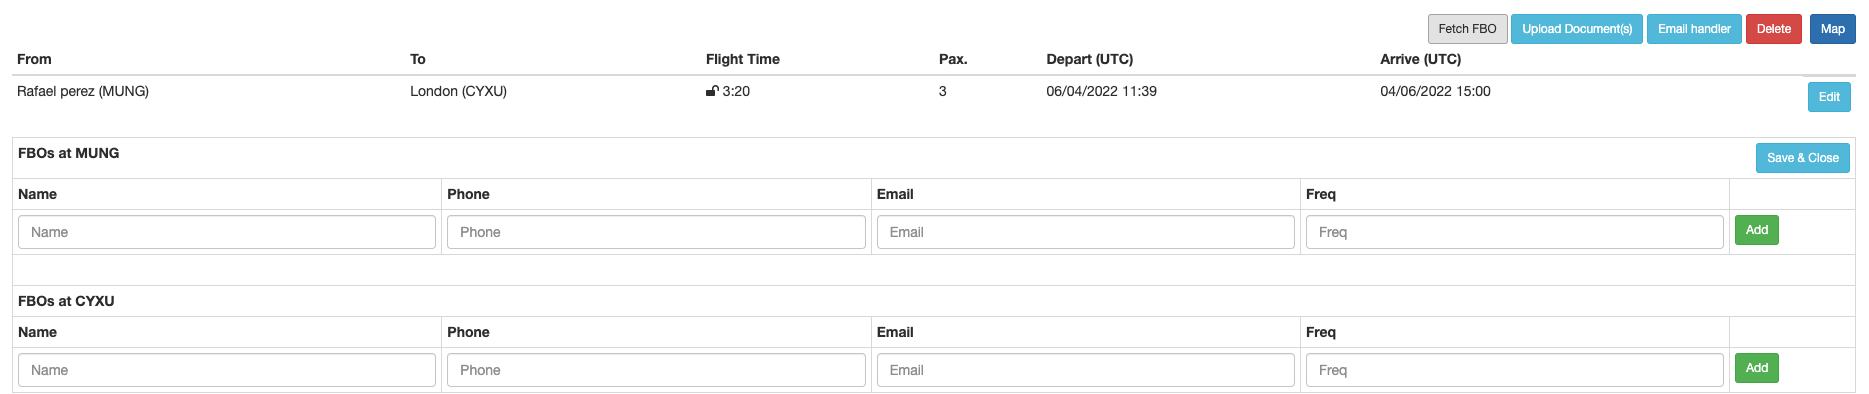
To add an FBO to your trip, click the Fetch FBObutton.

A ferry leg shows the repositioning of the aircraft if it's not already at the departure aiport.

A leg can be edited by clicking the Editbutton on the right hand side.

The passengers and Crew members that will be on the trip are shown here.
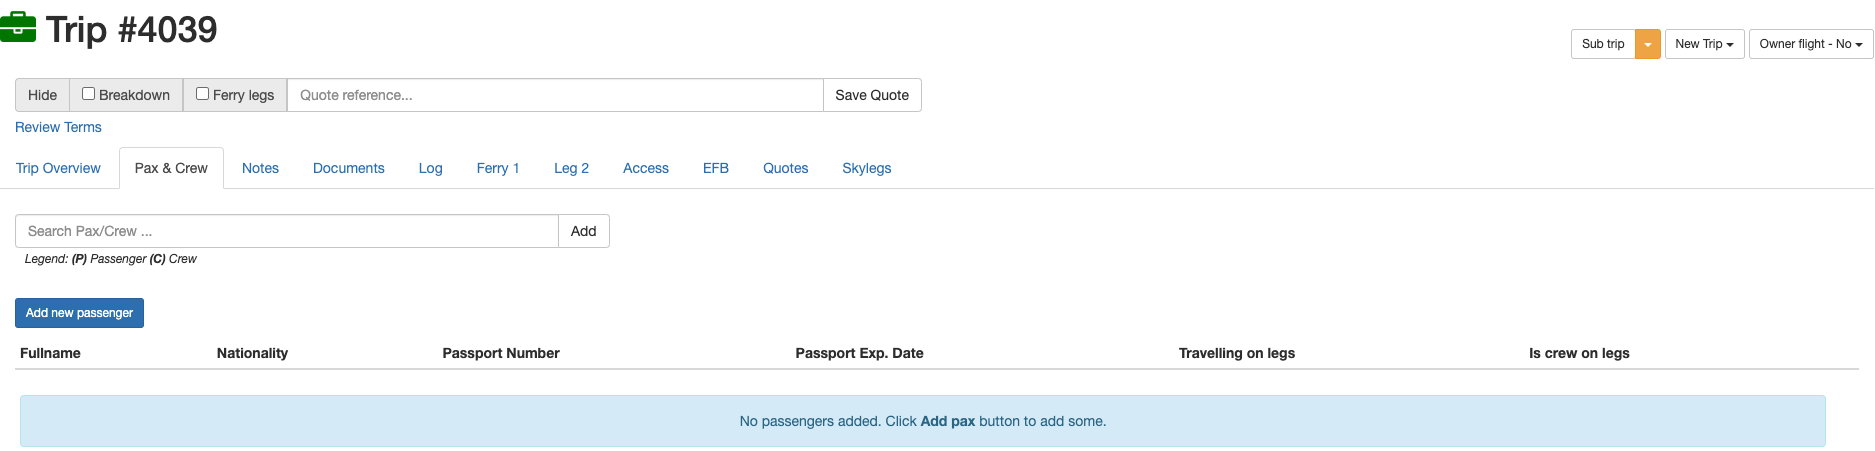
A passenger that already exists can be searched and added to a trip.

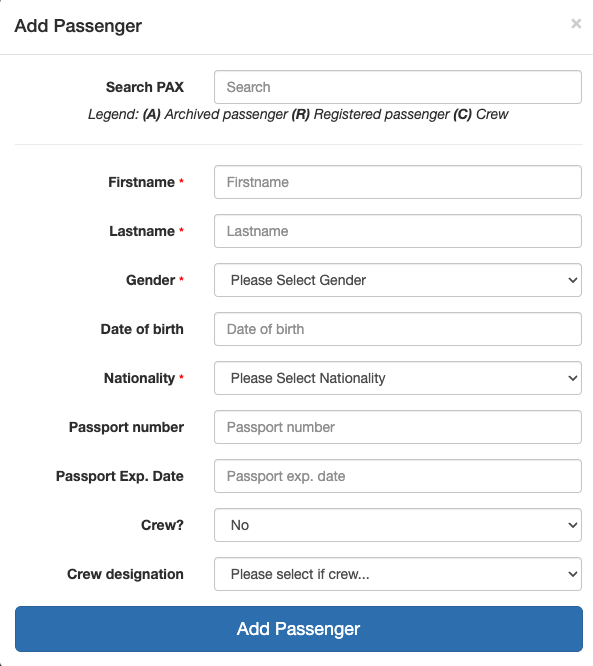
Click on the Add New Passenger button for adding a new passenger.
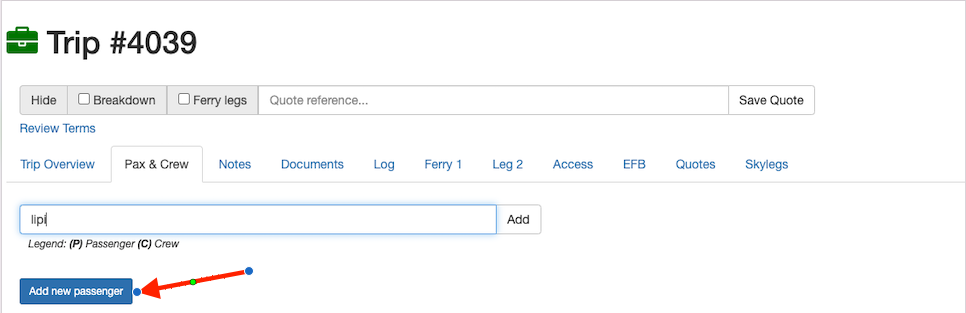
Then fill out the form for a new passenger to be added.
A passenger can be removed from the list by clicking theRemovebutton on the right hand side of the passenger list.

Designation for the crew can be assigned for each individual leg from the drop down menu.

The Notestab can be used to view your notes.
A checklist can be added to a trip or leg from the trip overview.
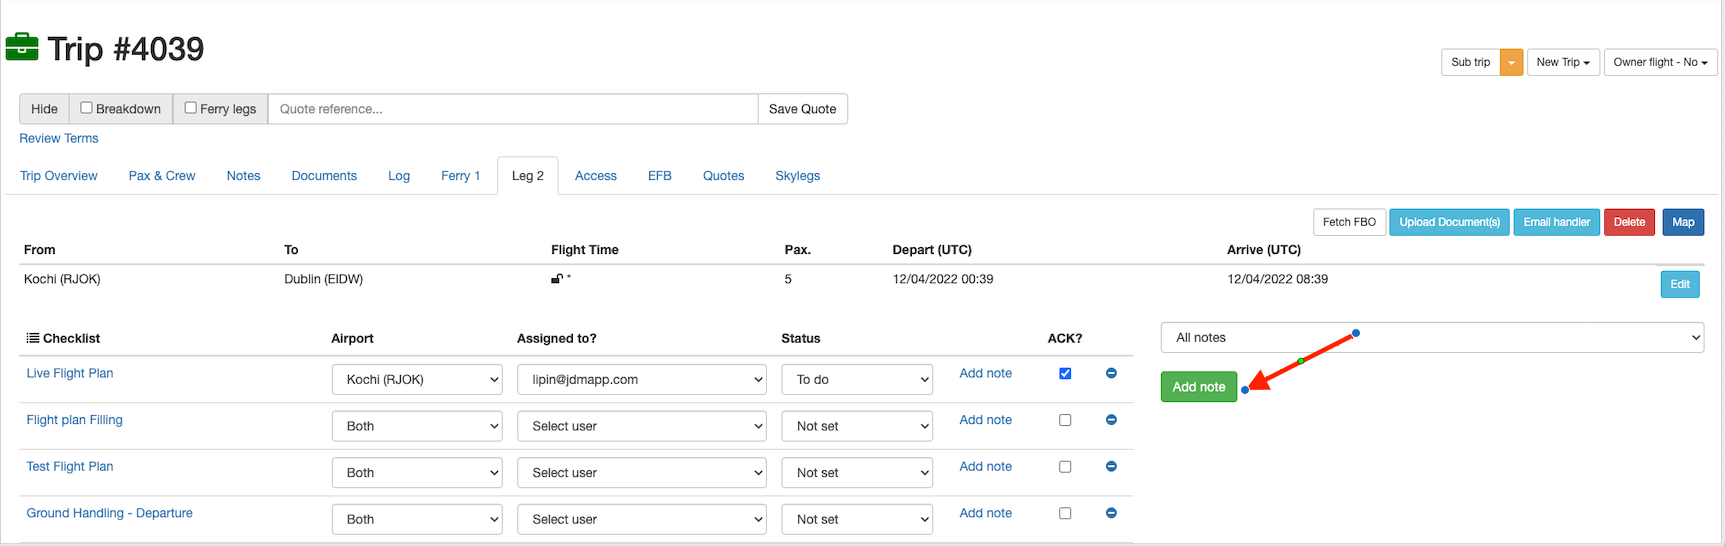
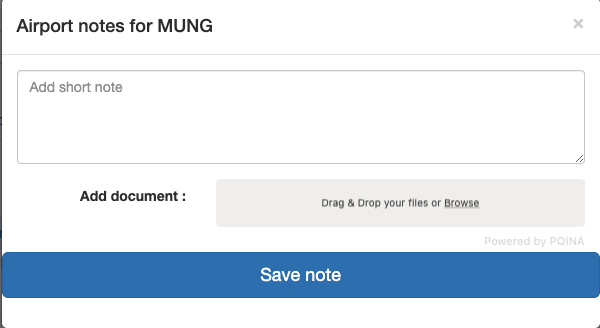
Any extra notes can be added against each and every airport on legs bt clicking on them.

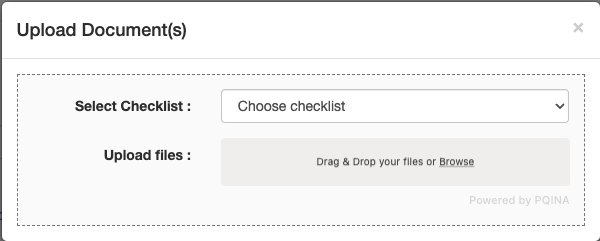
To add documents against a leg, click on theUpload Document button and then fill out the pop-up.

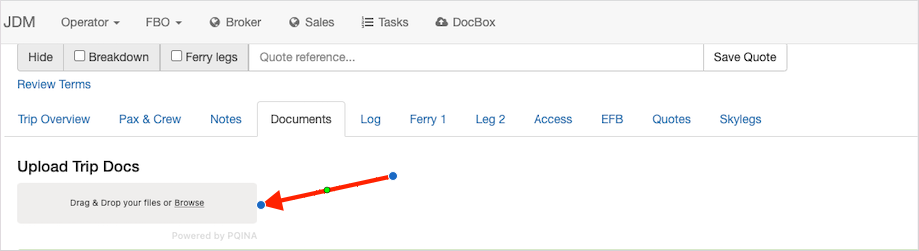
Trip documents can be directly uploaded from the Documentssection.
Log displays the trip timeline.

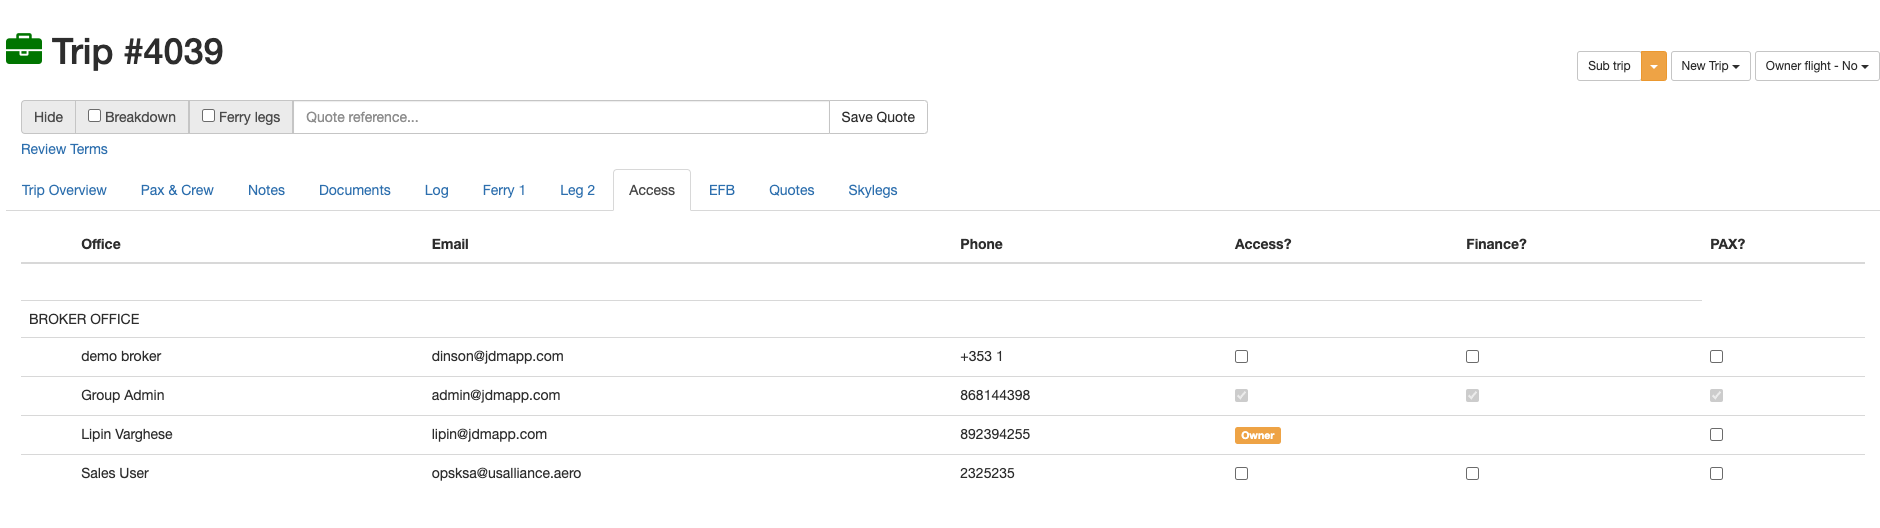
This shows who has access to your flights and their contact details.
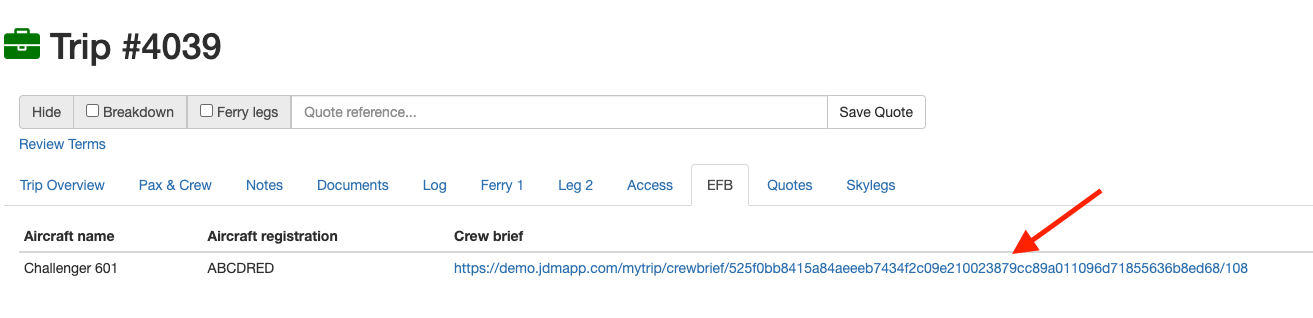
this is the electronic information being sent to the crew for performing the flight management tasks.
The quotes generated against a trip will be displayed here.

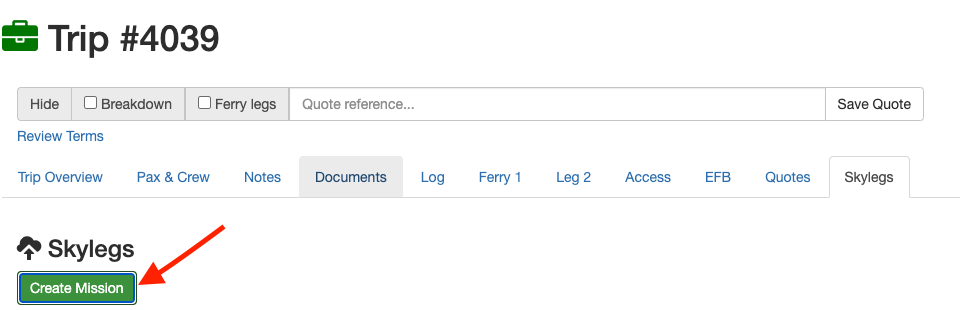
The Skylegsbutton redirects you to the skylegs. You can manage your trip by creating a mission on skylegs.
An existing client can be searched on the Client Directory using the search button on the top right hand side.
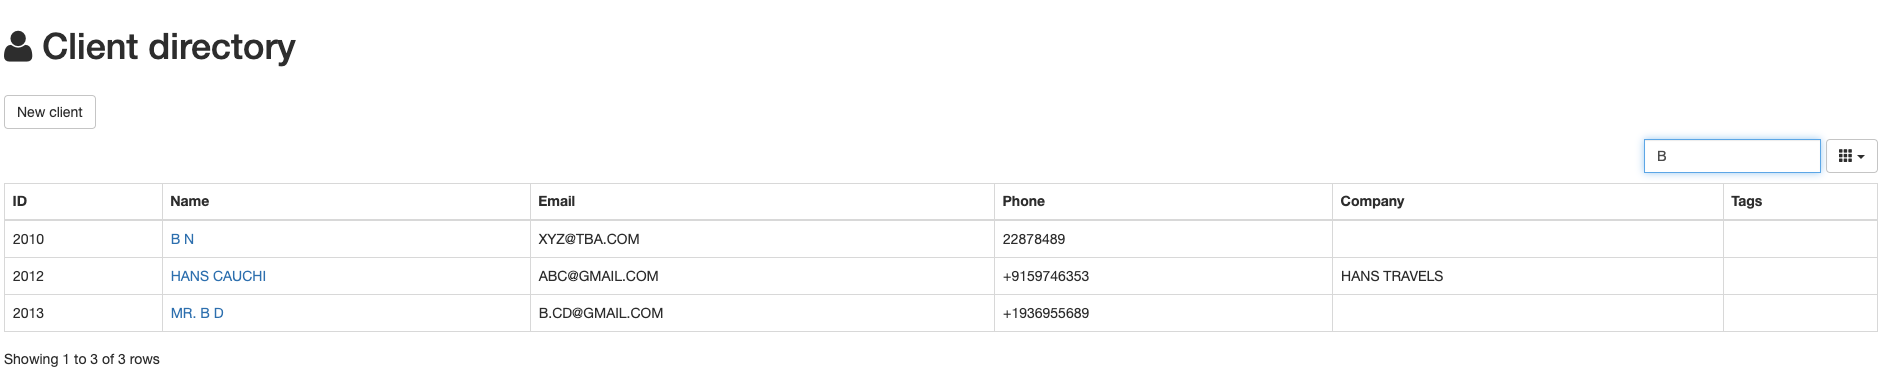
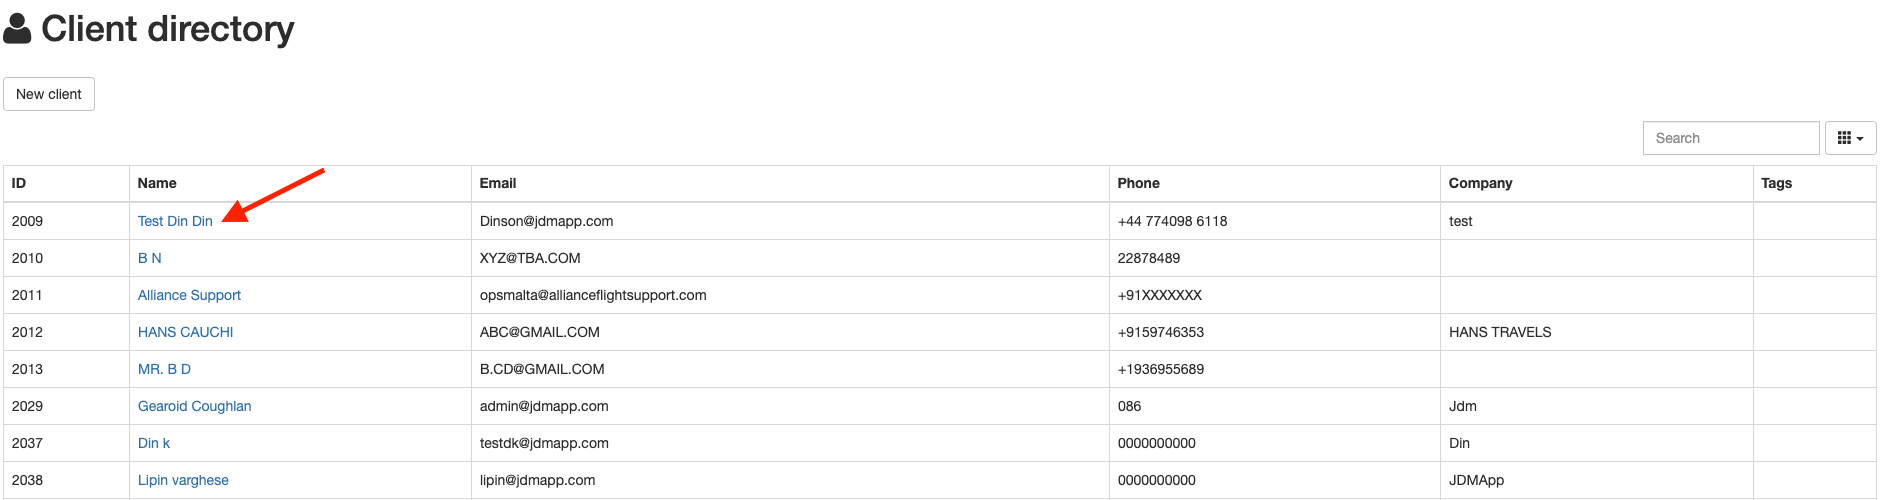
A client can be edited by clicking on the name from the client directory.
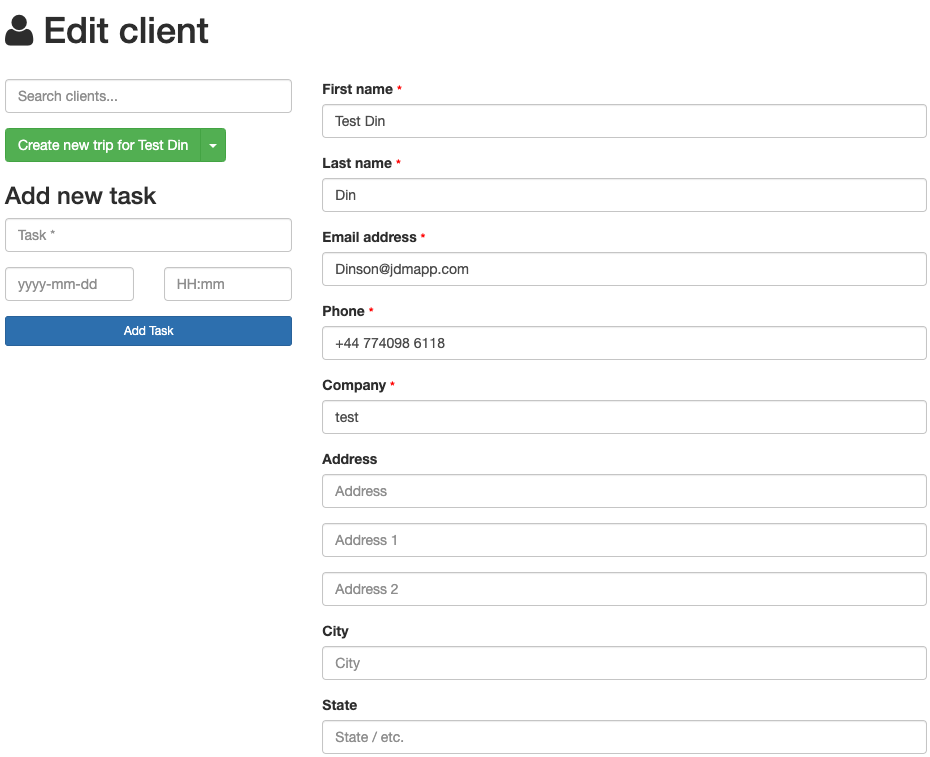
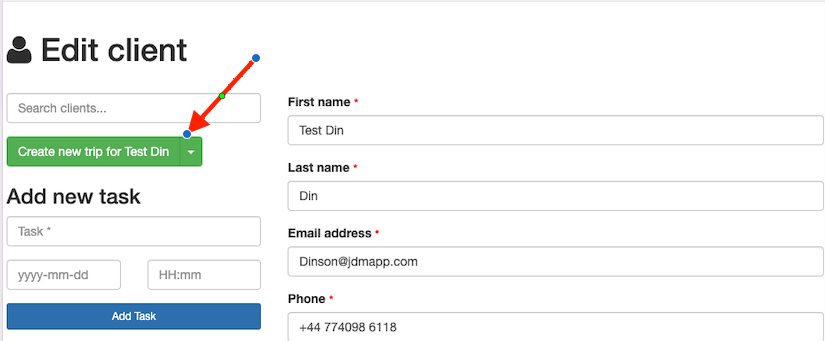
new trips can be created for clients from the client directory by clicking on Create new tripon the top left most corner.

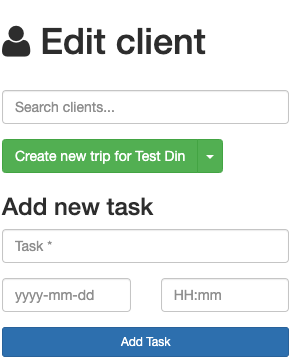
A new task can be created for a client by clicking the Add Taskbutton.
My Aircraft section allows operators to track their aircrafts, add and remove aircrafts and so on. An aircraft can be accessed by clicking on the name of it.
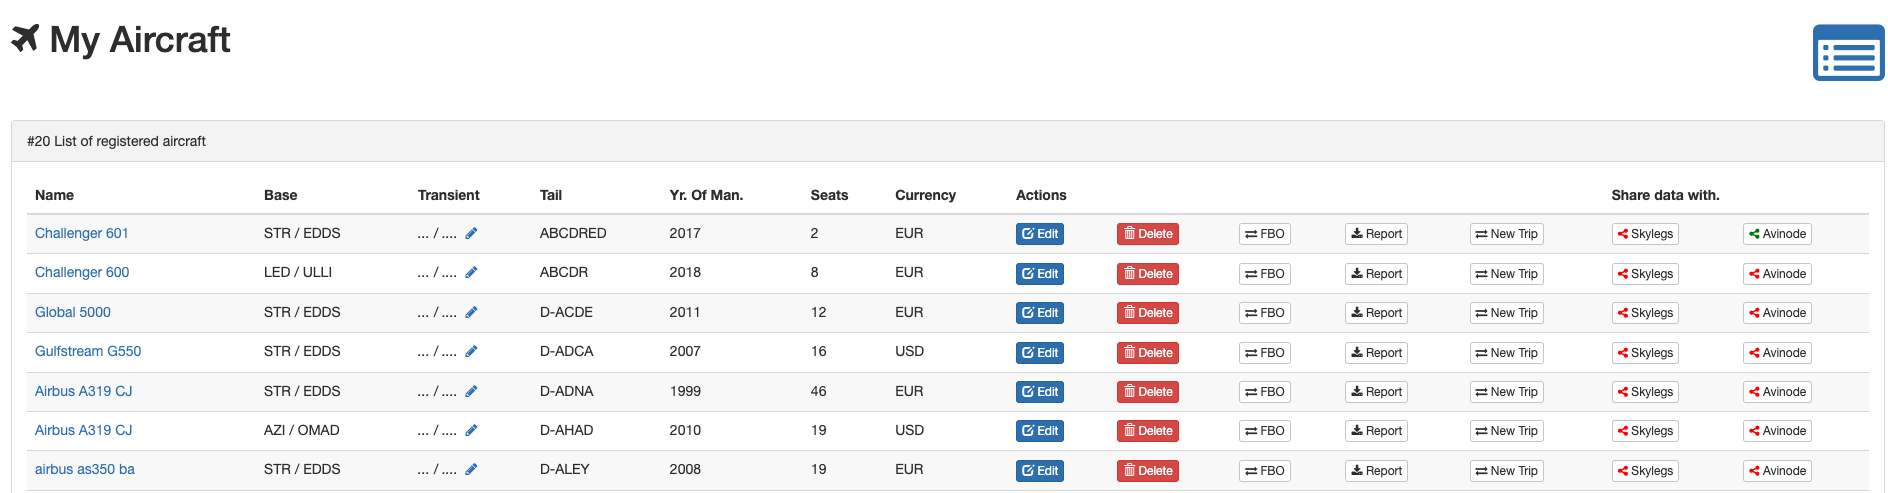
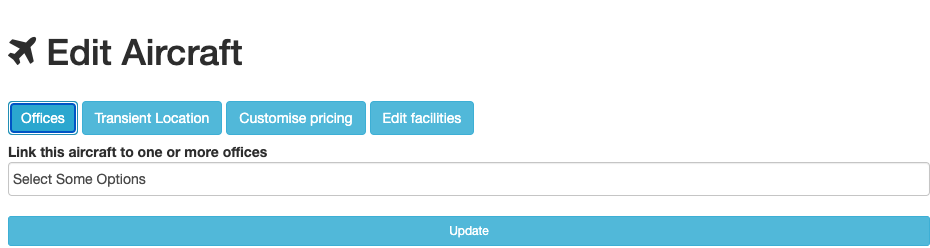
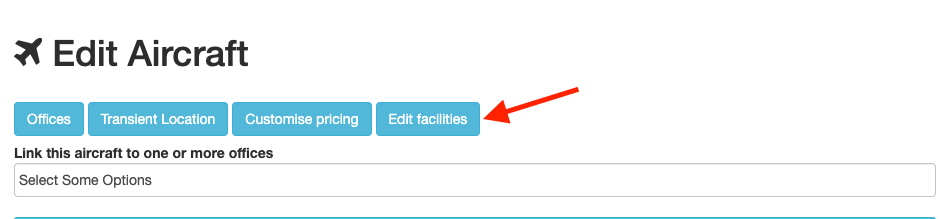
An aircraft can be edited by clicking on the Editbutton.

An aircraft can be assigned to multiple offices by clicking the Officesbutton.
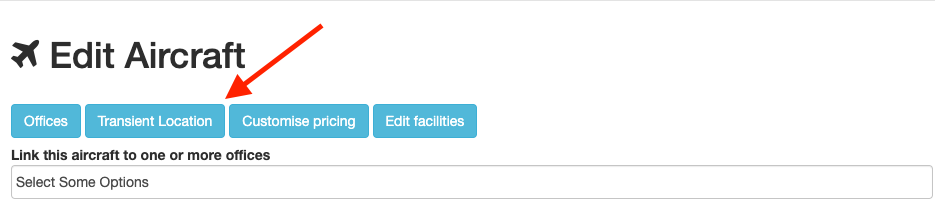
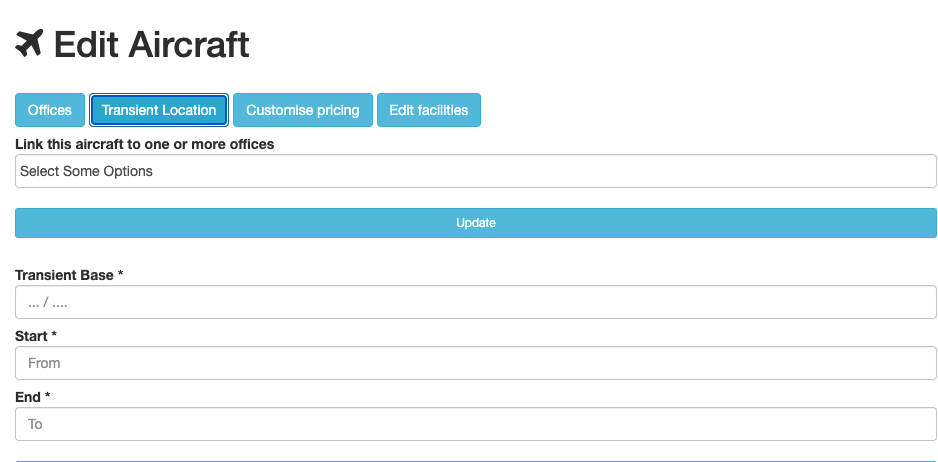
A transient location is where the aircraft is templorarily positioned out of their base.
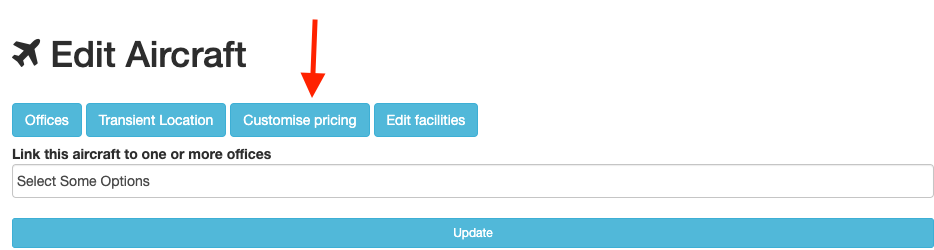
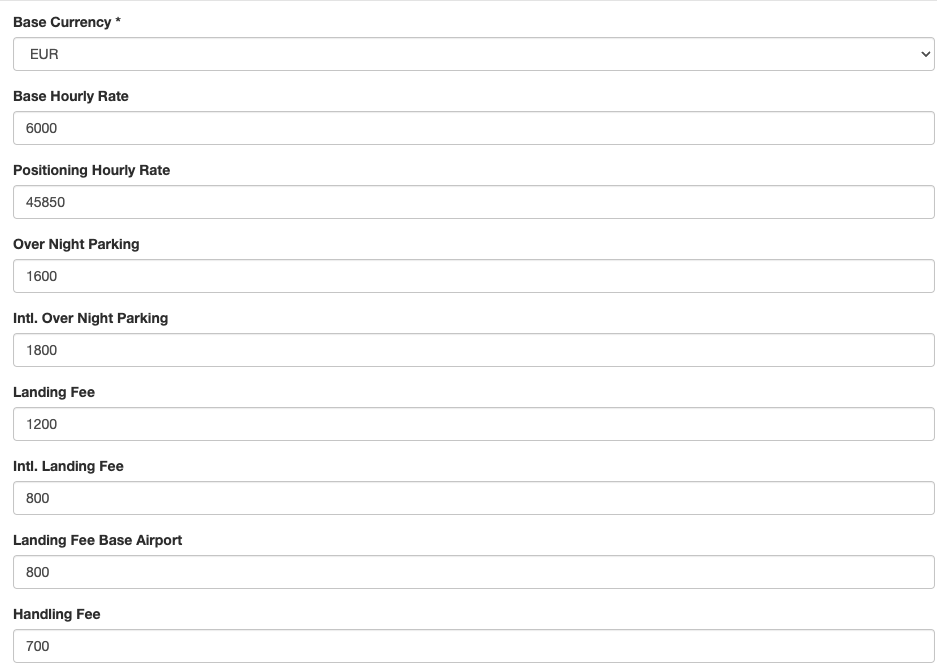
All pricing related to the aircraft on a base can be added or modified here by clicking on Customize pricingbutton.
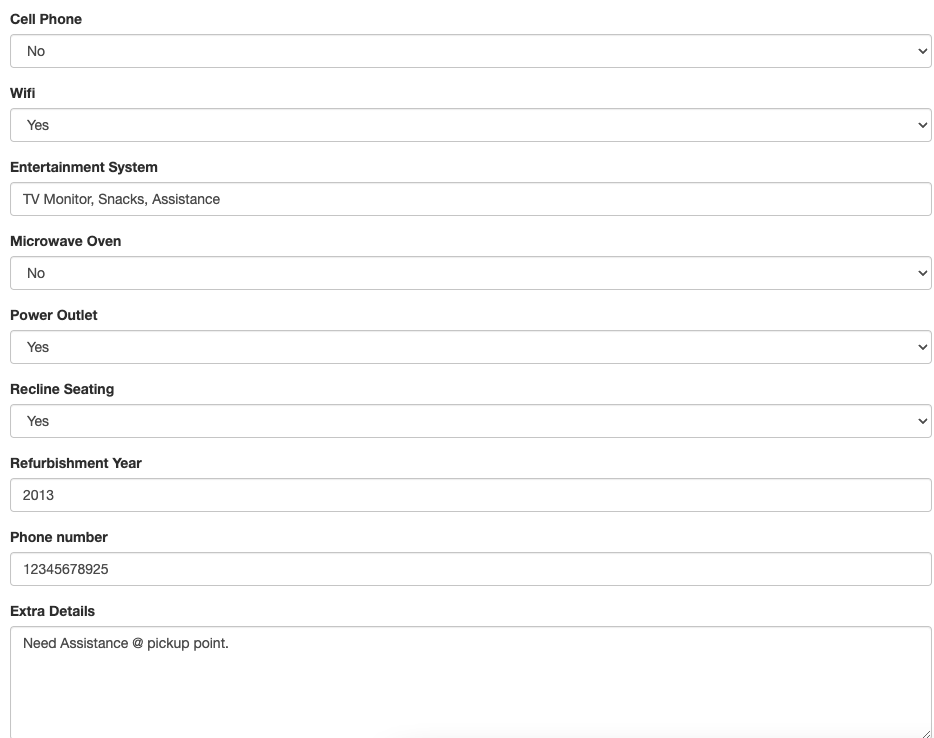
All the aircraft facilities can be edited by clicking the Edit facilitiesbutton.
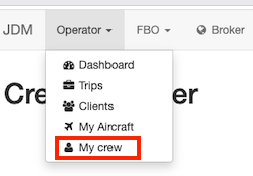
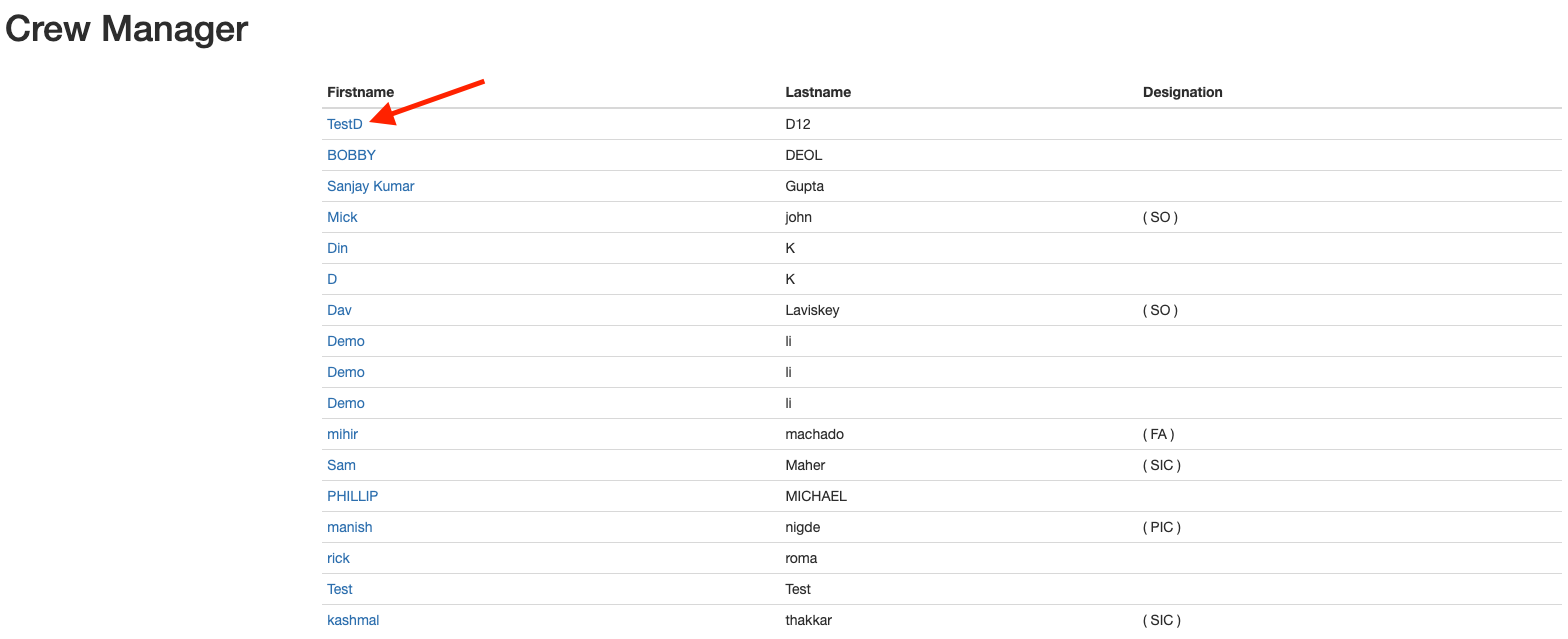
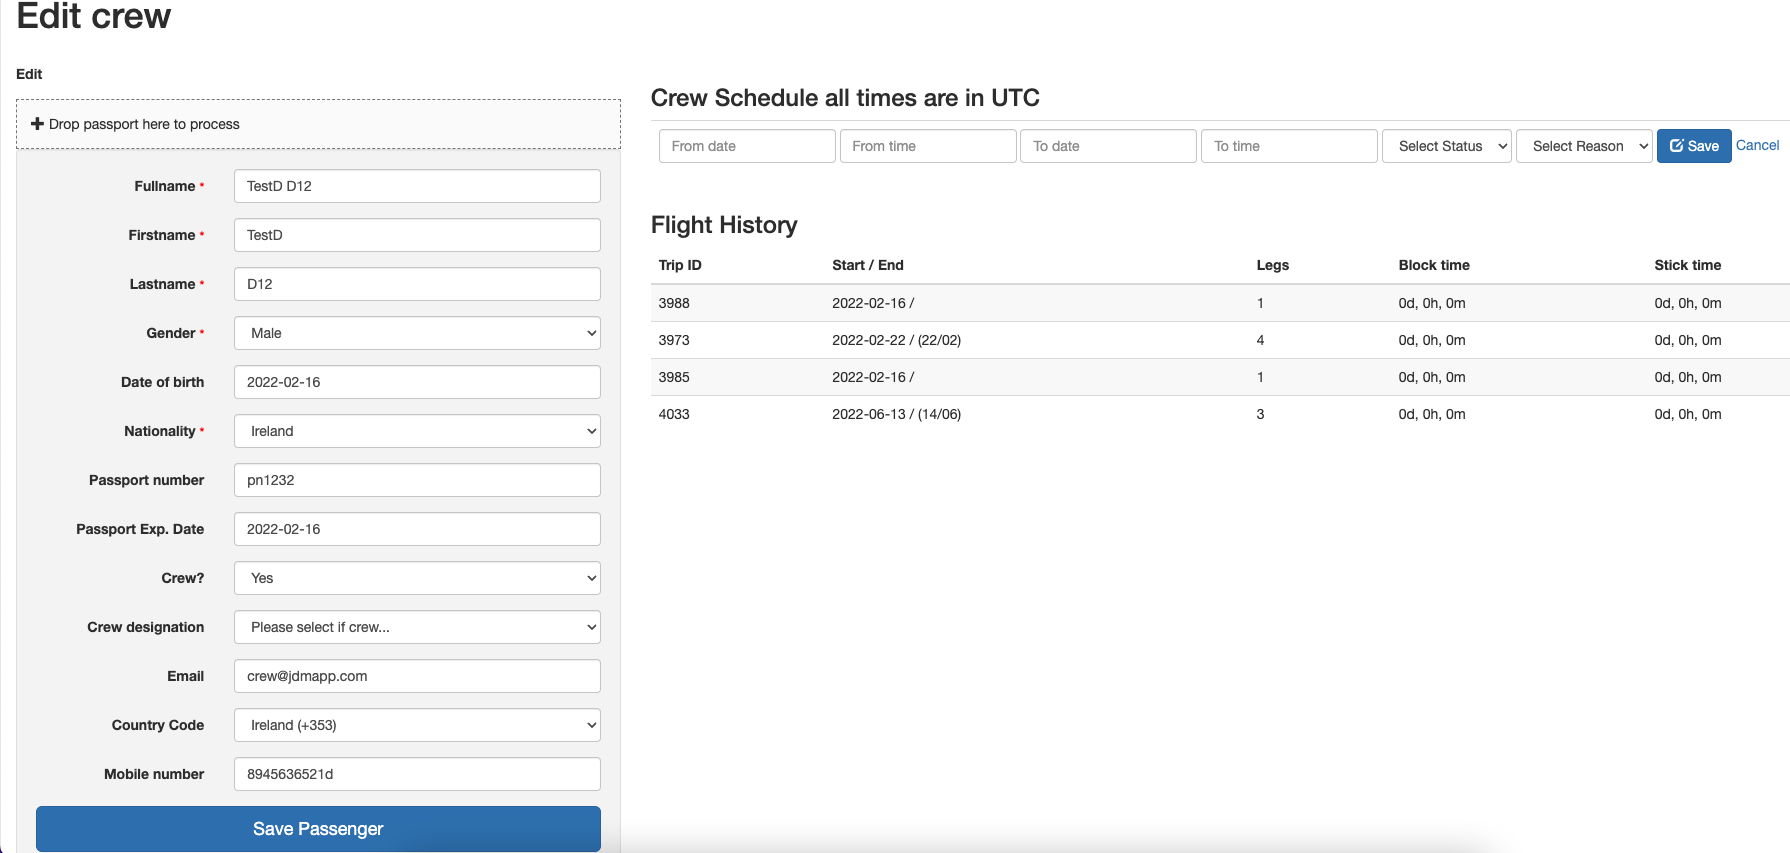
All the crew details cen be added/updated here by clicking on My crewbutton. A crew member can be accessed by clicking on the first name.
An external person can create trips on JDM as a guest, using the URL from a JDM user. An authorized user can generate a url from the API access option on the settings menu.
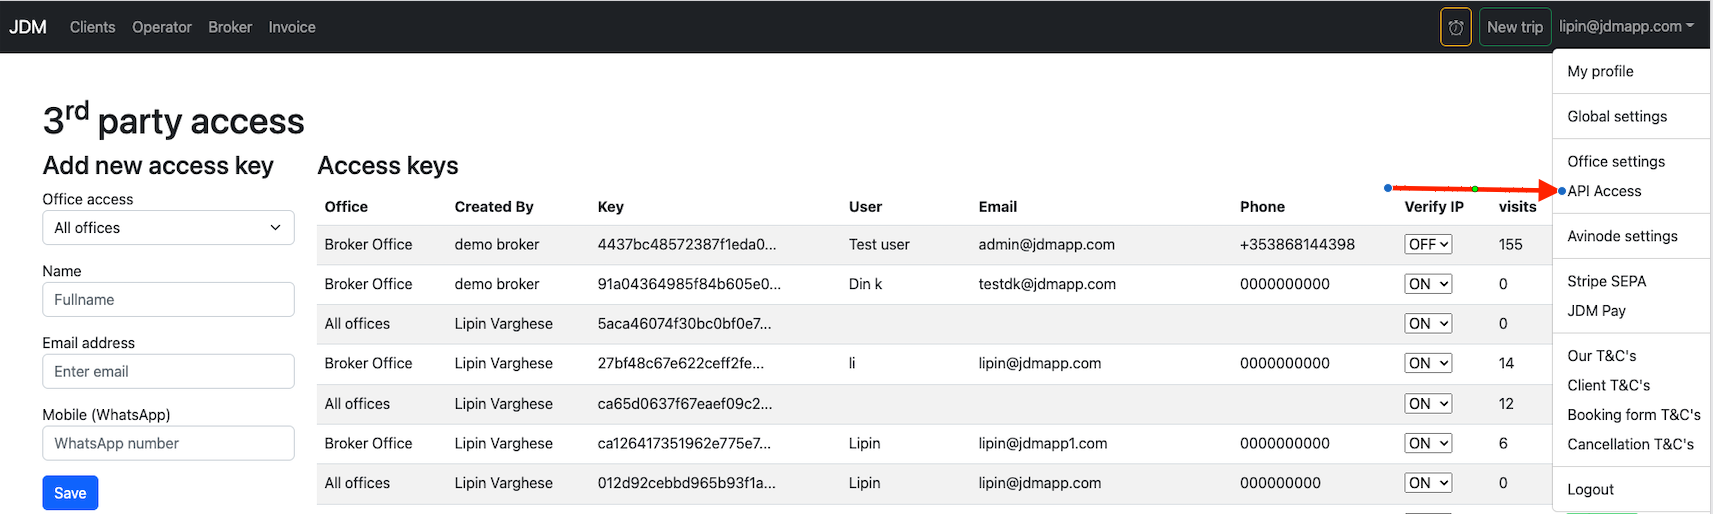
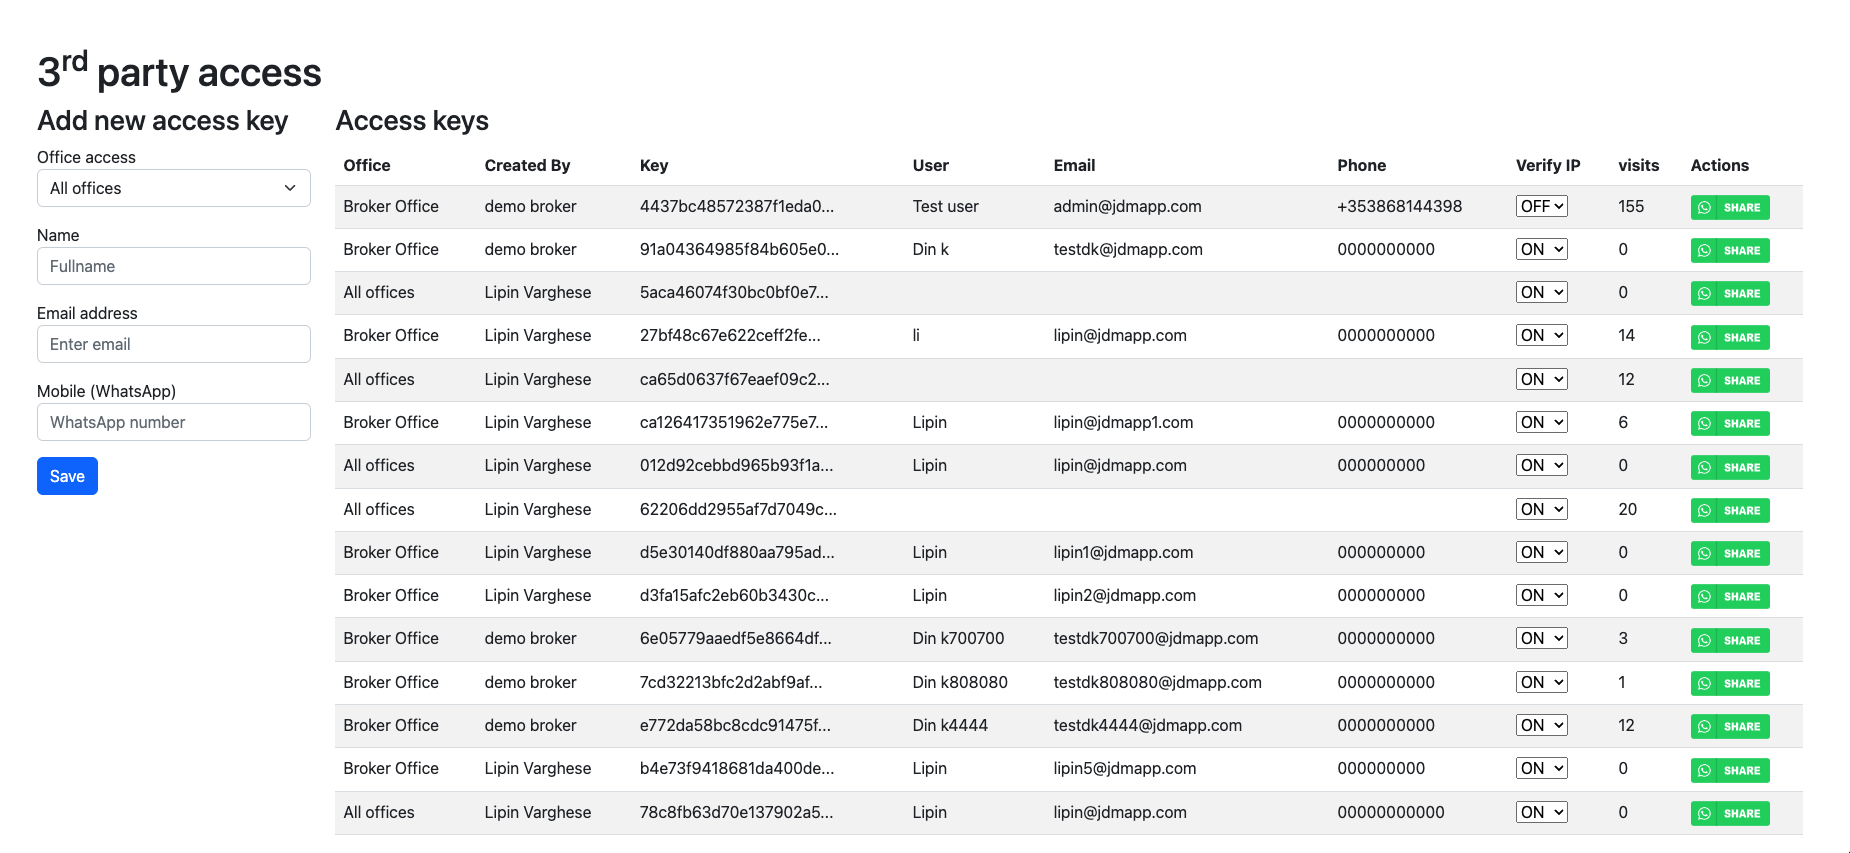
Access can be shared on whatsapp and external person can create/manage trips on JDM using the access.


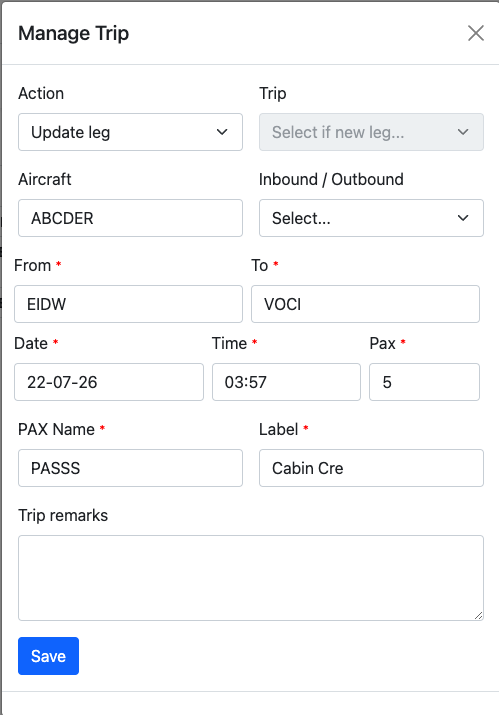
A new trip can be created by clicking on the New Trip/Leg button on the top left corner.


Now, the trip is on pending status and has to be approved by the authorized user.

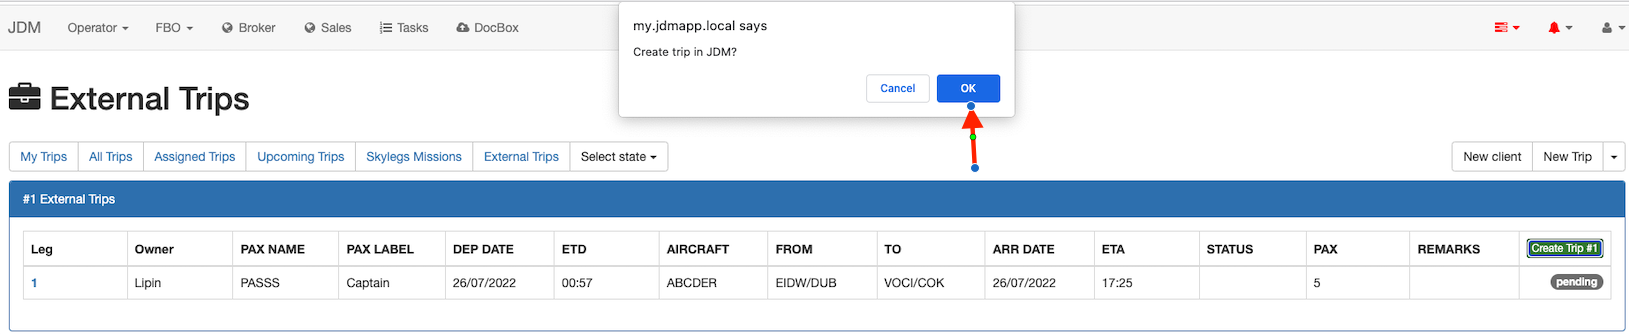
Now, the trip has been created in JDM and the trip status has been updated.

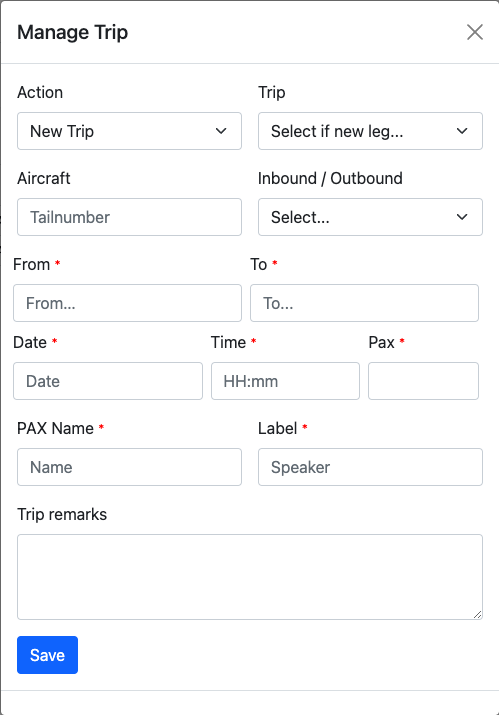
New leg can be added to a trip using external trip dashboard by clicking on the New Trip/legbutton on the top left hand side corner.

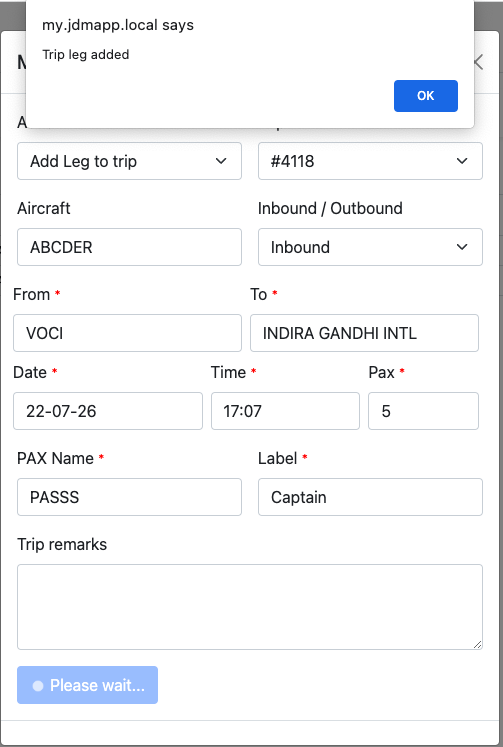
Now, just refresh the browser and the new trip will be updated on external trip dashboard. the trip status is pending and the JDM user has to approve it on JDM trips for the leg to be updated.
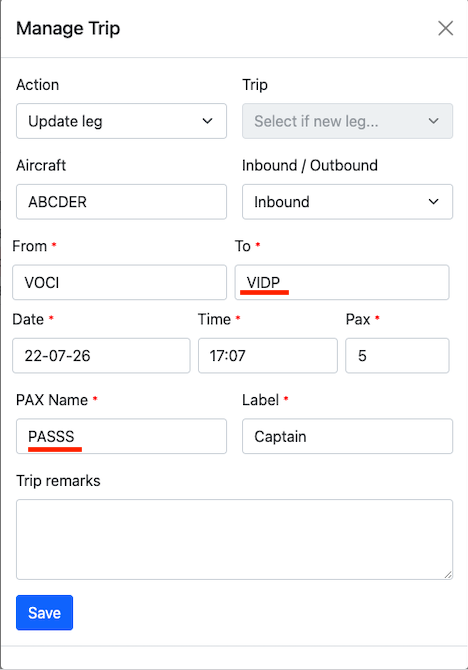
An existing leg can be updated by clicking on the New Trip/Legbutton and select the update leg option from the action menu.

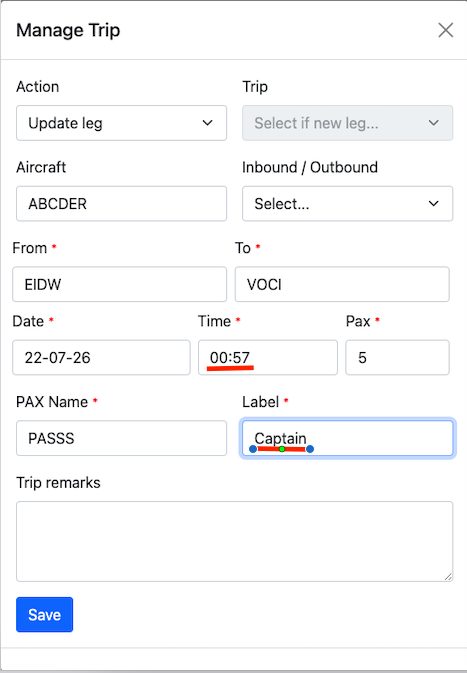
The trip leg has been updated and is highlighted.

The JDM user recieves anAcceptpop-up on the external trips dashboard.
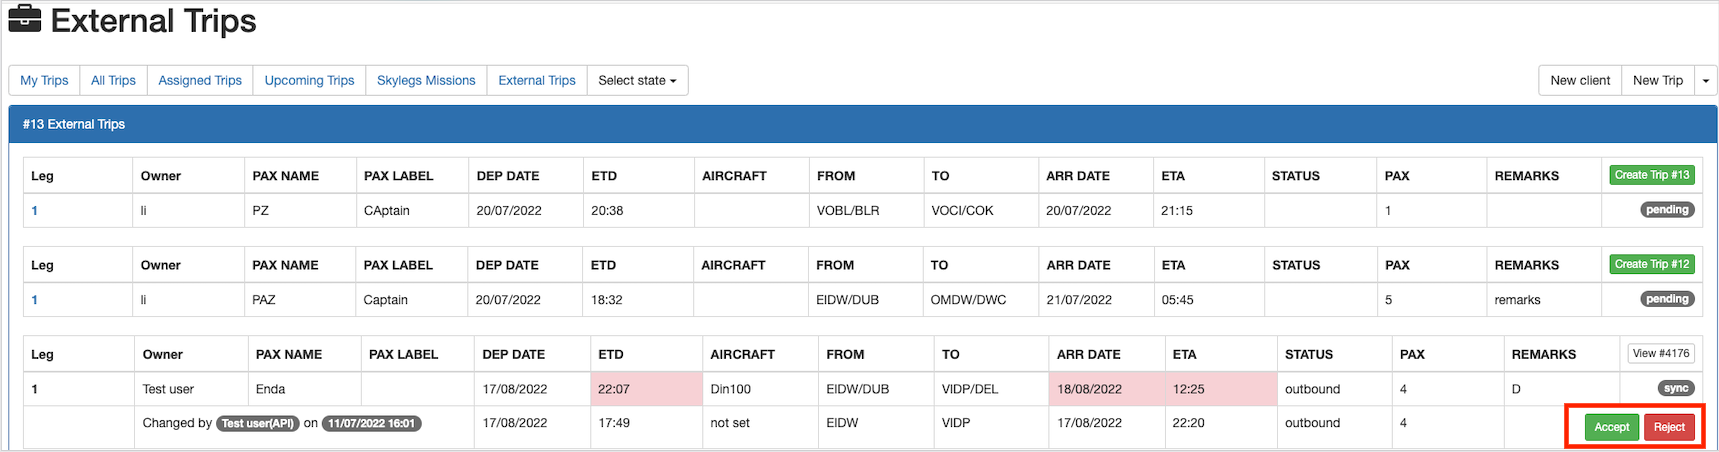
The leg will be updated on JDM, if the JDM user accepts the changes.
An external trip leg can be updated on JDM. Here, the API user has to approve the changes which has been made by the JDM user.

Modifying the trip details on leg 2.

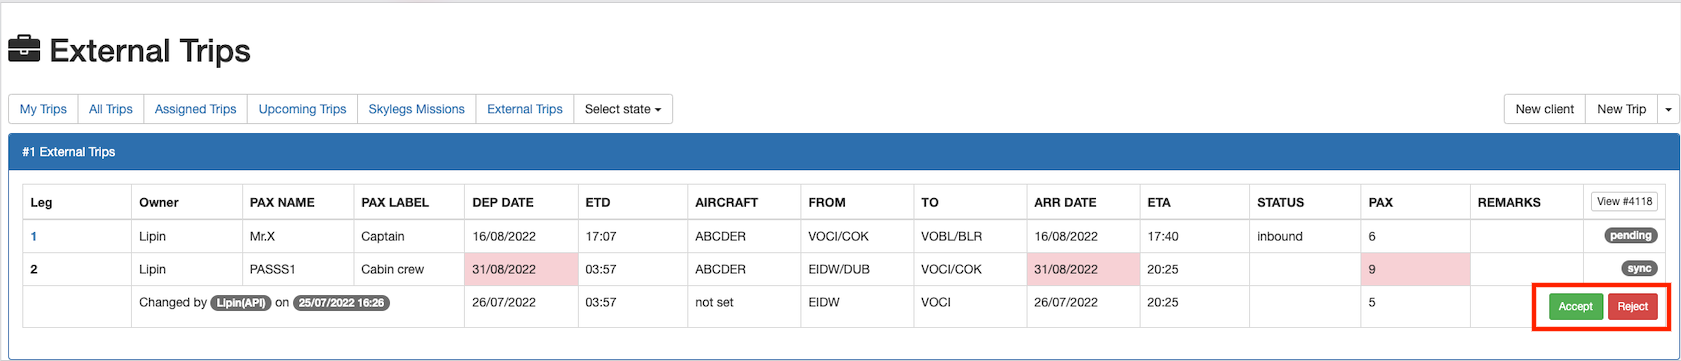
The changes will be updated if the API user accepts the changes.
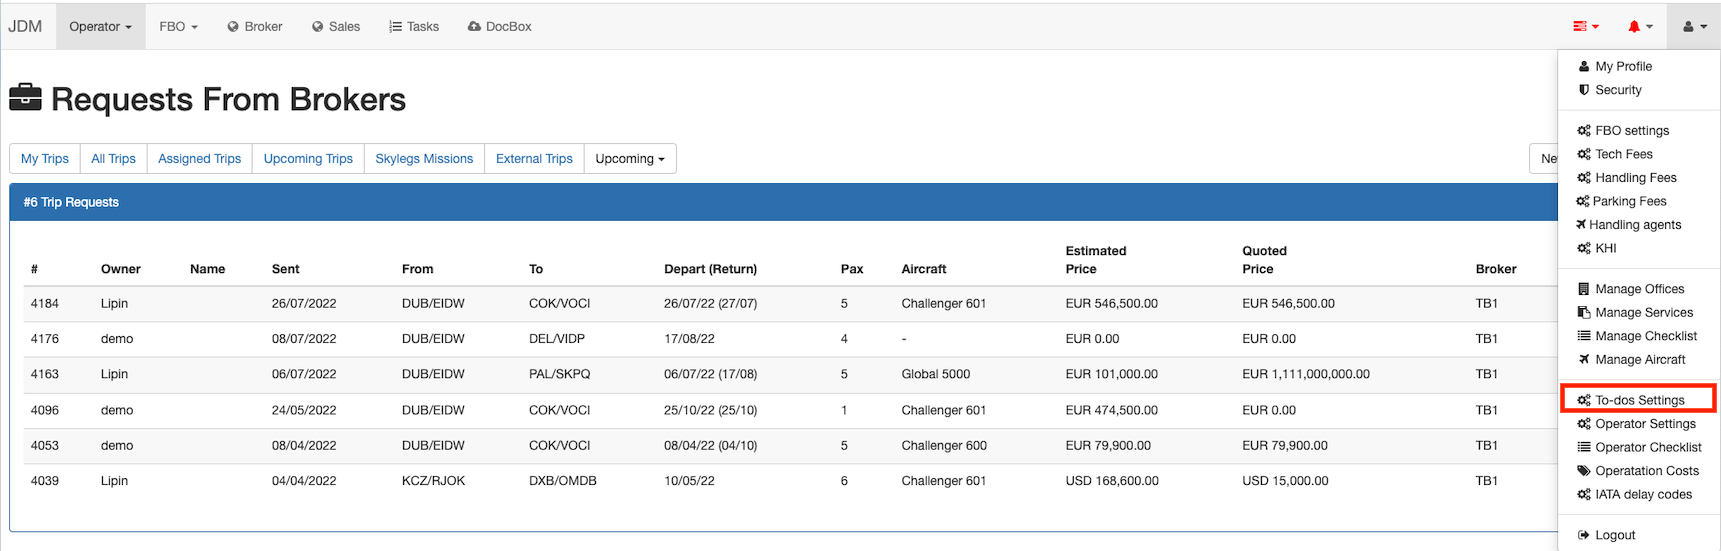
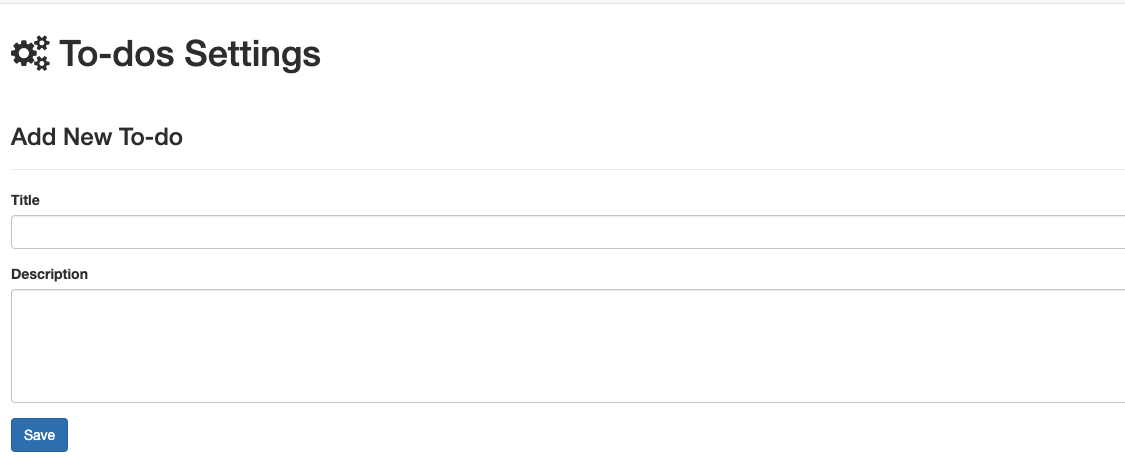
Boiler templates are used to add default to-dos to the system. Boiler templates can be added from the settings menu.
All you have to do is to add the To-dos
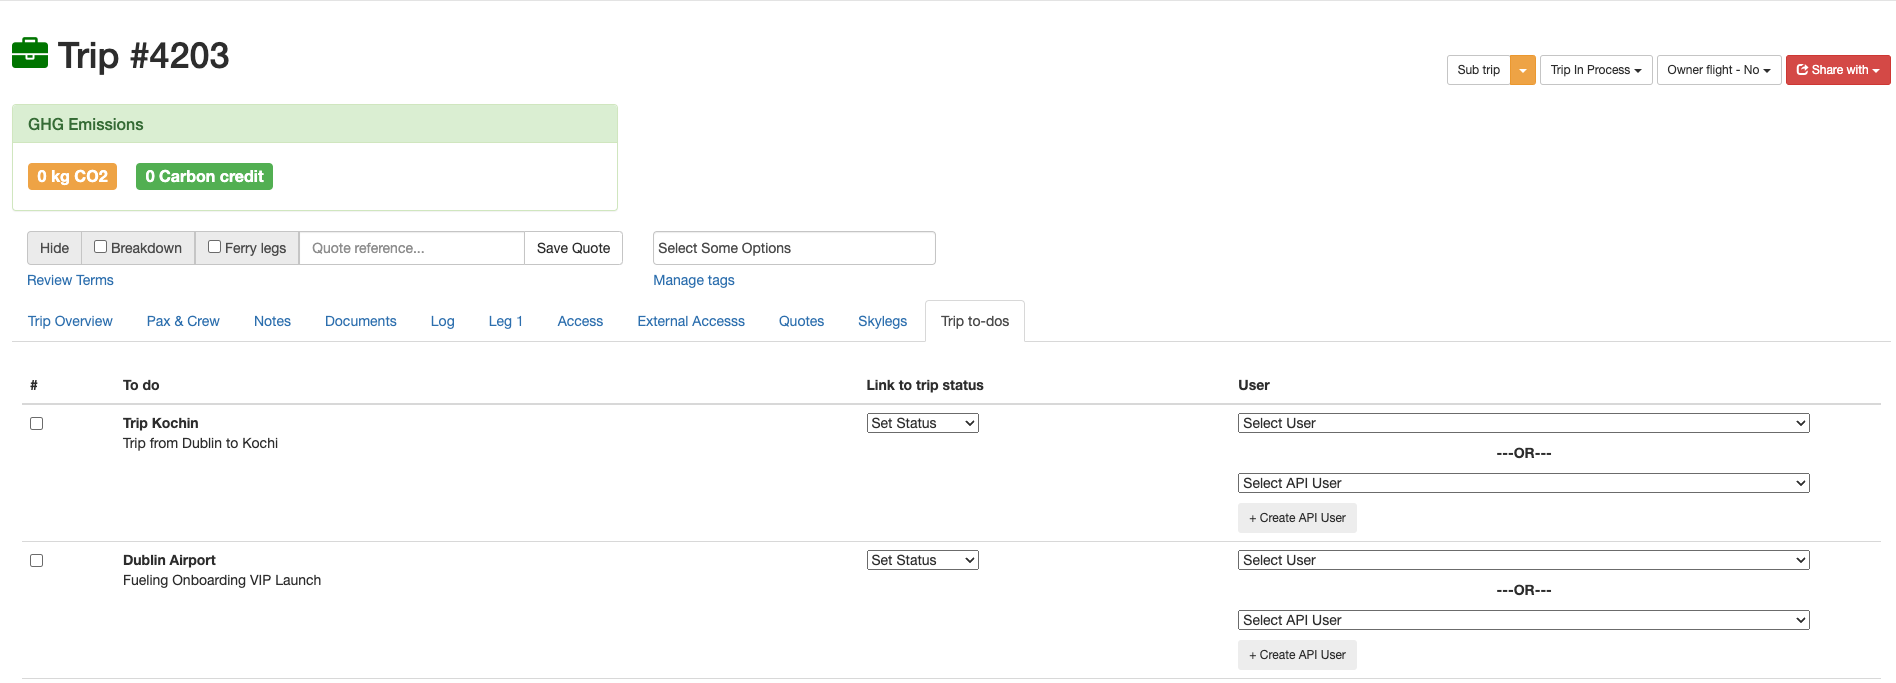
To export boiler templates into the trip, select Trip-To-Doson the right hand side of the trip view.

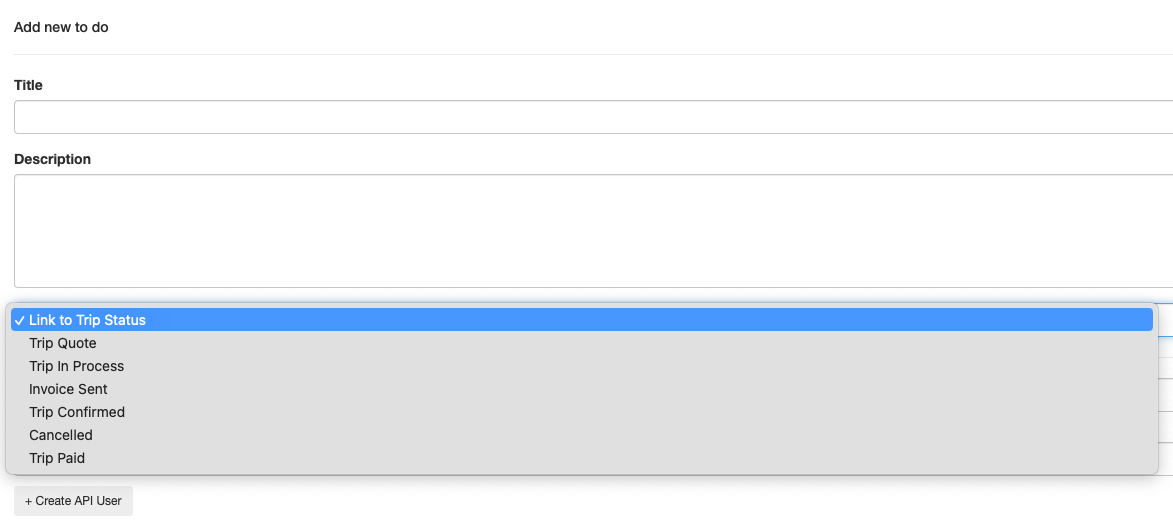
Fill in the boiler template and add it to the trip by clicking on the Savebutton.
Click on the + Create API Userbutton to create a new API user.
Trip status can be added to a trip from the drop-down menu in the boiler template.
Once a trip status has been assigned to a trip, it cannot be changed unless all the to-dos have been completed.
Trips are listed on the operator's to-dos dashboard based on the trip status and each trip status has assigned an indication color.

Once all the to-dos are done, trip status can be changed down to done.All the actions against a to-do is logged and can be viewed on the view log section.

A to-do can be removed from the list by using the Deletebuton on the right hand side.

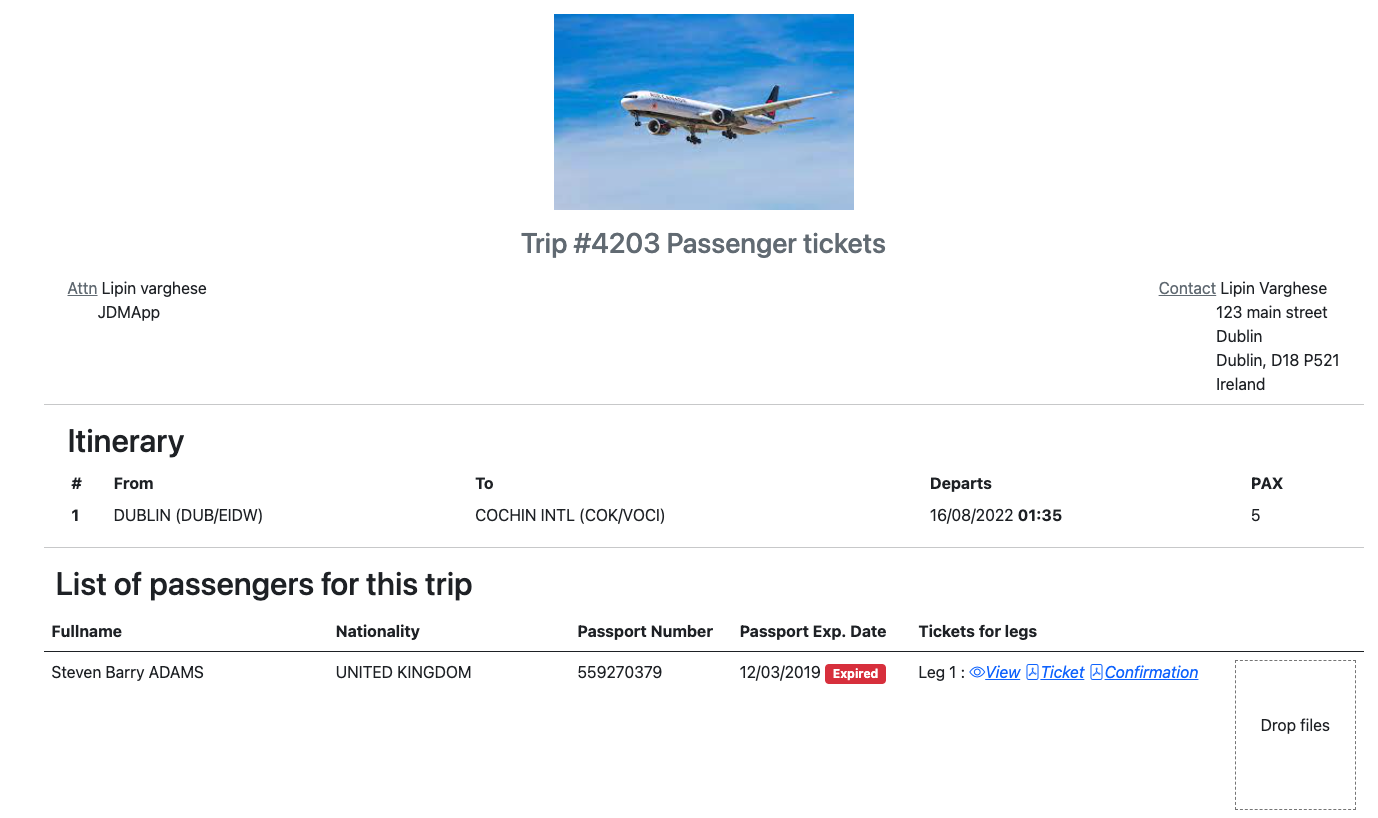
An external person can add passengers to a trip and can bulk import passenger passport information to JDM. Access for an external person is generated from the External Accessbutton. Also you can find out here the access url as well
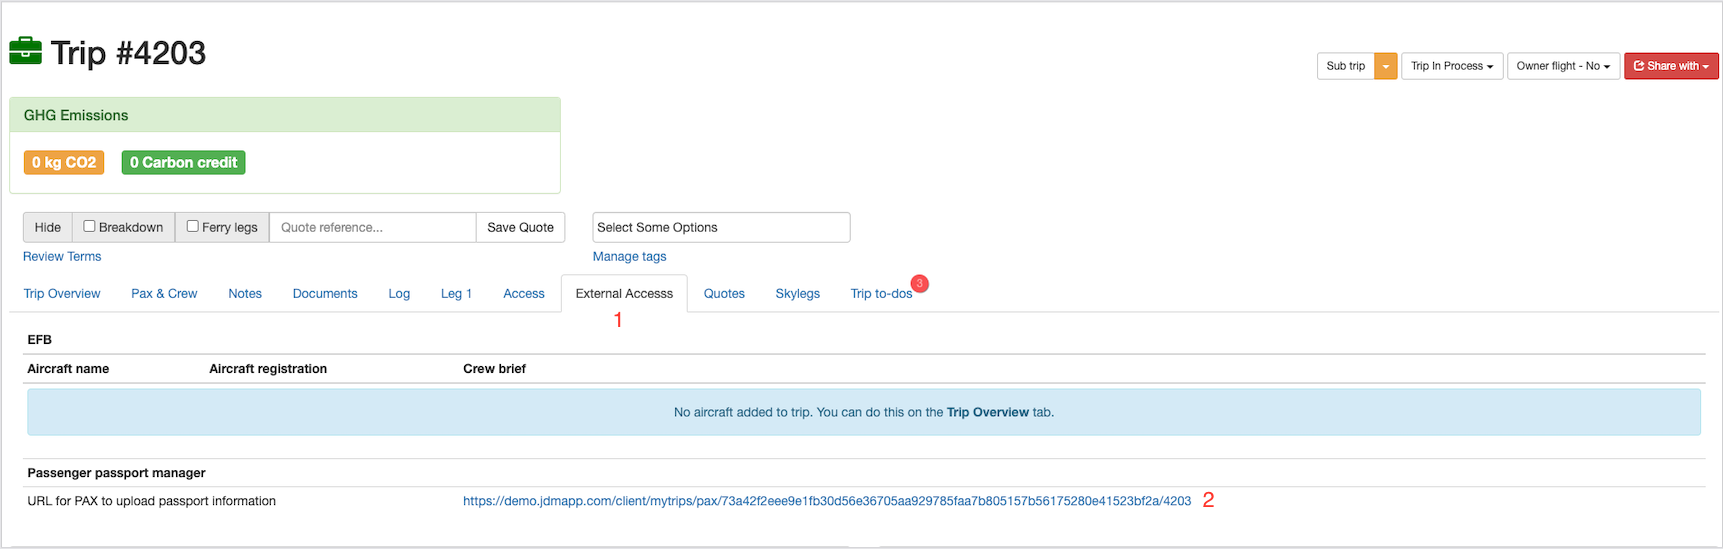
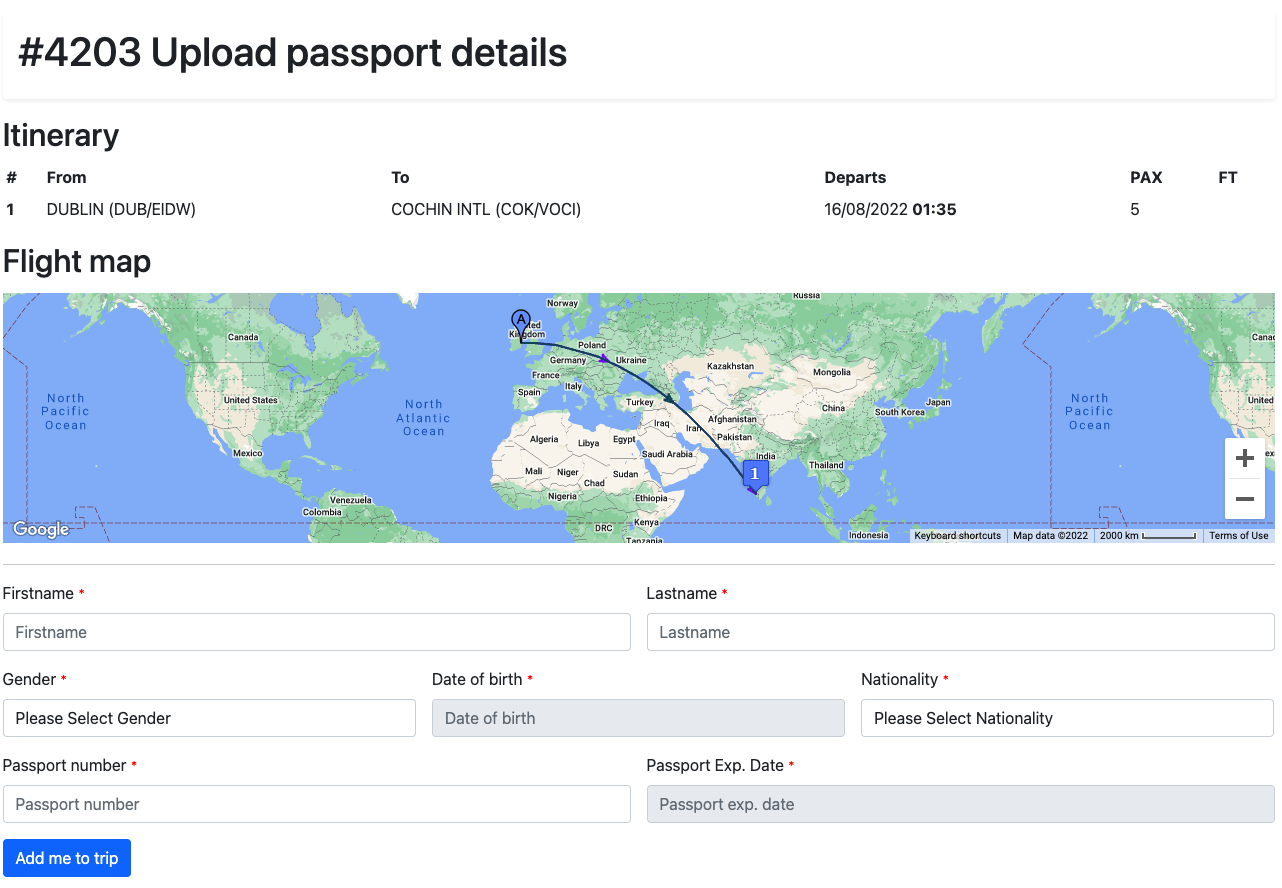
Pax can be added to a trip externally with the passenger passport manager url.
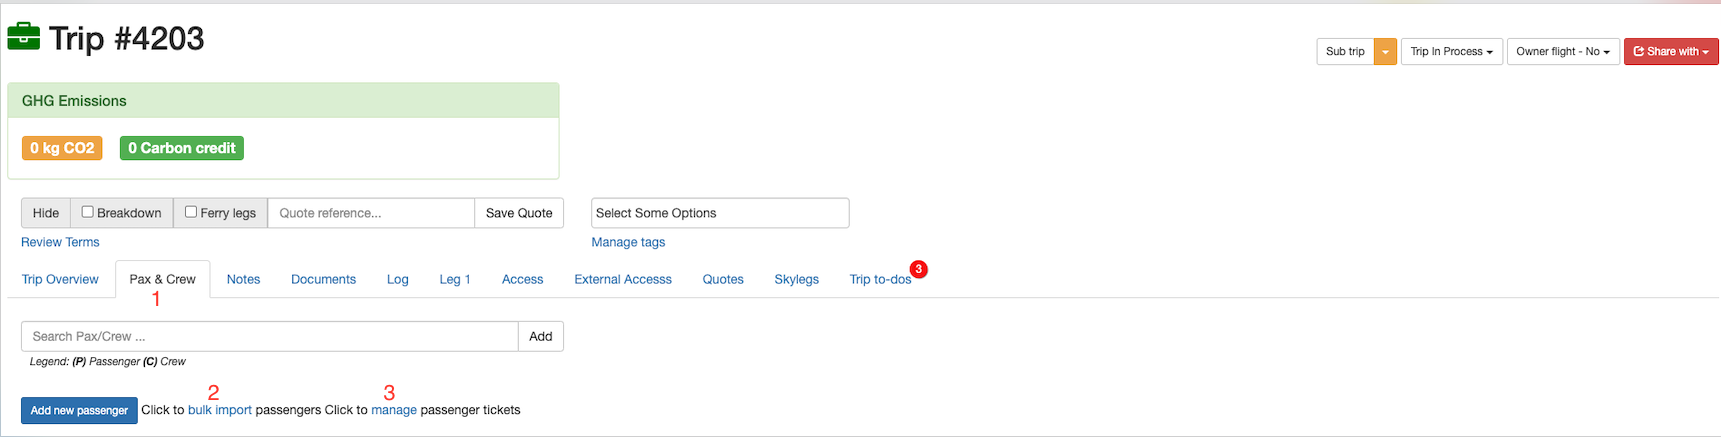
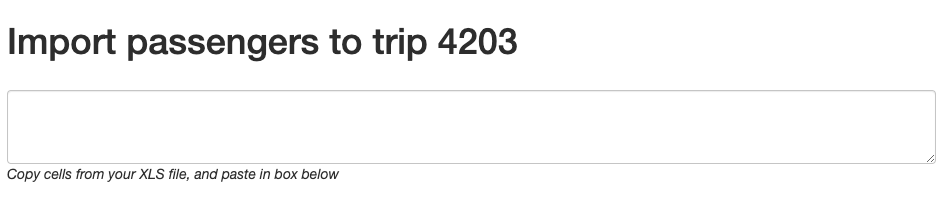
passenger details can be bulk imported into JDM from any sort of spreadsheet using thebulk import.Bulk import can be accessed from the Pax & Crew button. All the passenger tickets can be managed on themanage button.
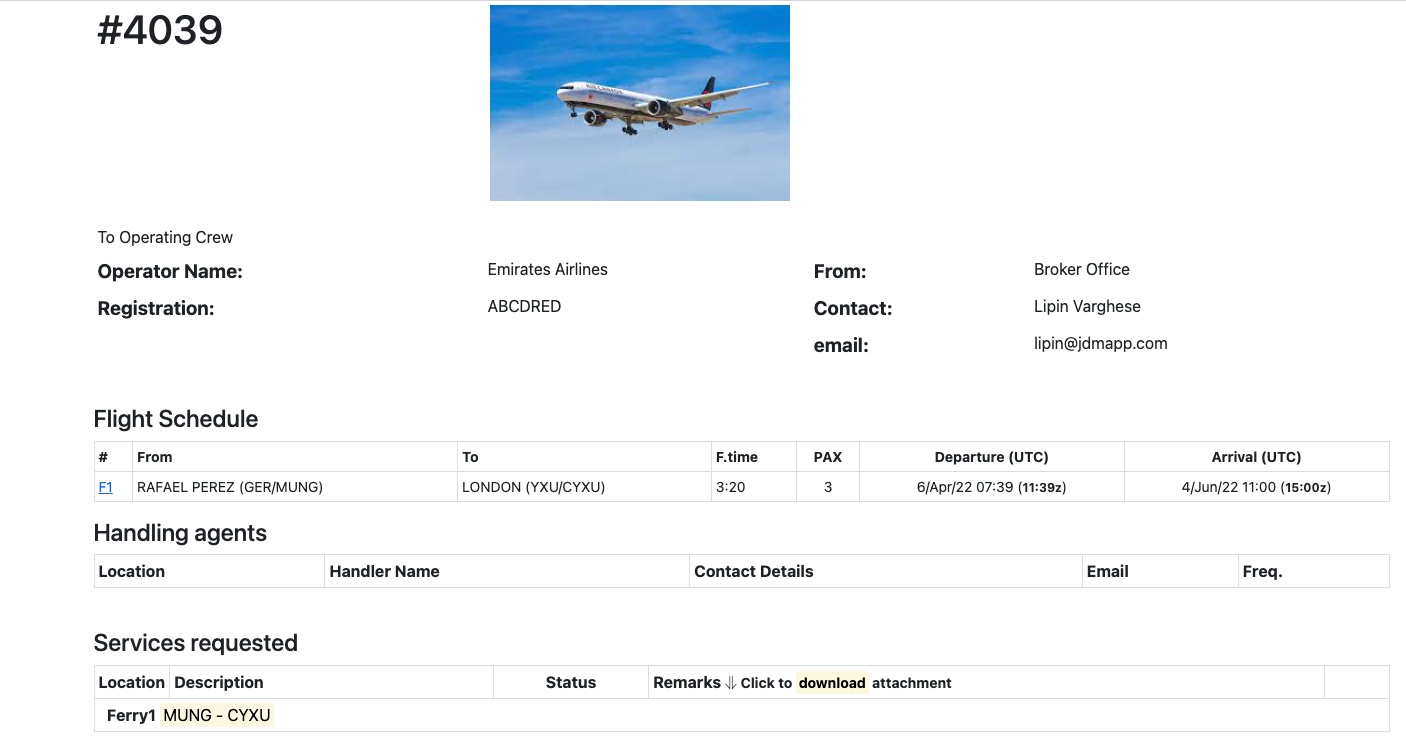
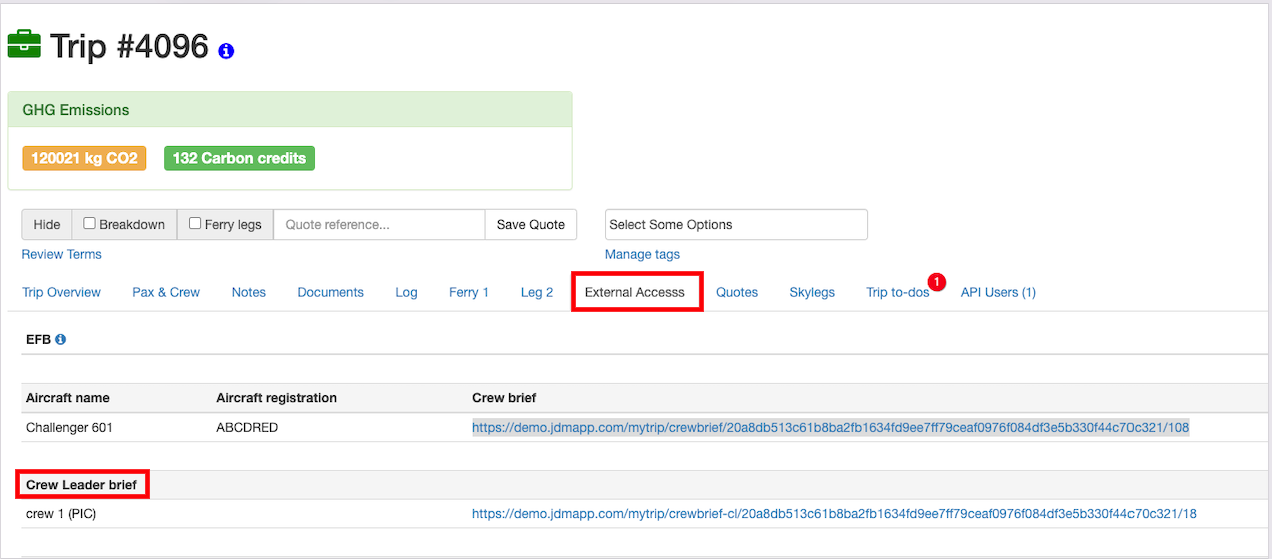
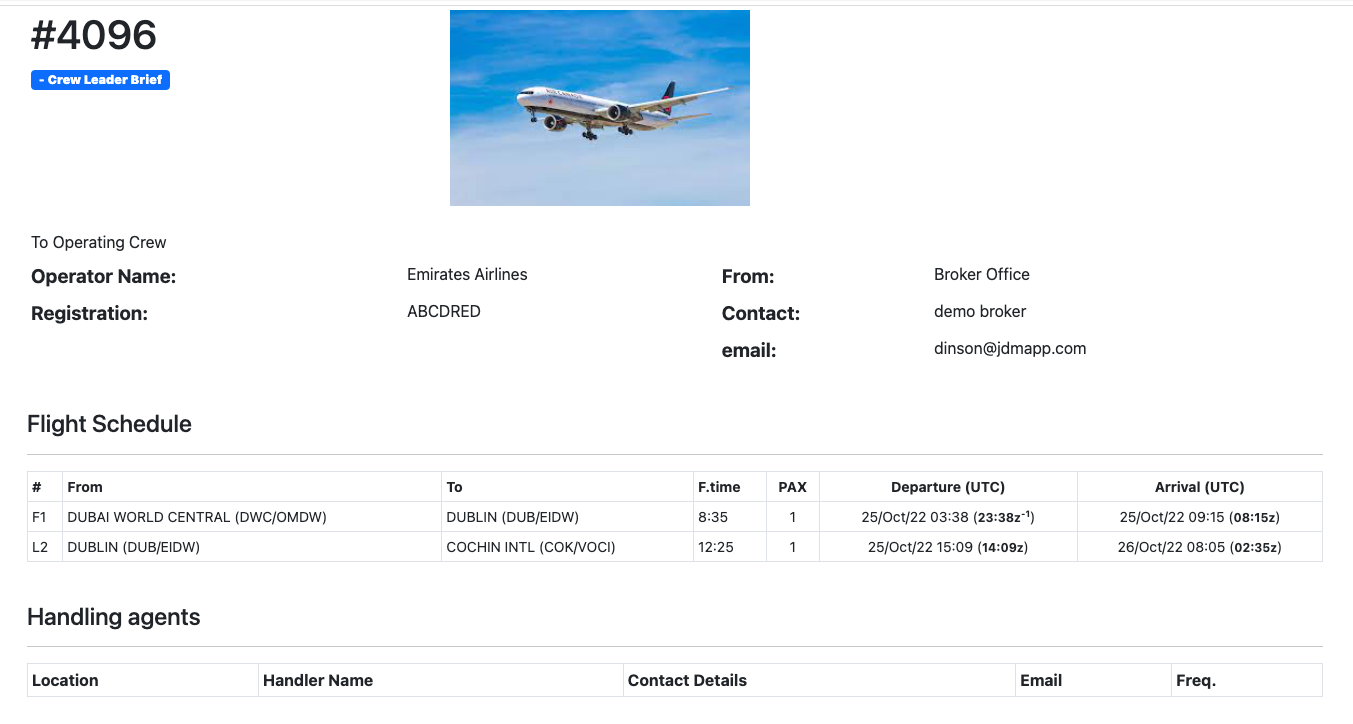
Crew Leader Brief can be accessed from the External Access. Crew leader brief has the basic trip details, operator details, and handling agent details. Crew has to be marked as Crew Leader and crew designation has to be added for generating the Crew Leader Brief access url.
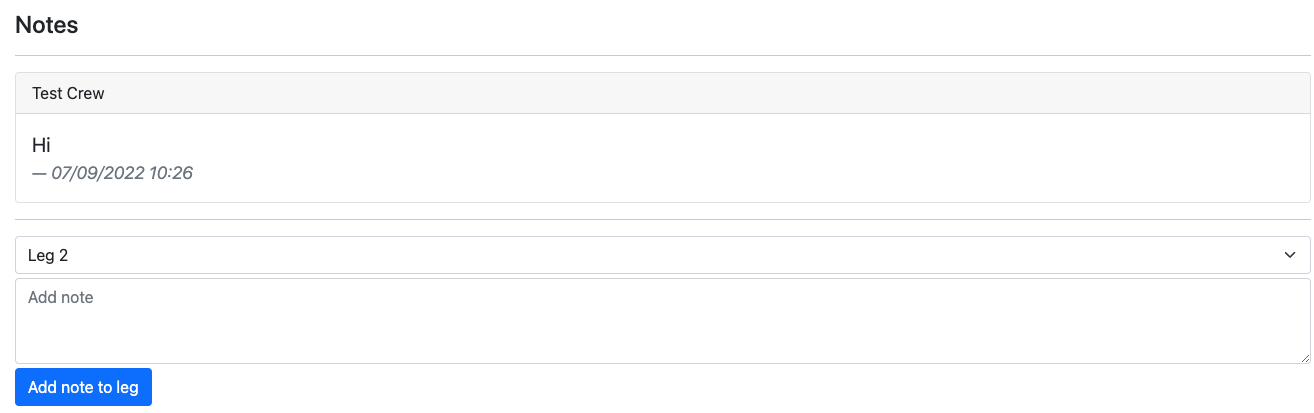
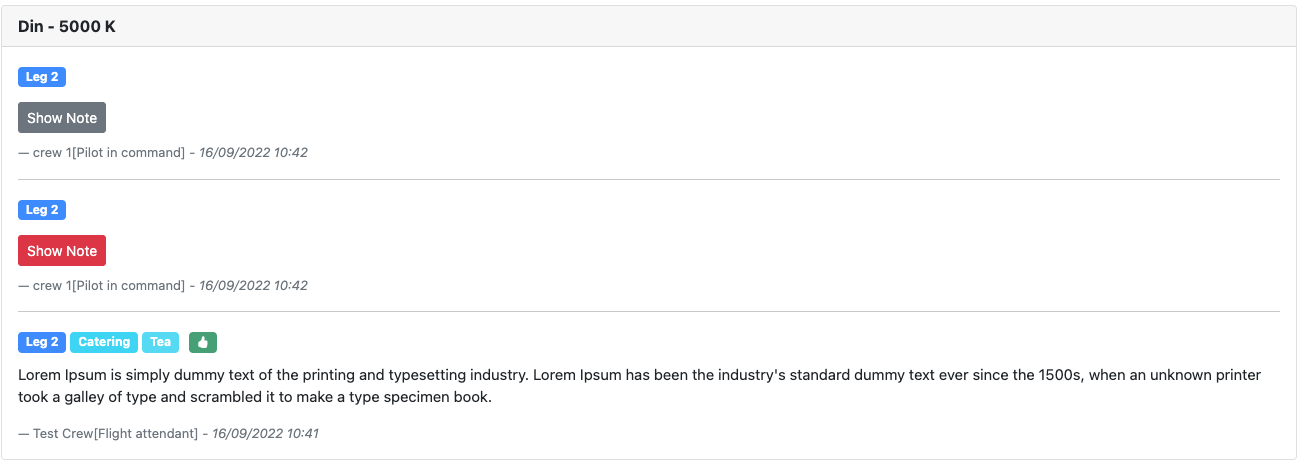
Lead FA can record basic info on each pax like favorite food/wine, likes.dislikes and so on. Each piece of information can be marked as Public/Private.
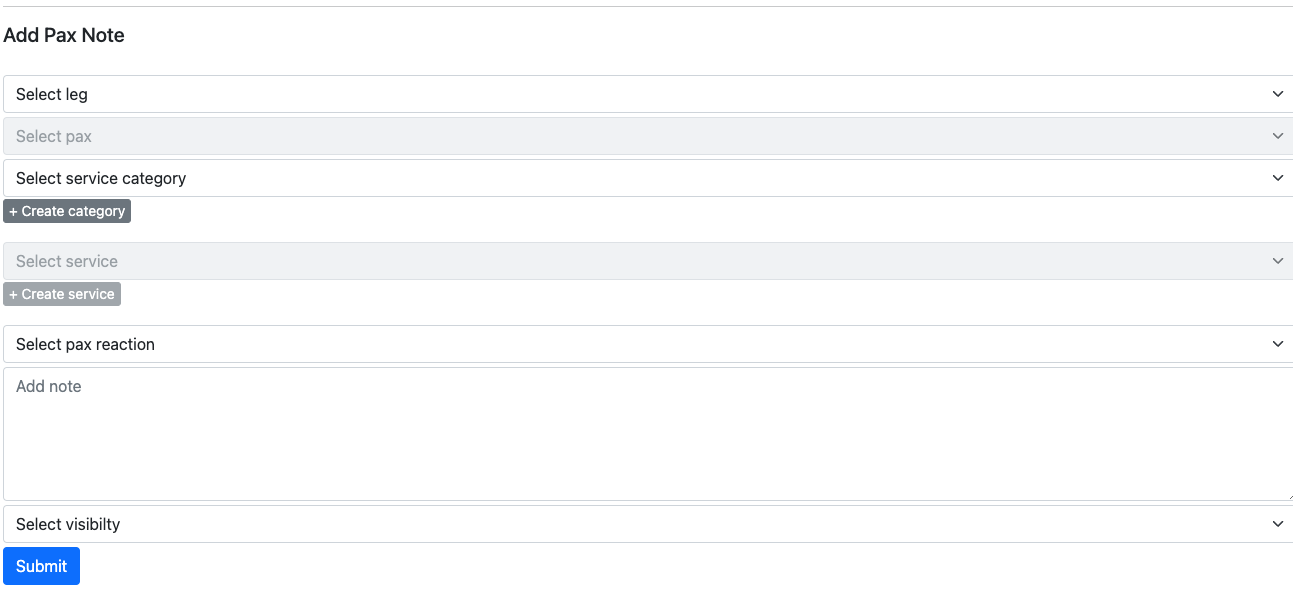
Notes can be created and added to the leg from here.
Pax will be displayed on the Pax profile with the details like leg, crew designation, services and visibility.
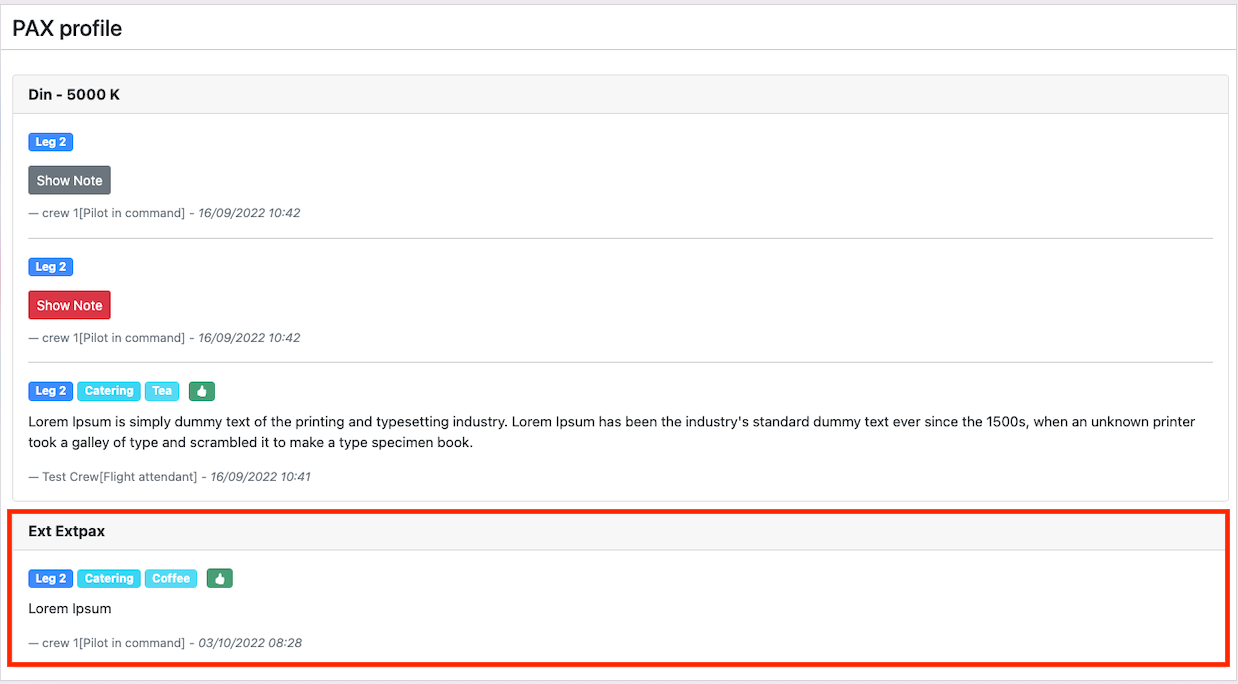
Pax created is displayed on the Pax profile Section.

All you have to do is to choose the file and hit on the Upload file to leg button.