Login:
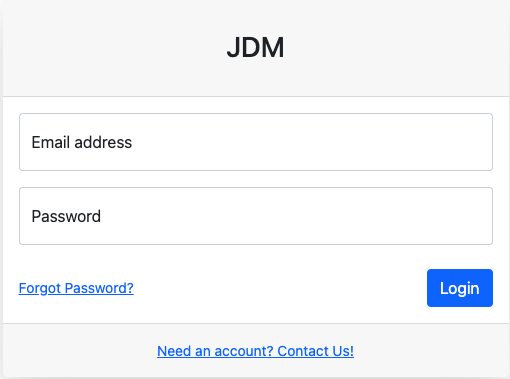
Login page appears to be like this. Enter your credentials for accessing the application.
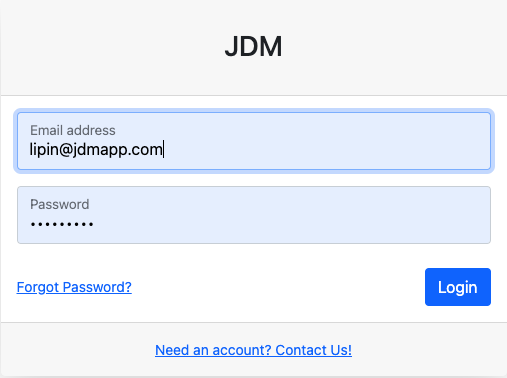
Login credentials bring you up to the JDM dashboard.
Login page appears to be like this. Enter your credentials for accessing the application.
Login credentials bring you up to the JDM dashboard.
In FBO, customers can create worksheets, notify airport authorities, generate PDF handling accepatance documents and create invoices/reciepts.
FBO has two sub modules.
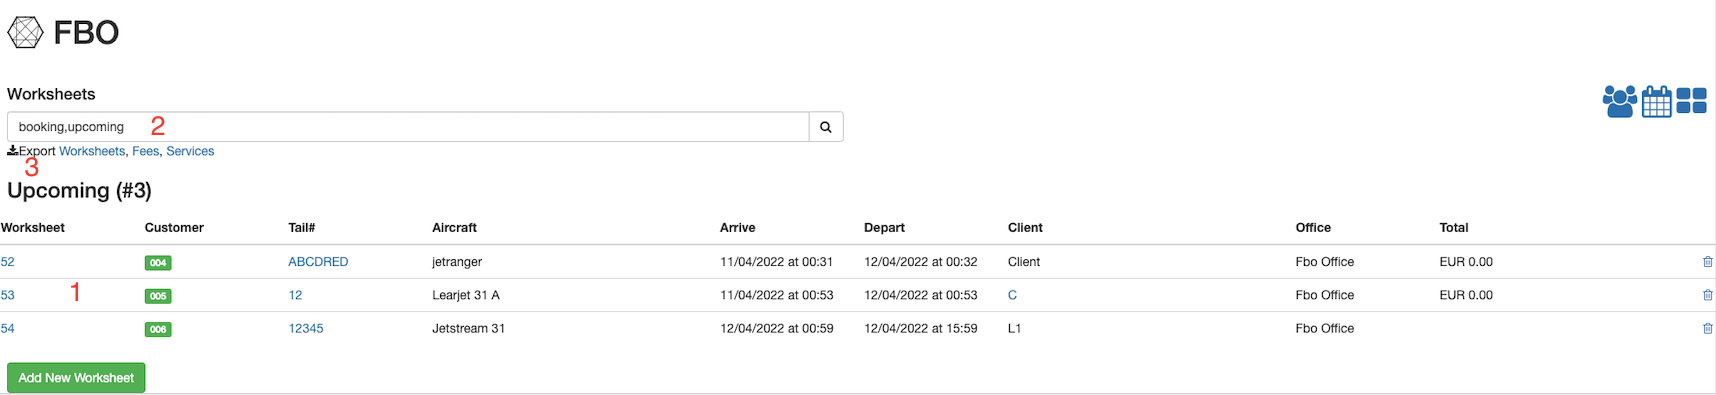
All the upcoming worksheets are displayed on the main page(1). Worksheets can be searched on the search button based on the criterias booking and upcoming(2). All the worksheets, FBO fees and the services can be exported into a csv file using the Export button(3) on the left hand side.
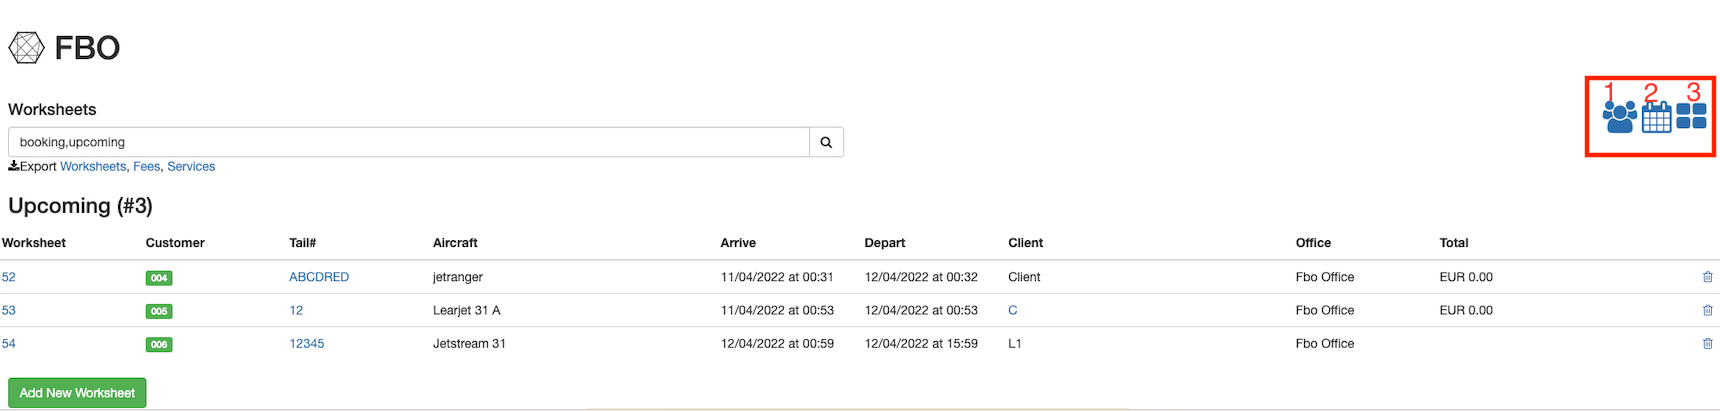
Client CRM(1), FBO Worksheet Calendar(2) and FBO worksheets(3) can be accessed by the buttons on the right hand side.
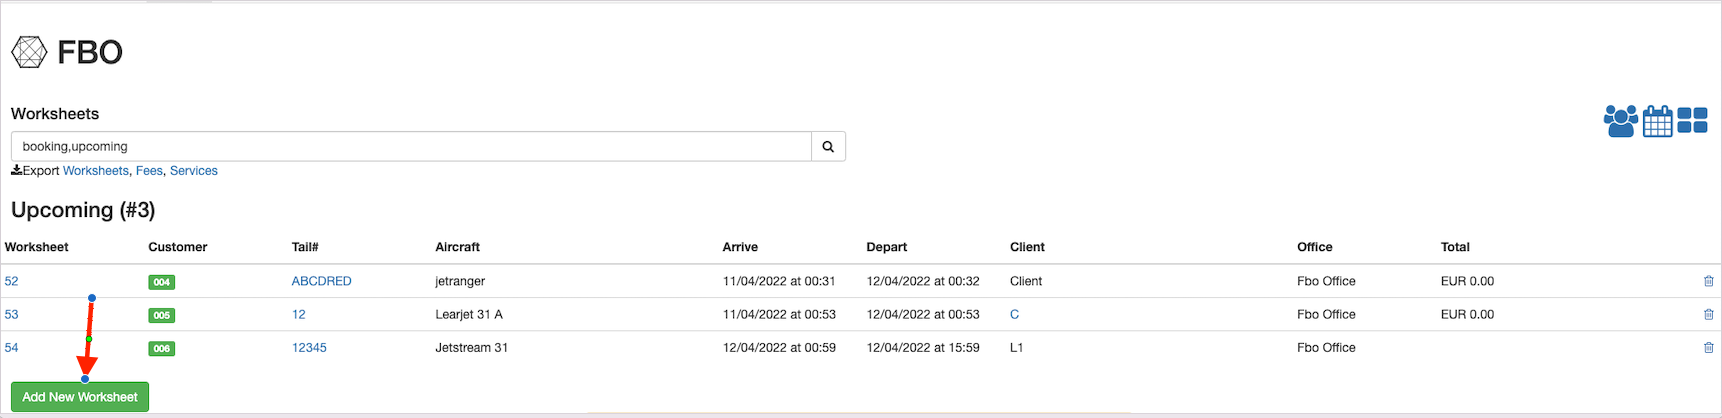
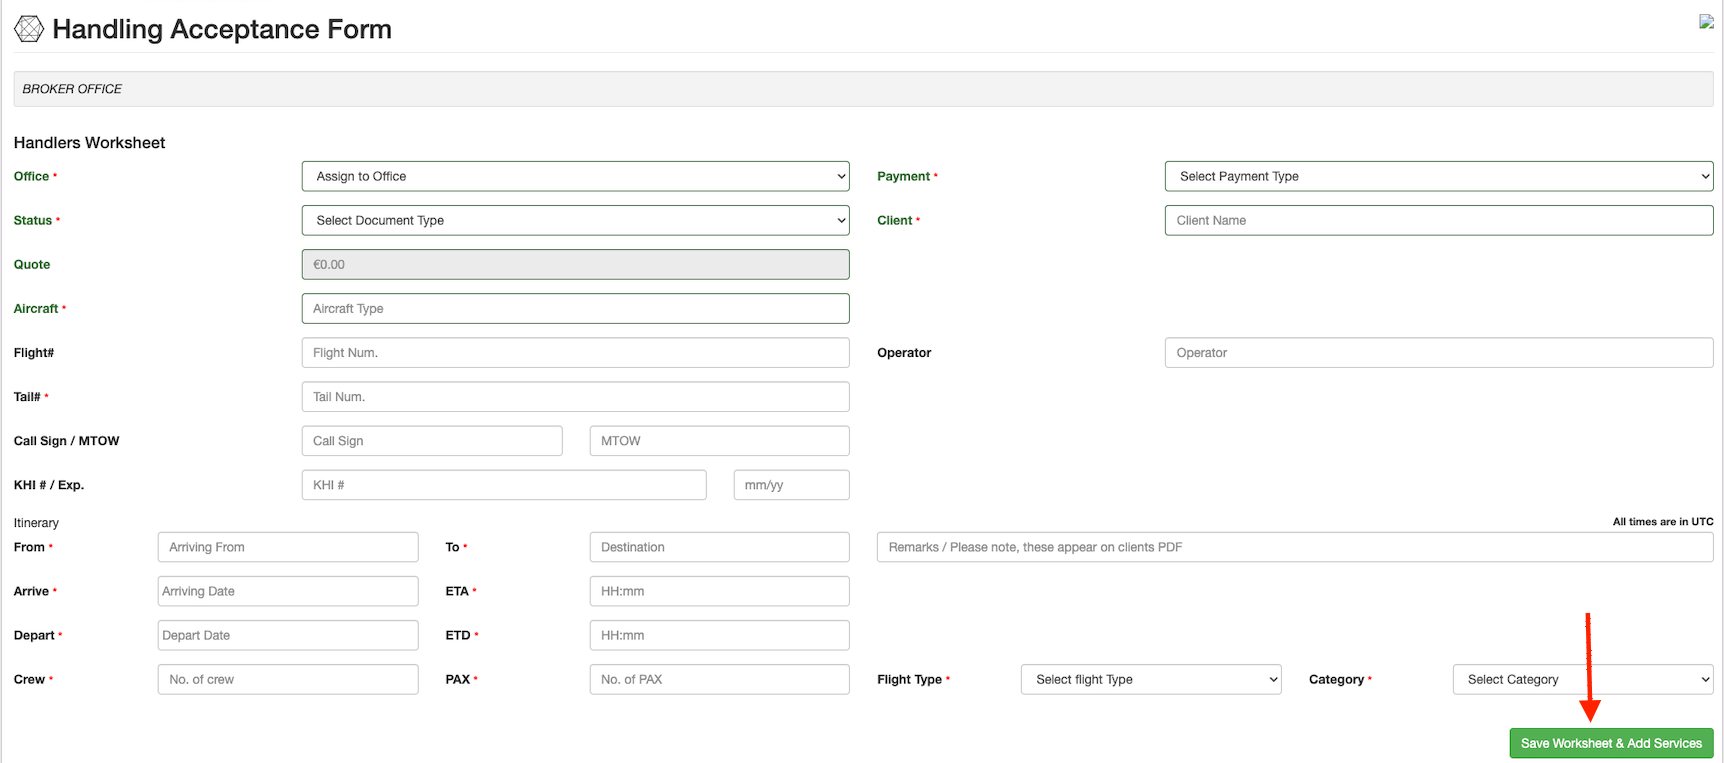
A new worksheet can be created by clicking on the Add New Worksheetbutton:
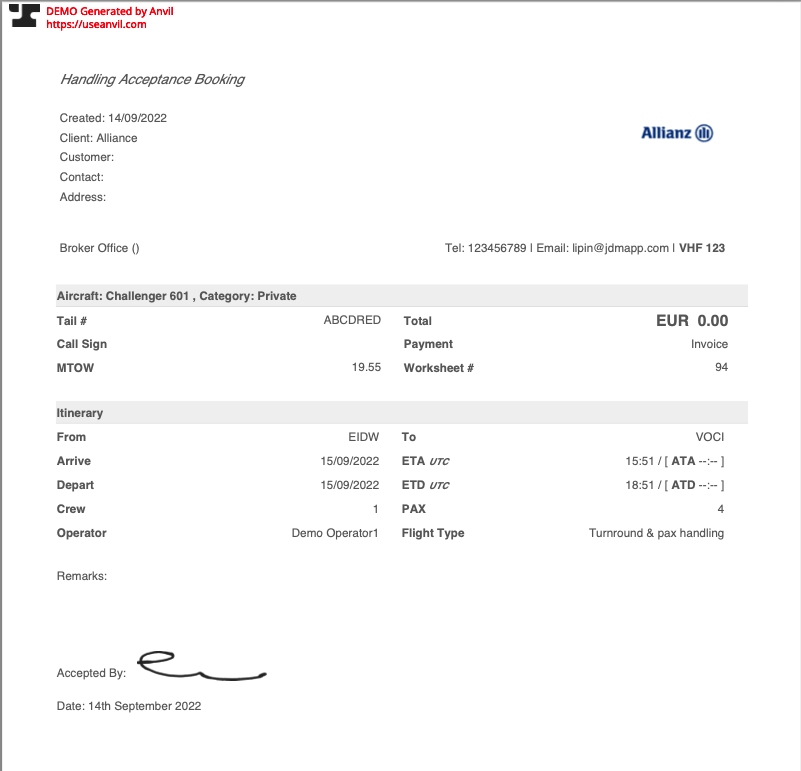
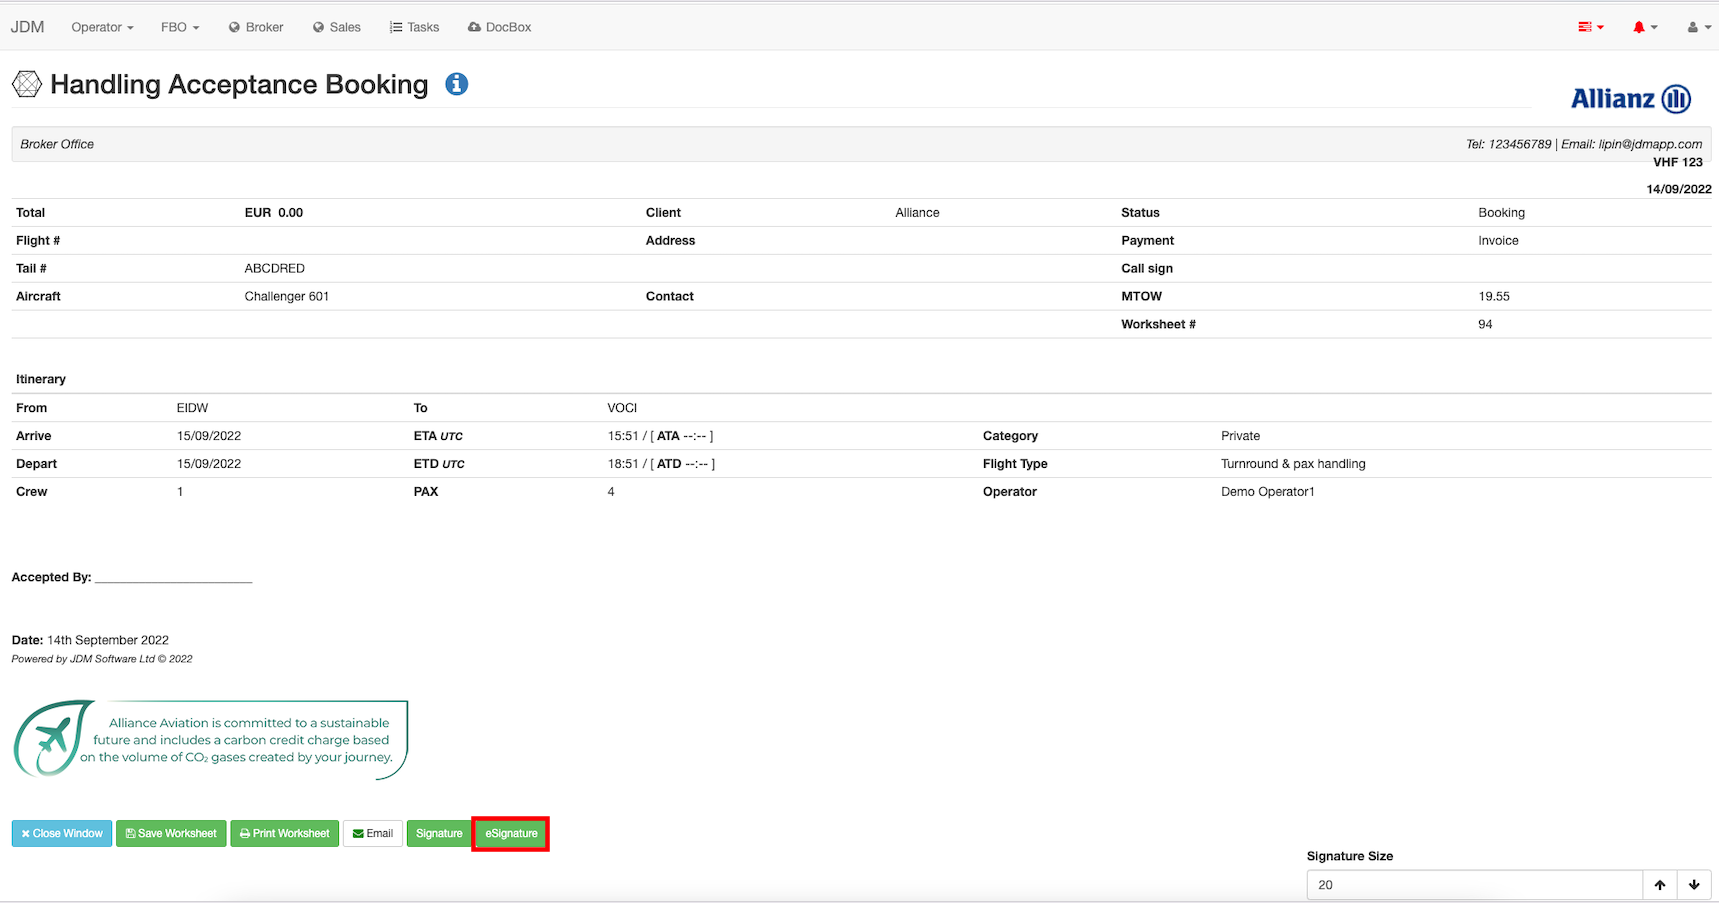
All we need to do is to fill the Handling Acceptance Form and save it.
A new service is added to a worksheet by clicking on the + Servicesbutton

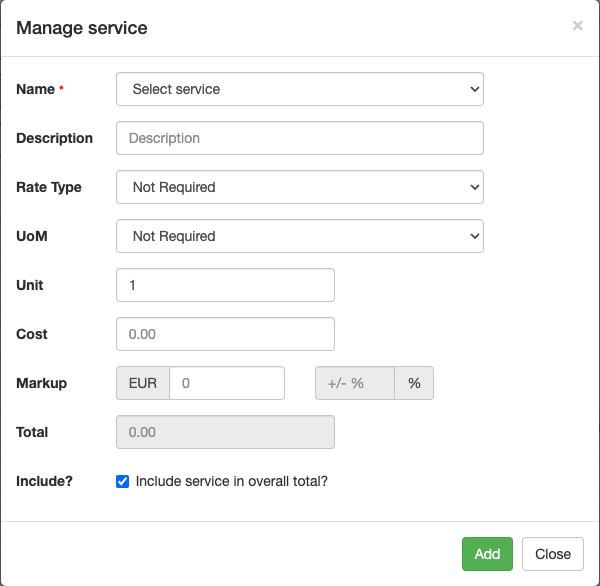
By hitting the Addbutton, a new service is being added to the worksheet.
A service can be deleted by selecting the service that has to be deleted and then click on the - Deletebutton.


Any of these service can be mofified by clicking on the Editbutton. Fees related to the services can be added from theAdd related feebutton.

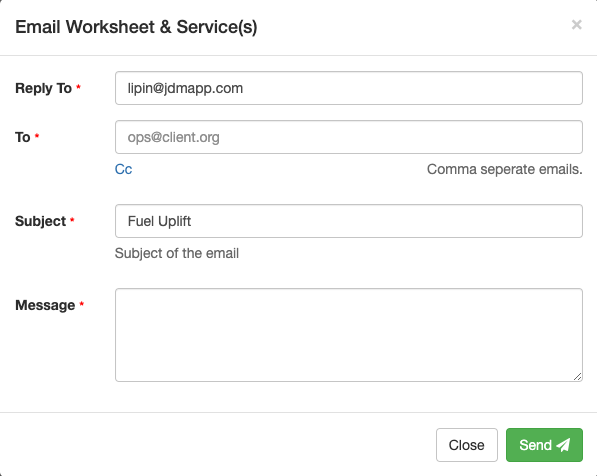
Worksheet and services can be forwarded to a client by clicking on theEmail services(s)button.

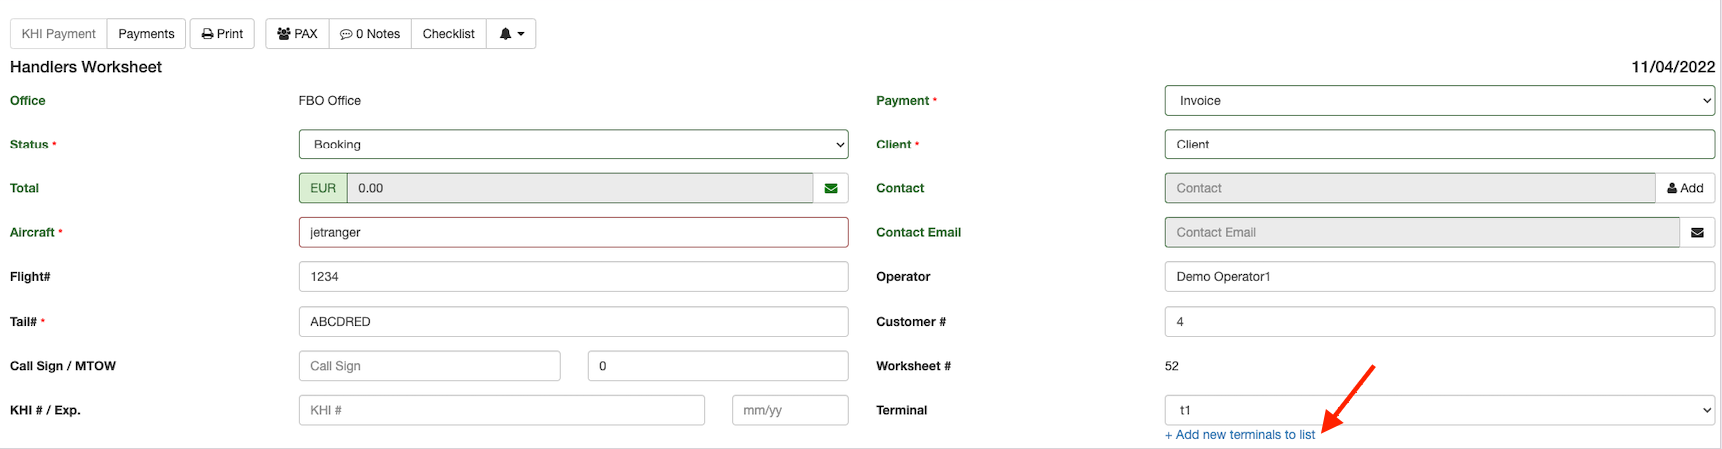
A terminal is added by clicking on the +Add new terminal to listbutton.
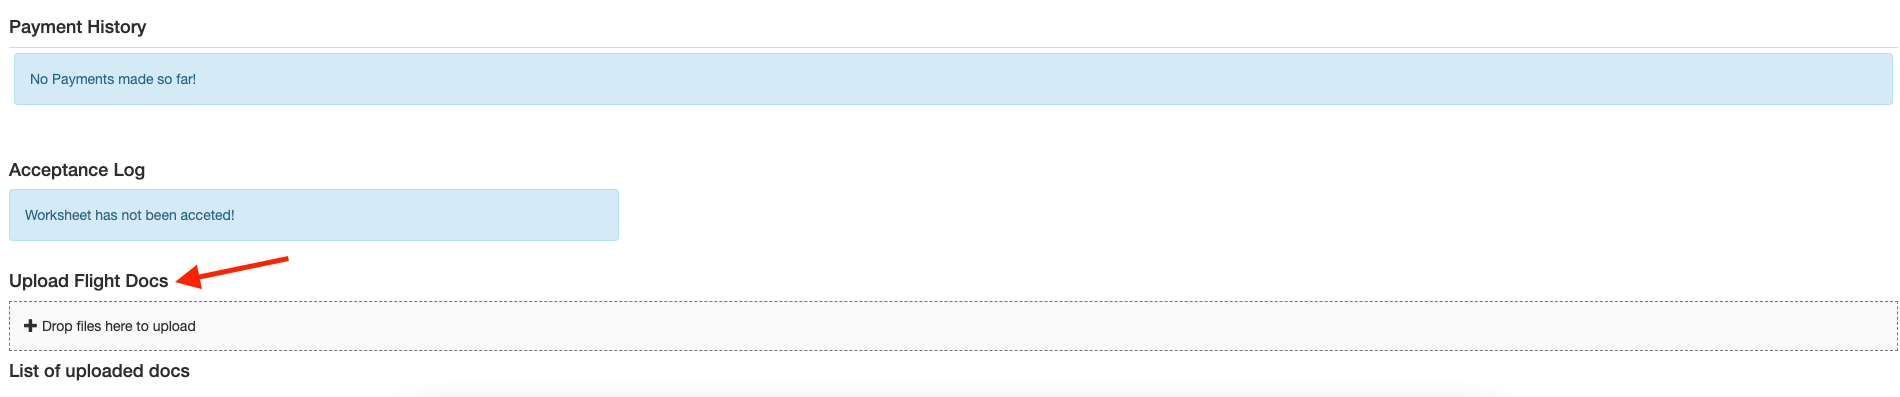
Flight documents can be uploaded by drag and drop it into the document section. All the uploaded documents will be listed below the document section.
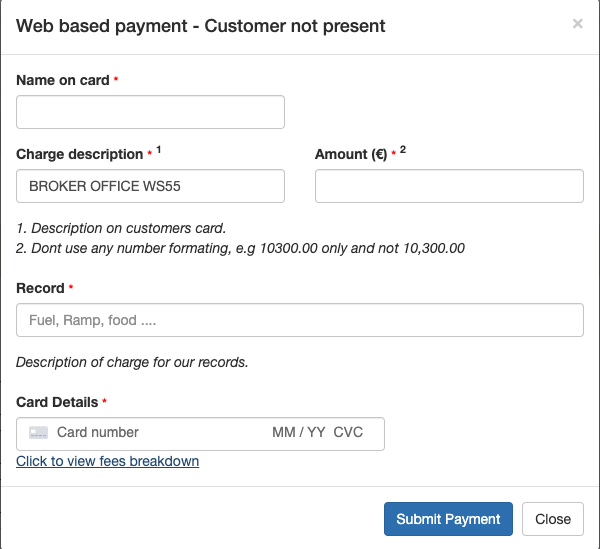
A payment is processed in FBO by clicking on the Paymentsbutton on the top left most corner.

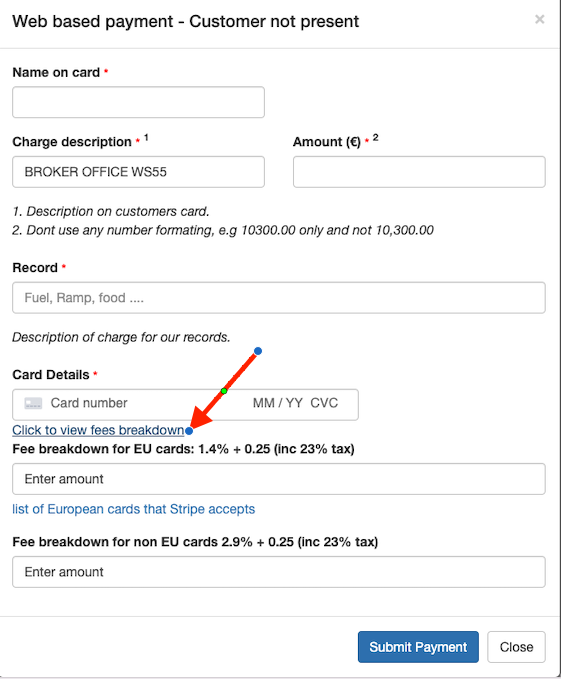
Fee breakdown can be calculated on clicking on theClick to view fees breakdown button.
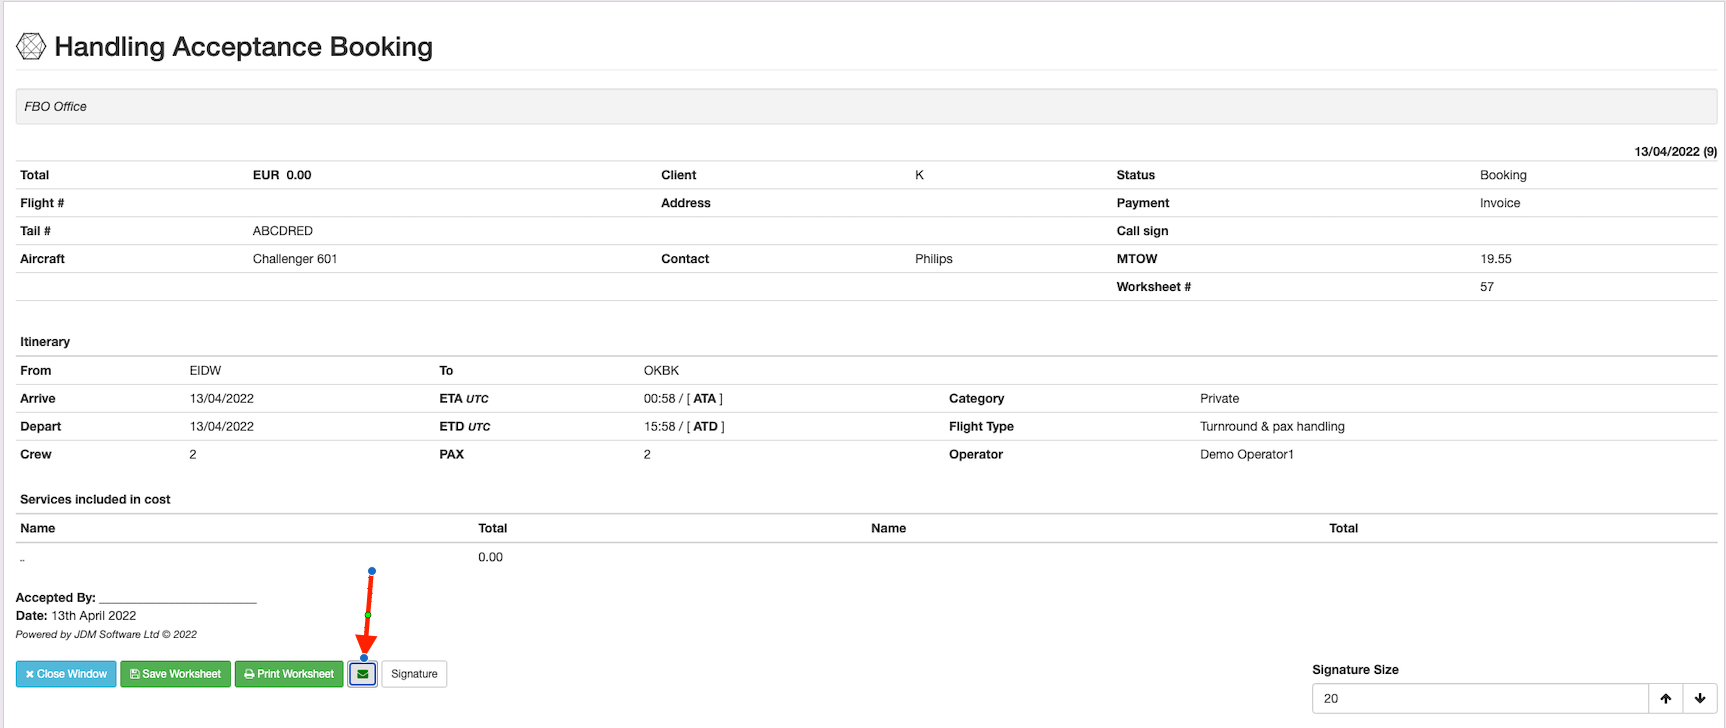
Once the worksheet is created and the payment has been processed, hit theprintbutton.

Then click on the  button on the down corner.

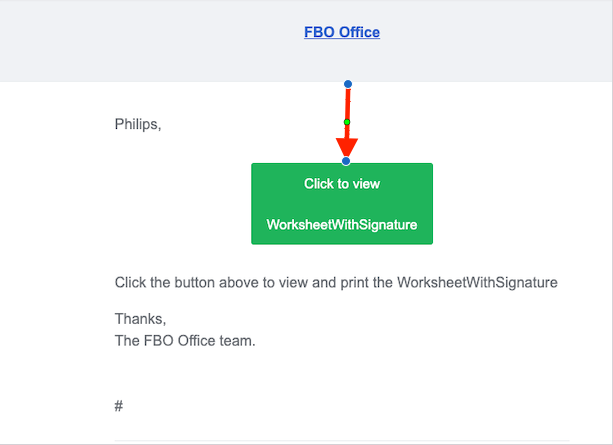
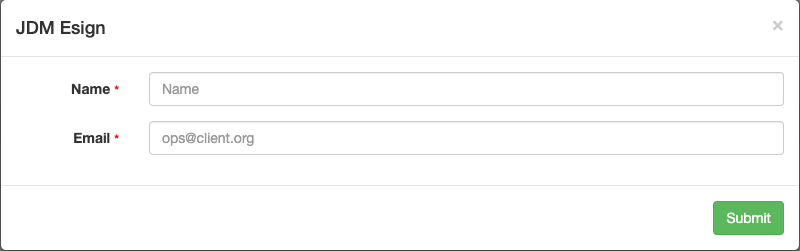
All we need to do is to fill up client details and send the email. Once the client side accepts the handling acceptance form from the email, job done.
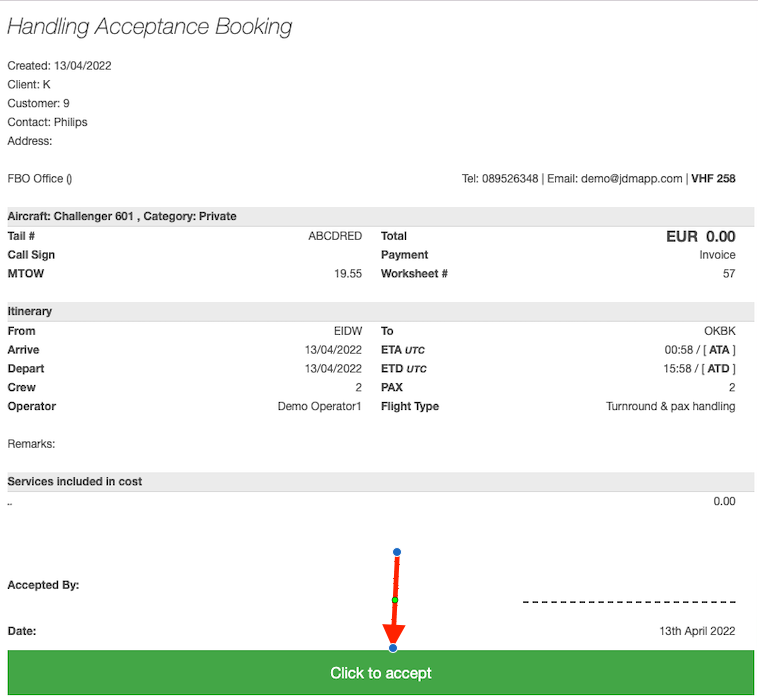
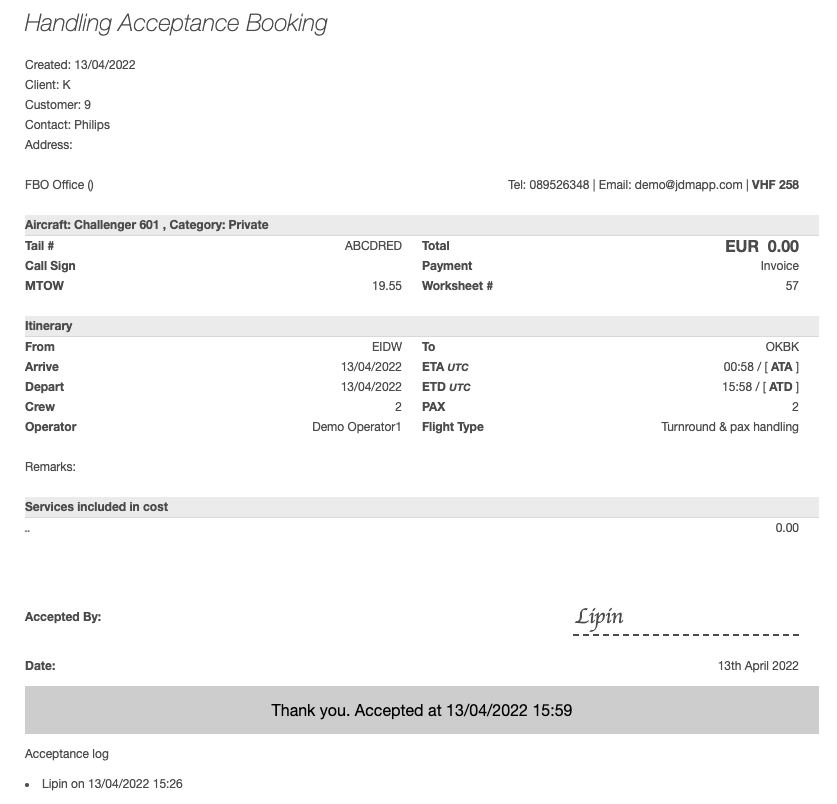
All the handling acceptance will be displayed on the Acceptance log.

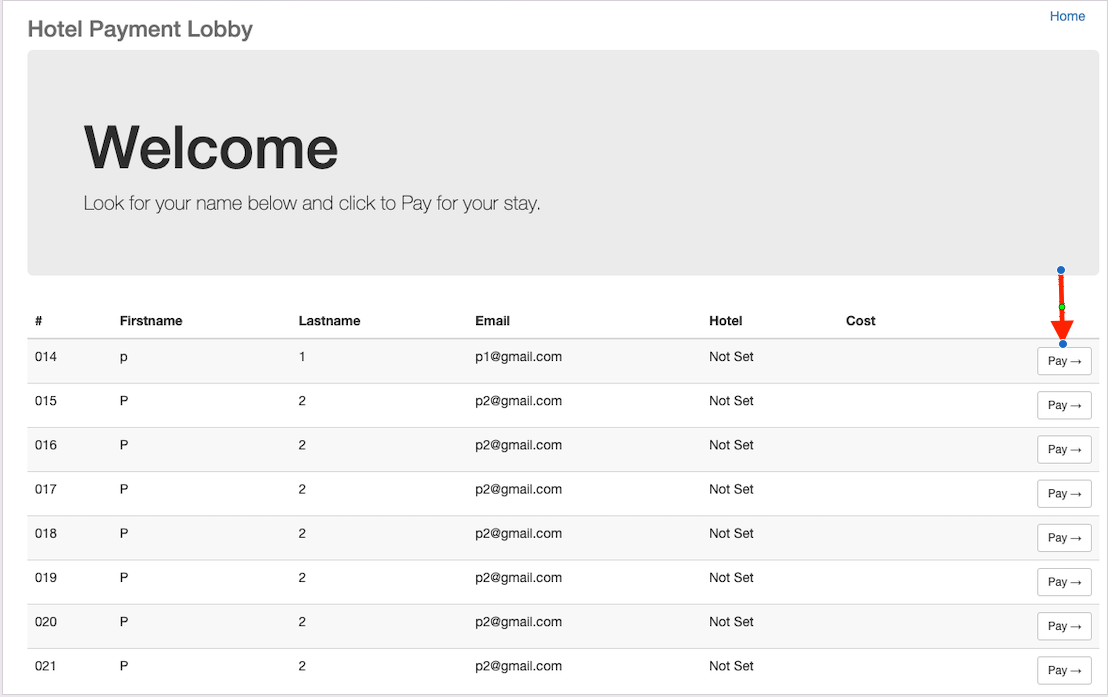
Passengers on the trip will be listed on the passenger manifest. New passengers can be added(1), removed(2) and modified(3) on the passenger manifest. If a passenger has booked a hotel, can send the invoice(4) from the passenger manifest.

Hotel payment can be made by clicking on the URL on the left most corner of the passeenger manifest.

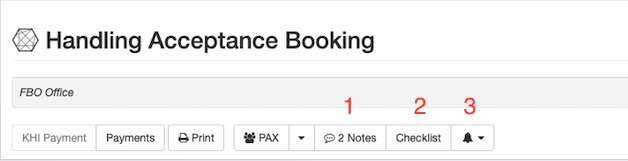
New notes can be added by clicking on the Notes(1) button. All the checklists for the worksheet will be displayed on the Checklistbutton. Progress of the checklists are tracked and displayed on the (3) button.
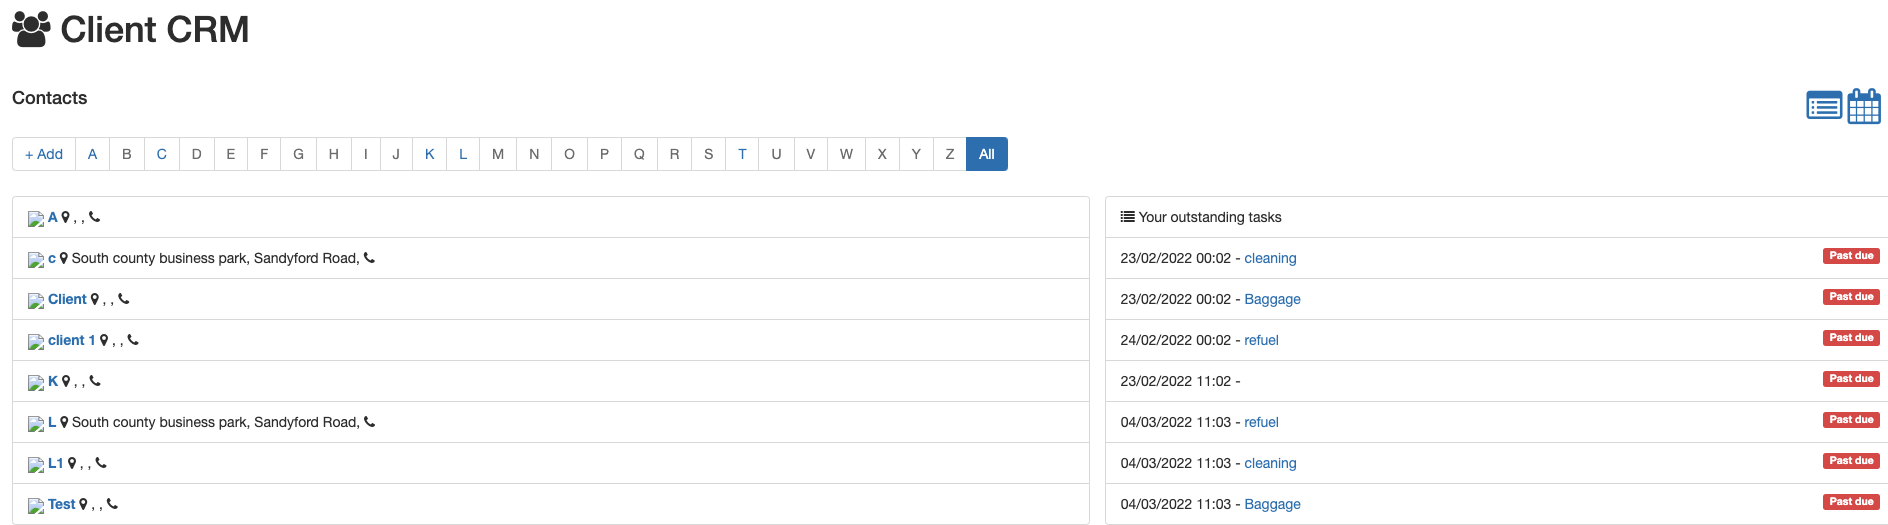
Client CRM displays the list of clients with the FBO. It allows users to filter clients on an alphabetical order. A new client can be added by clicking on Addbutton.
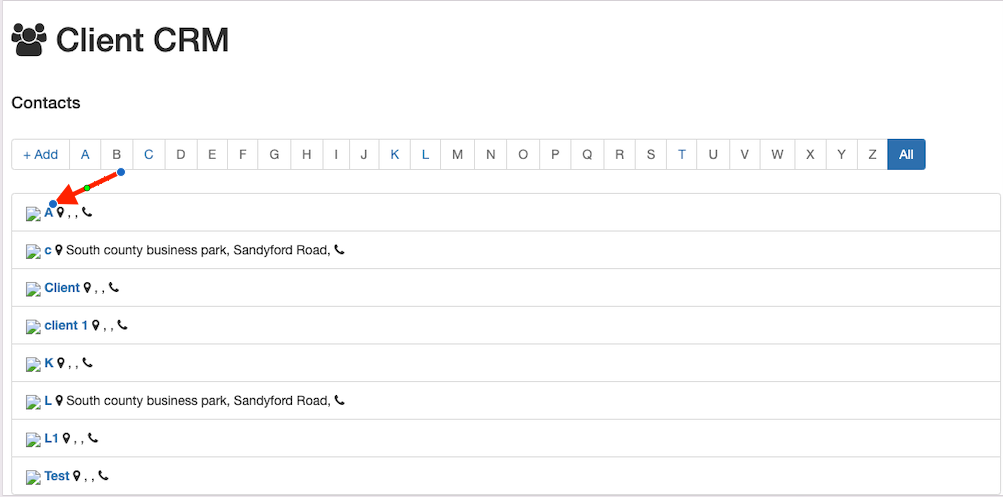
A new client can be added by clicking on the + Addbutton

A client can be edited by clicking on it.
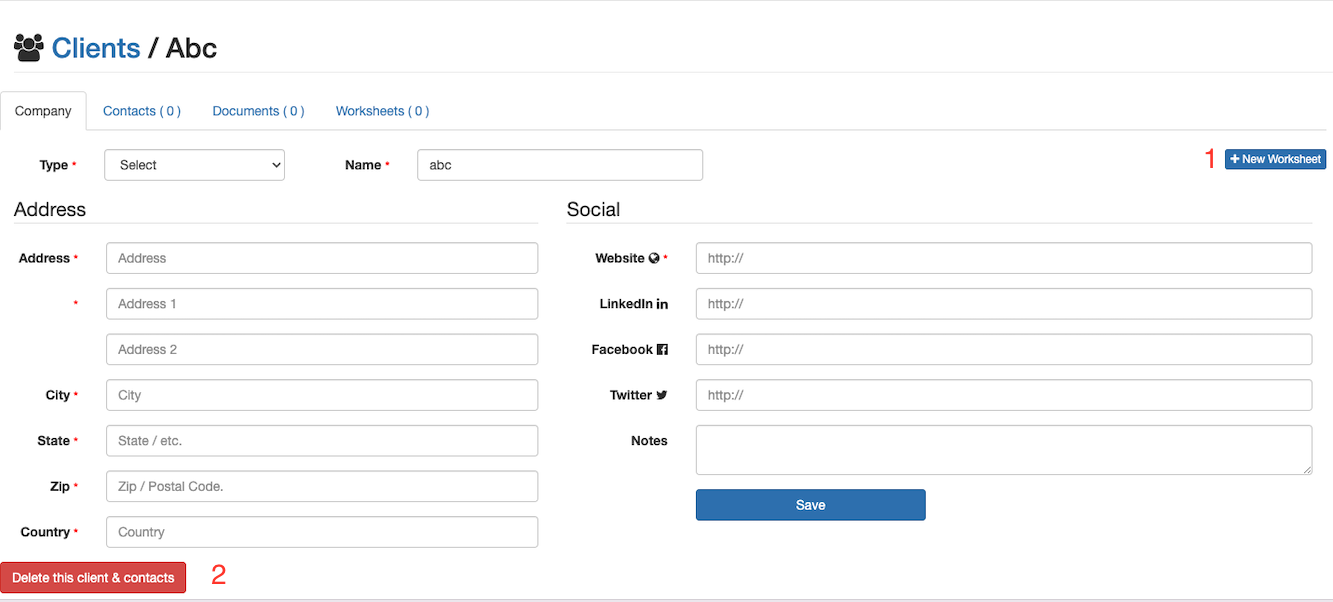
All the information related to a client can be added here. A new worksheet can be cretaed for the client by clicking on the Delete this client/contacts(2) button. A client who has linked to a worksheet can be deleted.
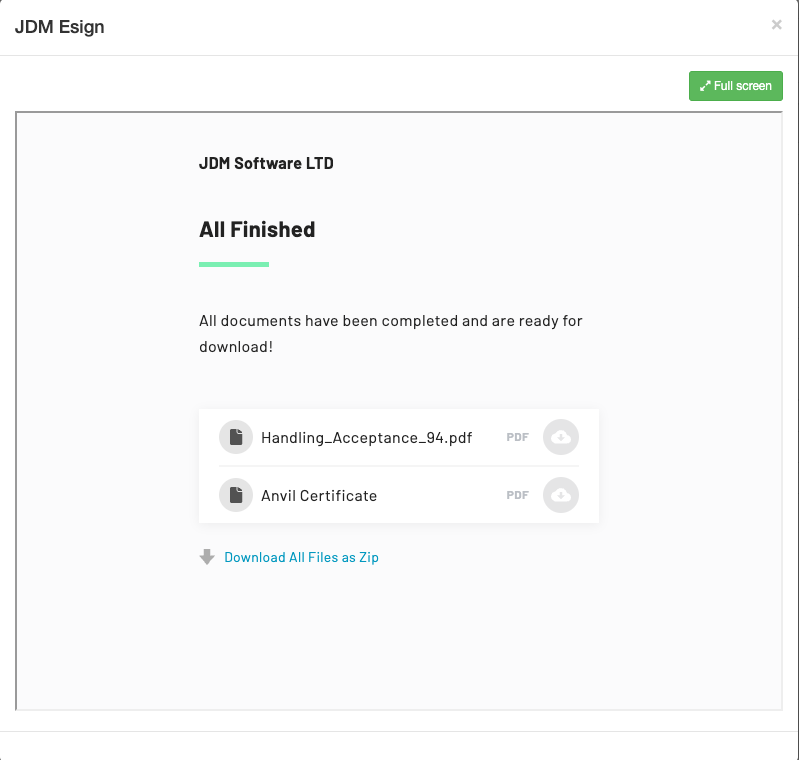
You can use the e-sign for digitally signing on the documents. E-signature can be accessed by clicking on the eSignature button on the right hand bottom side og the print page.
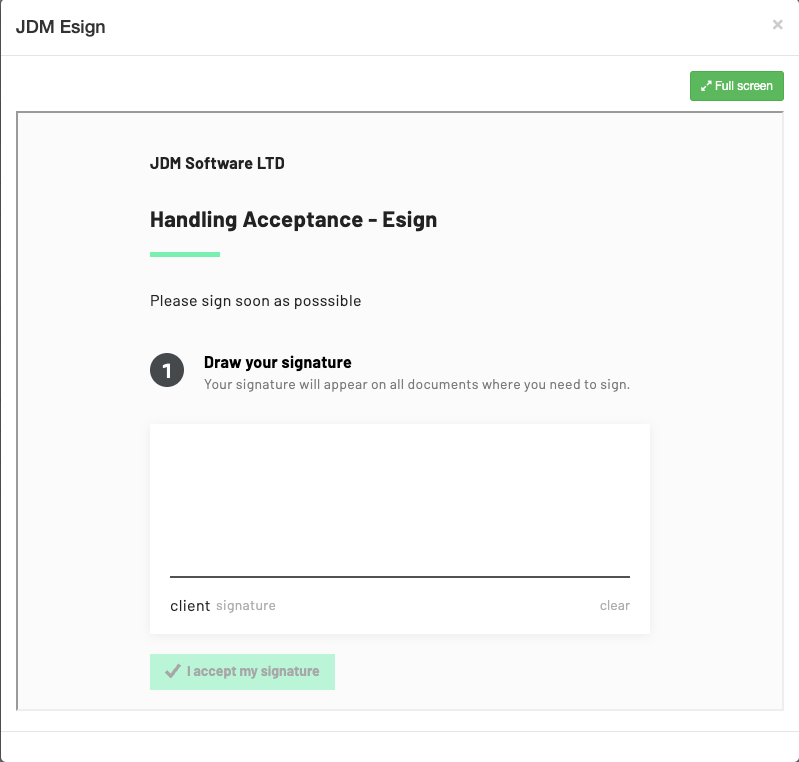
Now, draw the signature and click on I accept my signature button and tick on the consent button.
Click on the Start signing button for signing the documents.