Apps Module
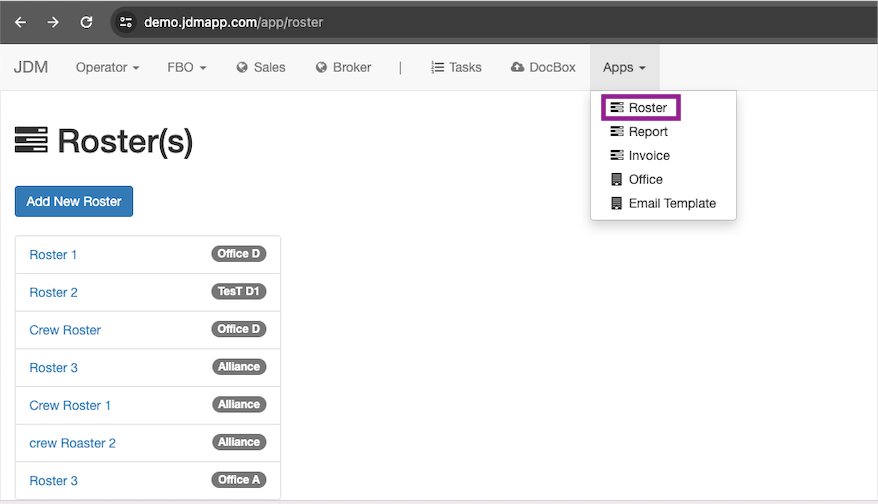
Apps module is designed to bring up all the apps under the same umbrella. Apps Module can be accessed on the main header. Apps module comes with Roster, Report, Invoice, Office and Email template sub modules.

Apps module is designed to bring up all the apps under the same umbrella. Apps Module can be accessed on the main header. Apps module comes with Roster, Report, Invoice, Office and Email template sub modules.
The aim of the Roster module is to manage the staff work schedule.
A new roster can be created by clicking on the Add New Roster button on the left most corner.
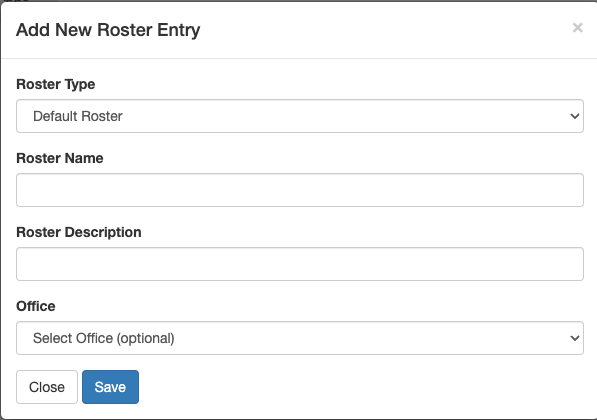
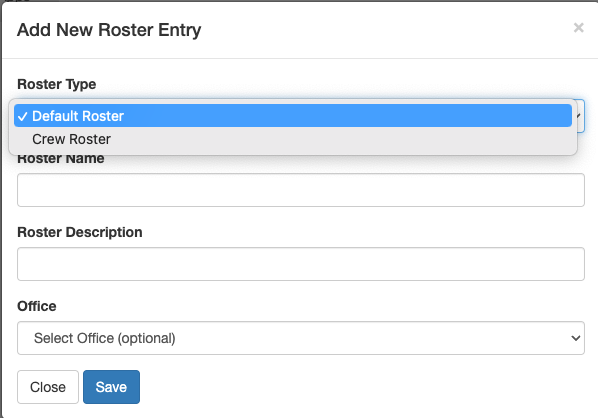
Roster can be created as a default roster or crew roster.The general purpose roster is created as default roster. The roster created as a crew roster can be accessed by the crew in the crew login.
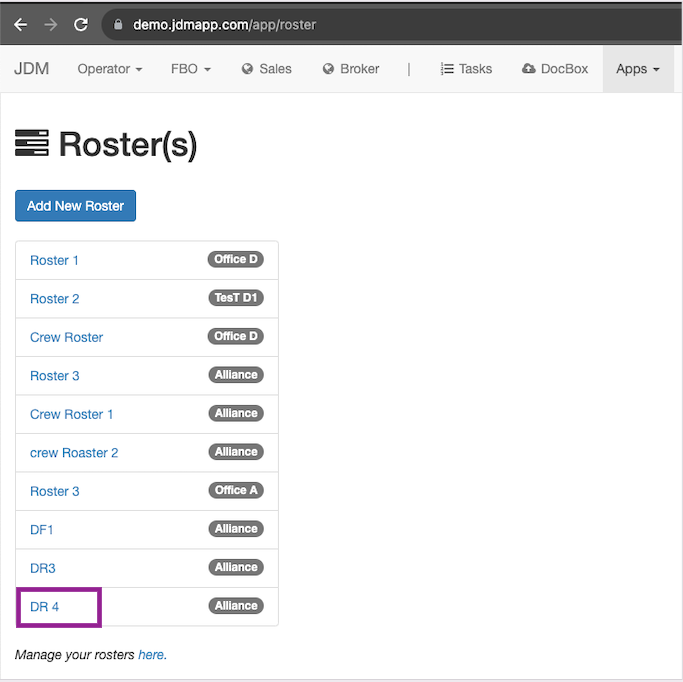
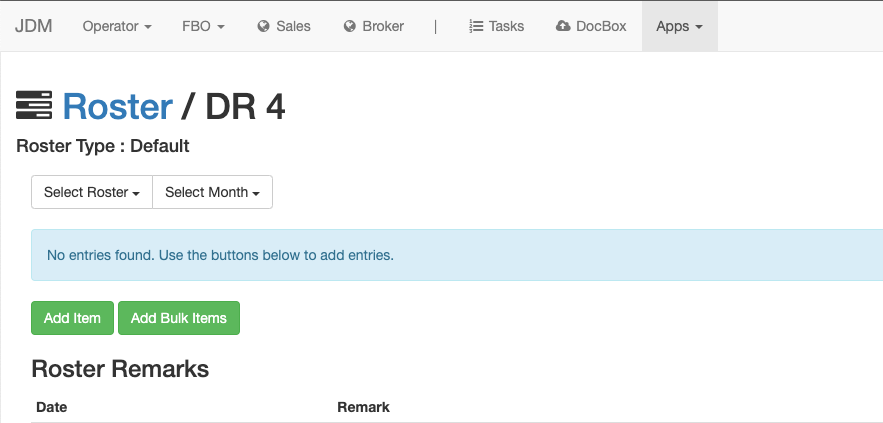
All the rosters are listed under Roster(s). Here we take DR4 as an example.
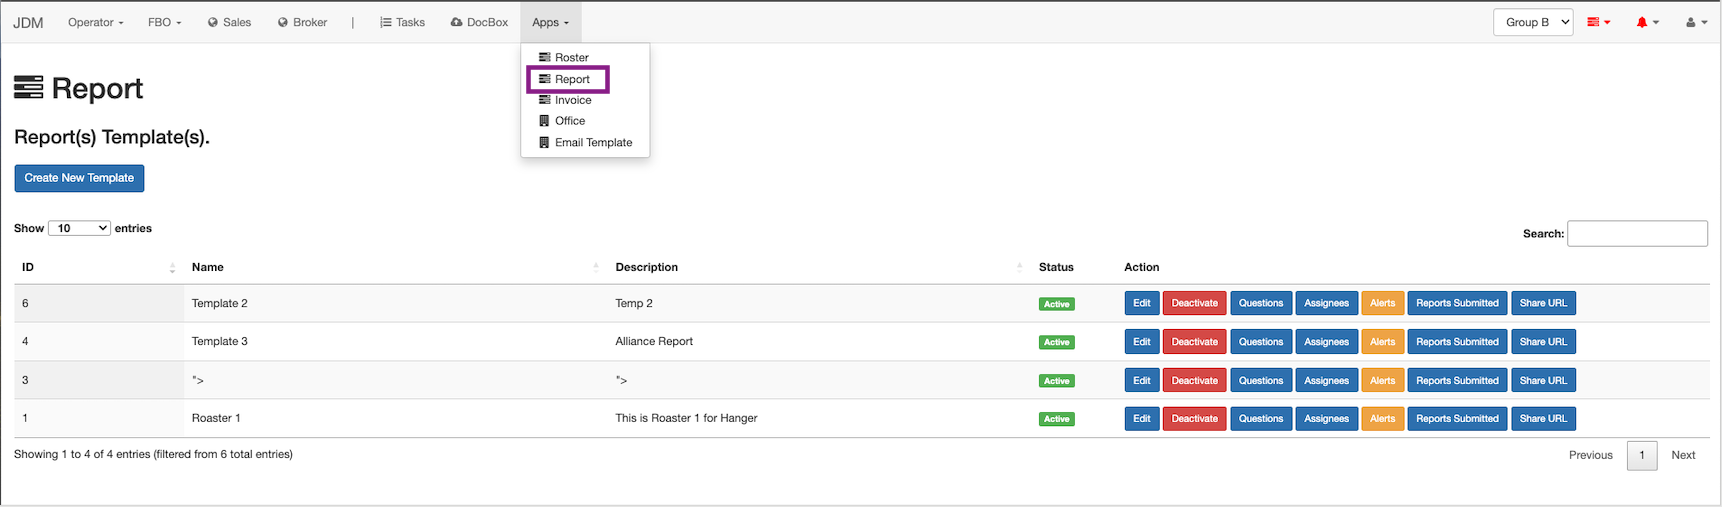
Report is accessed from the Apps section of the main navigation bar.
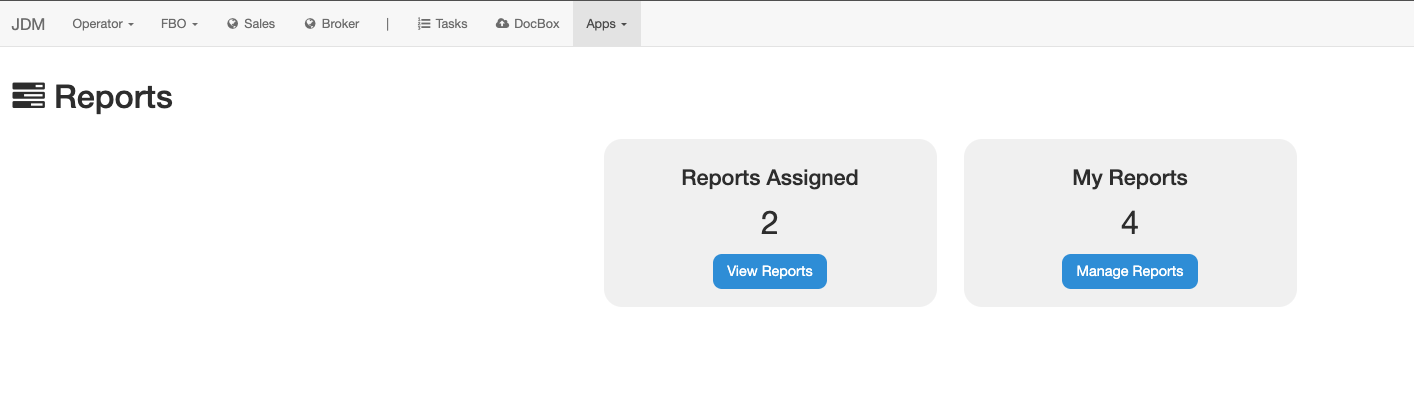
All the reports assigned to the user can be viewed on the View Reports KPI box and the reports can be managed on the Manage Reports section.
By clicking on the View Reports button, all the reports assigned to the user can be viewed.
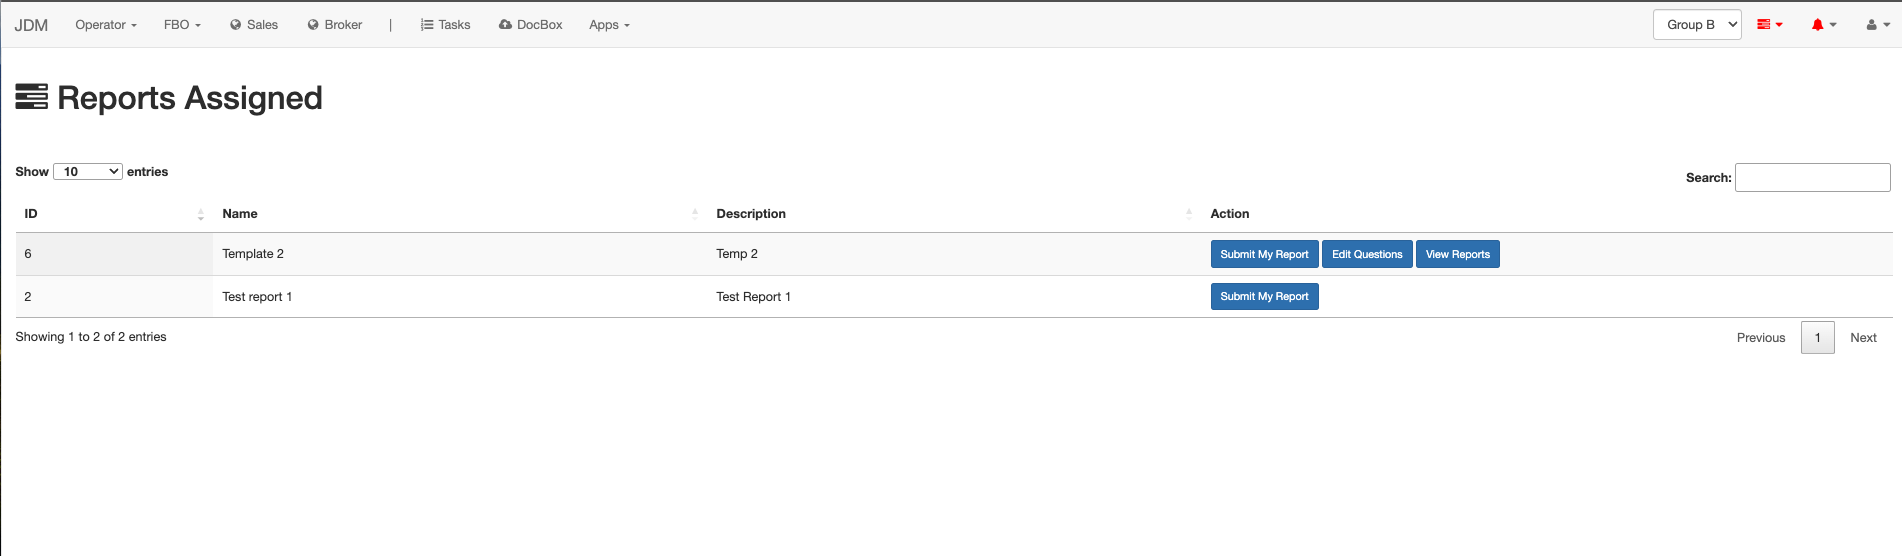
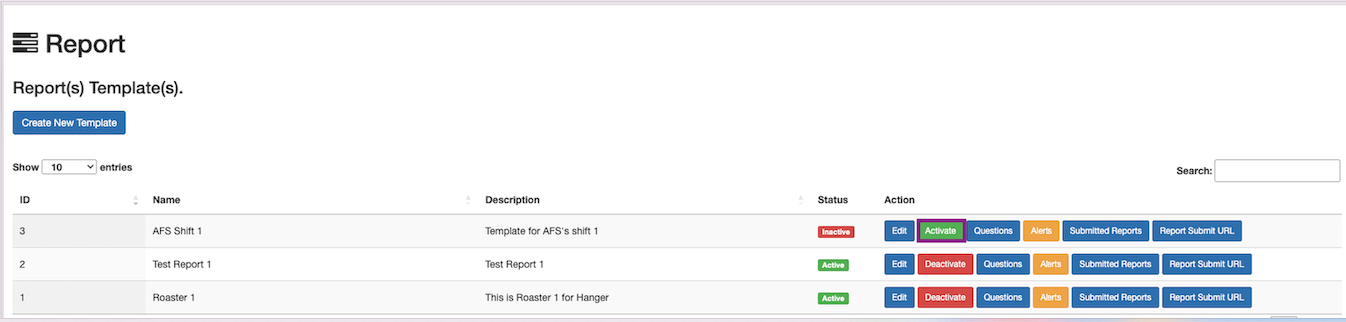
Users can submit the report, edit questions, and view reports here. By clicking the Manage Reports button, users can create new report templates and manage them.
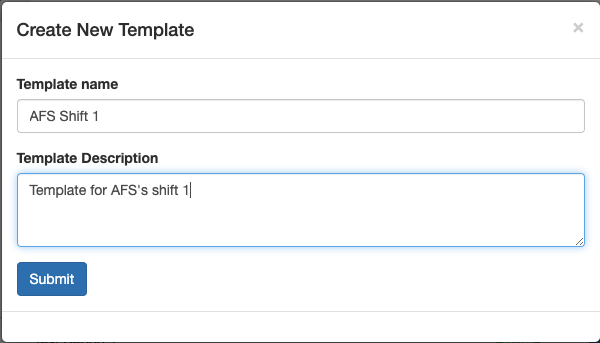
New templates can be created by clicking on the Create New Template button on the top left hand side corner.
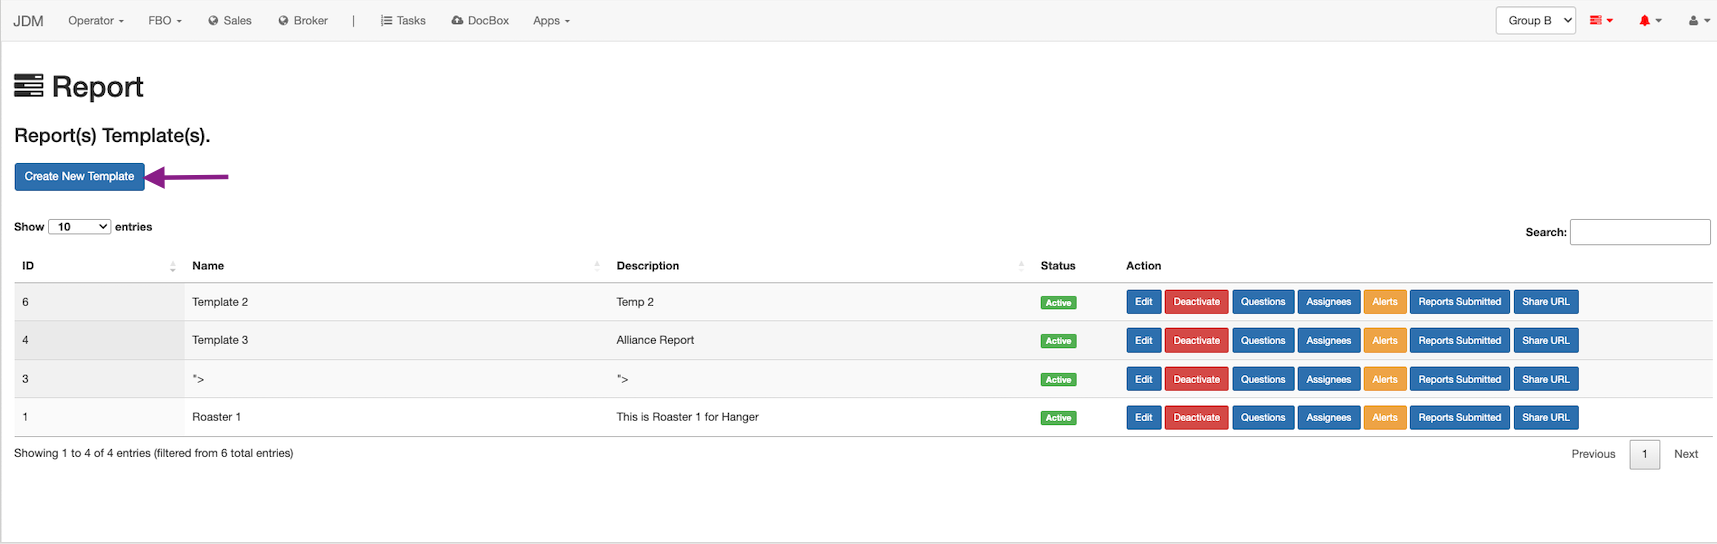
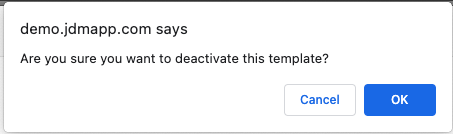
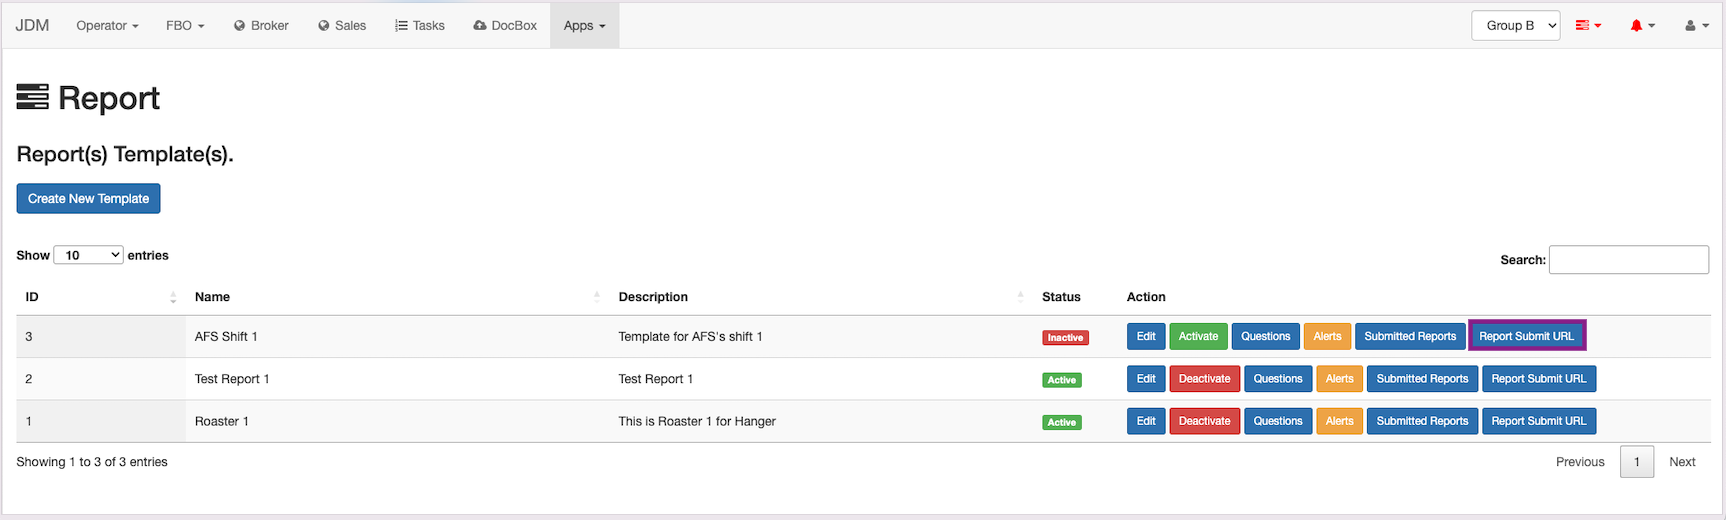
A report template can be modified by hitting on the Edit button. A report template can be temporarily or permanently disabled by clicking on the Deactivate button.
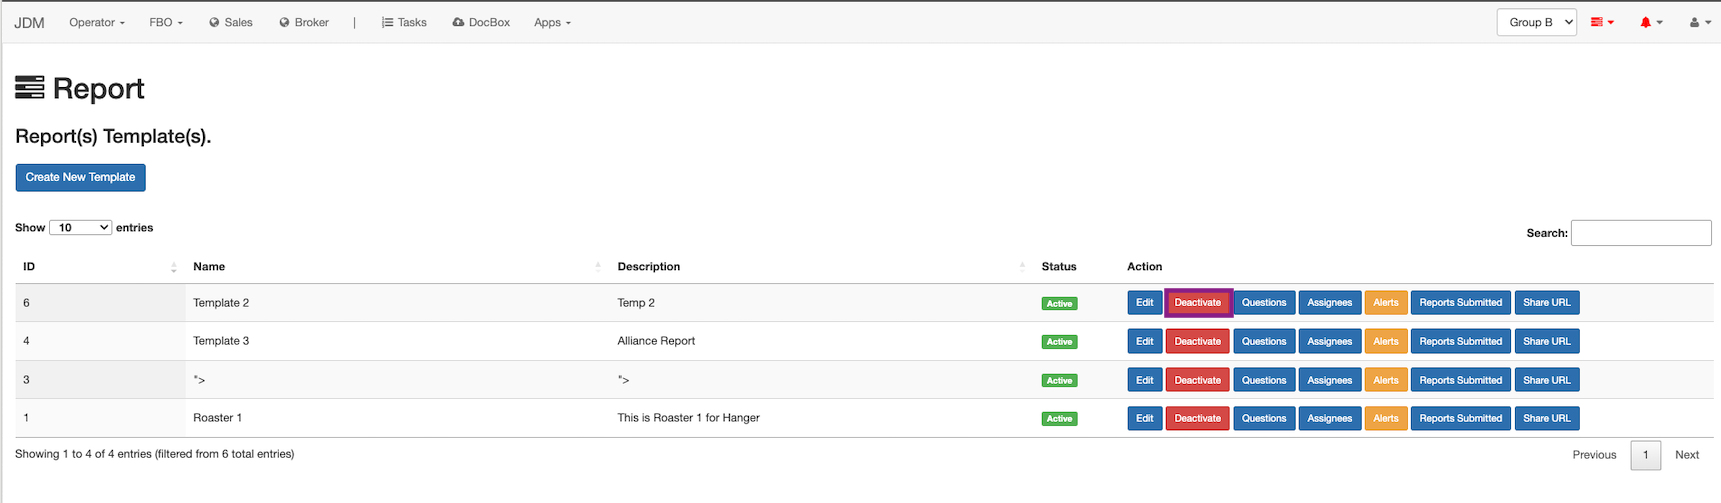
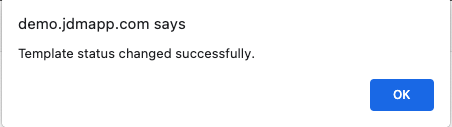
Report template is successfully disabled now and can be enabled back now anytime.
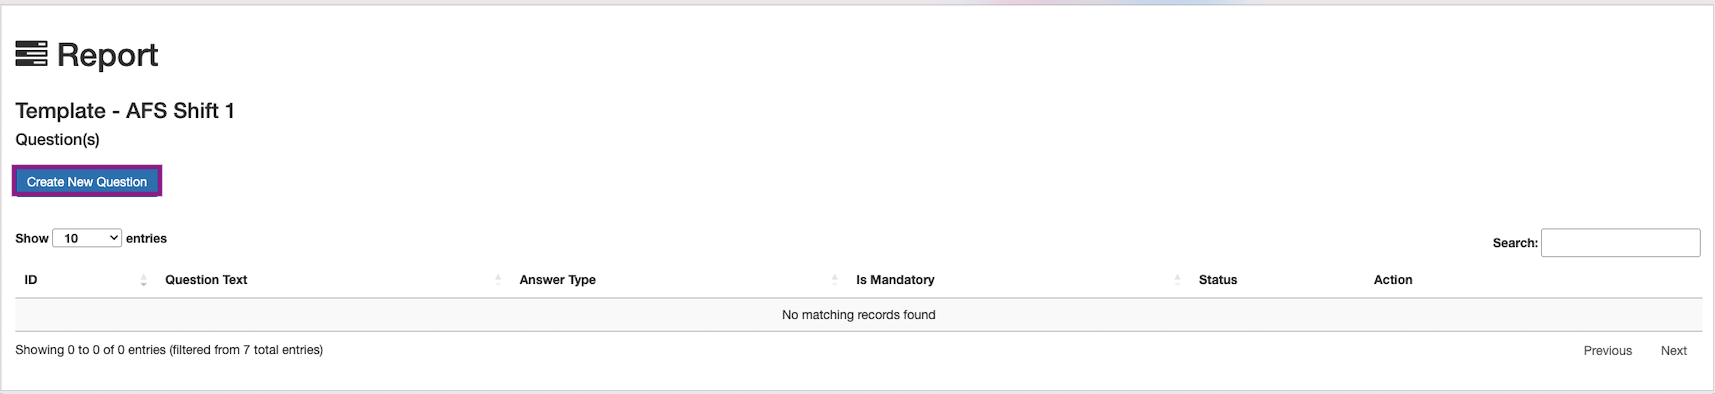
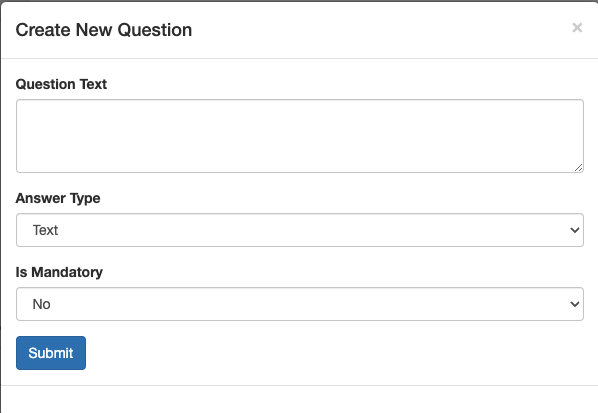
Questions can be created from the Questions button.
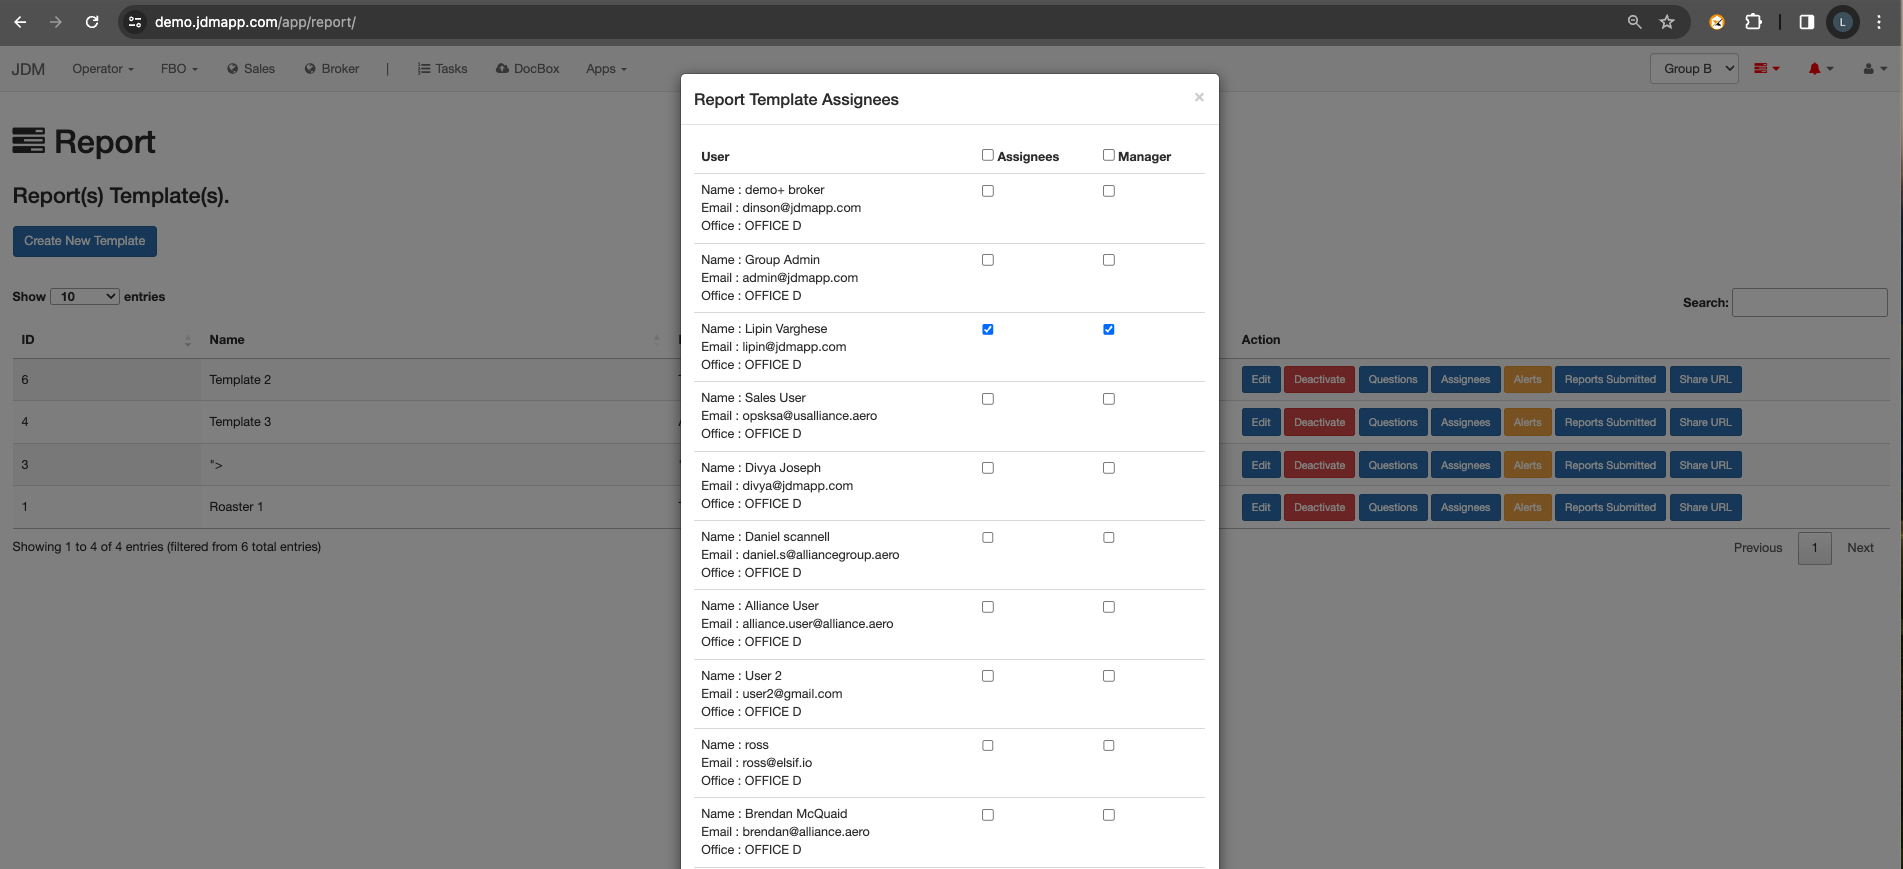
All the users that report is being assigned to can be accessed from the Assignees button.
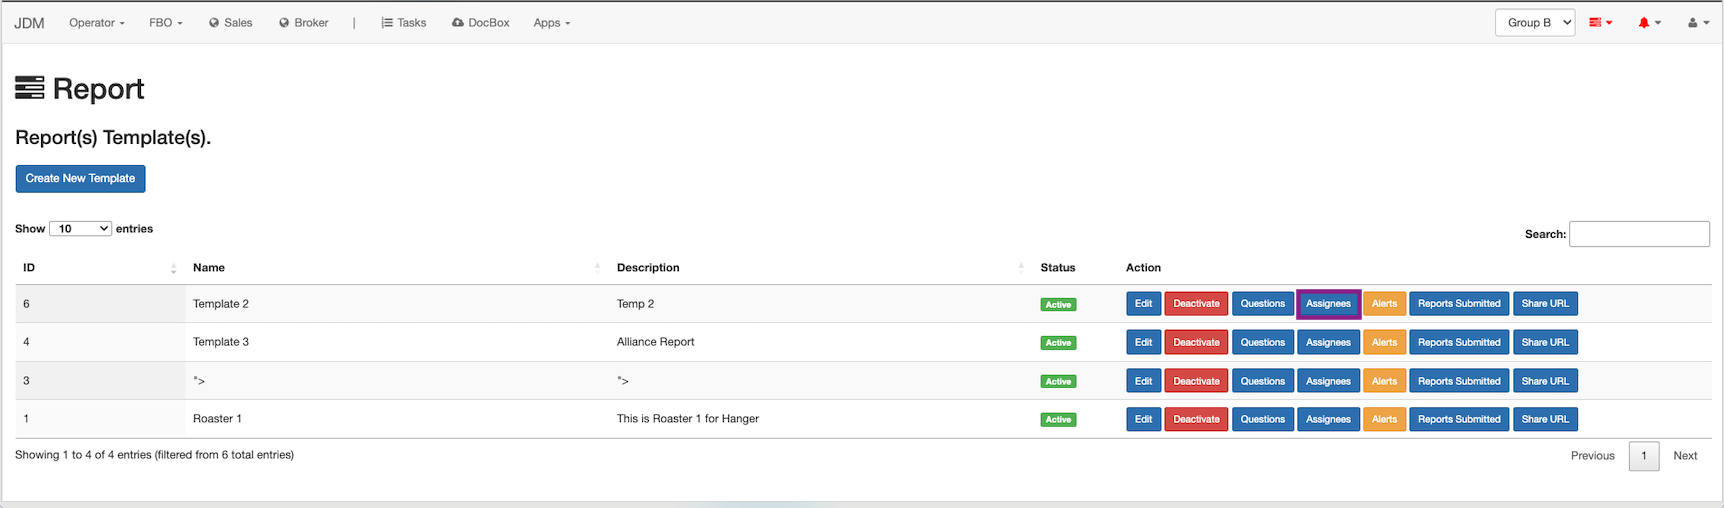
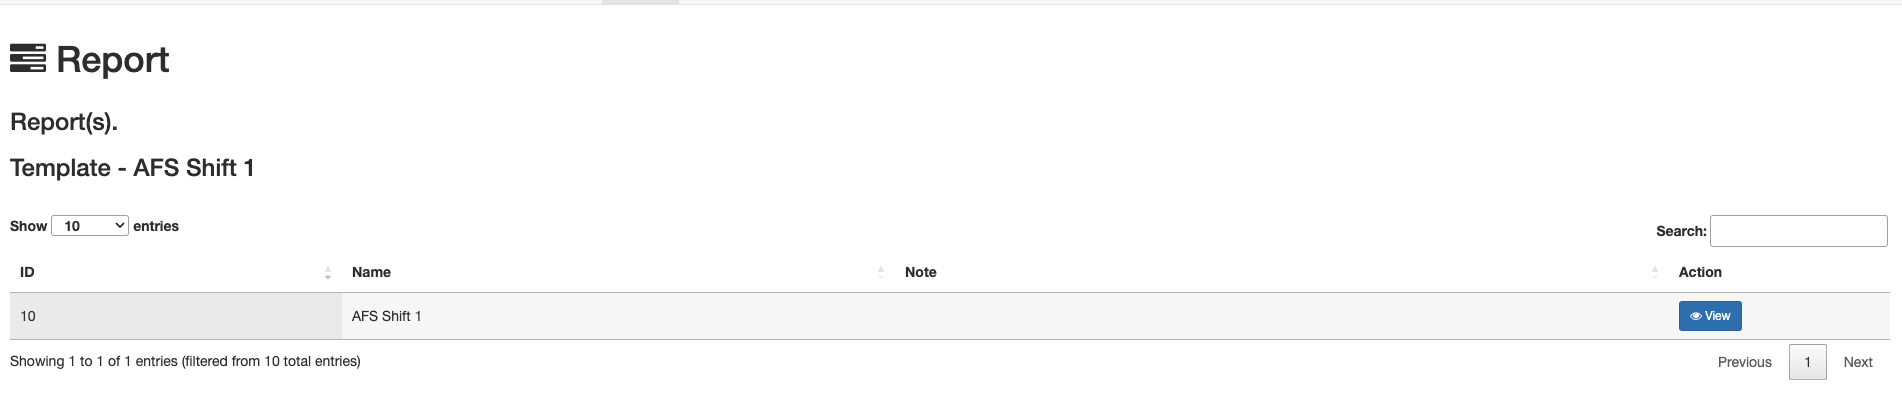
All the submitted reports can be viewed on the Submitted Reports.
Email and whatsapp alerts can be set to users for report updates by clicking on Alerts button.

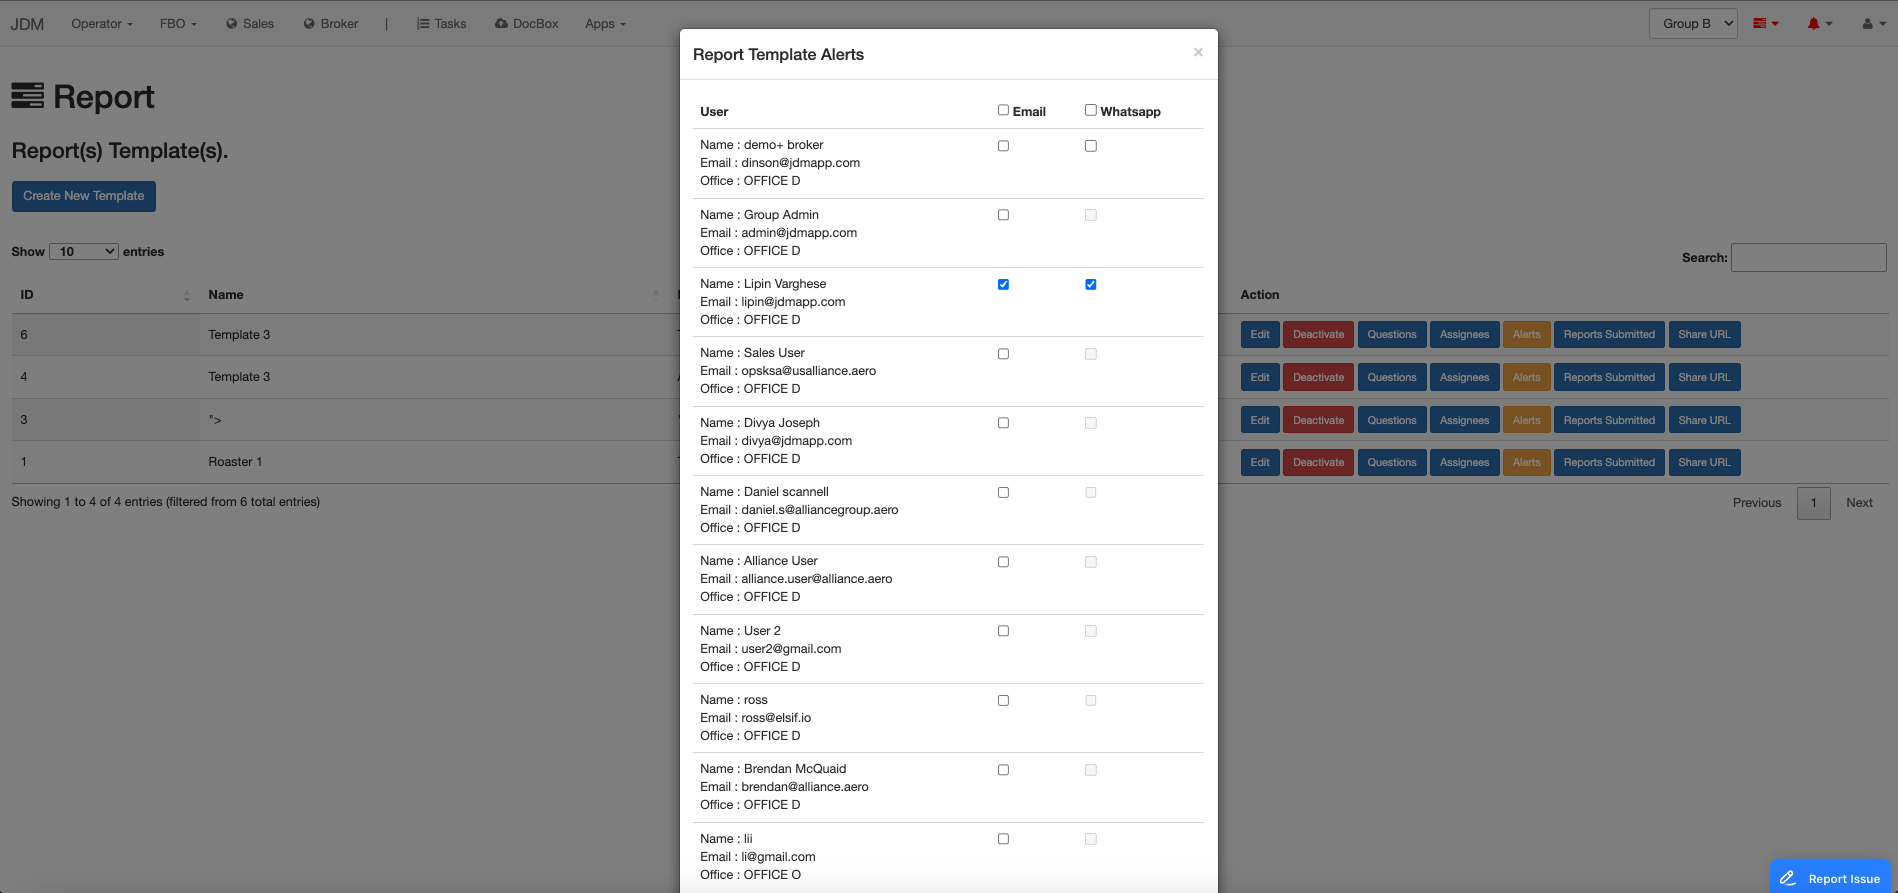
When a report is changed or submitted, users will be alerted over whatsapp and email in respective of the alert method chosen.
A user can submit their report by clicking on the Report Submit URL button.
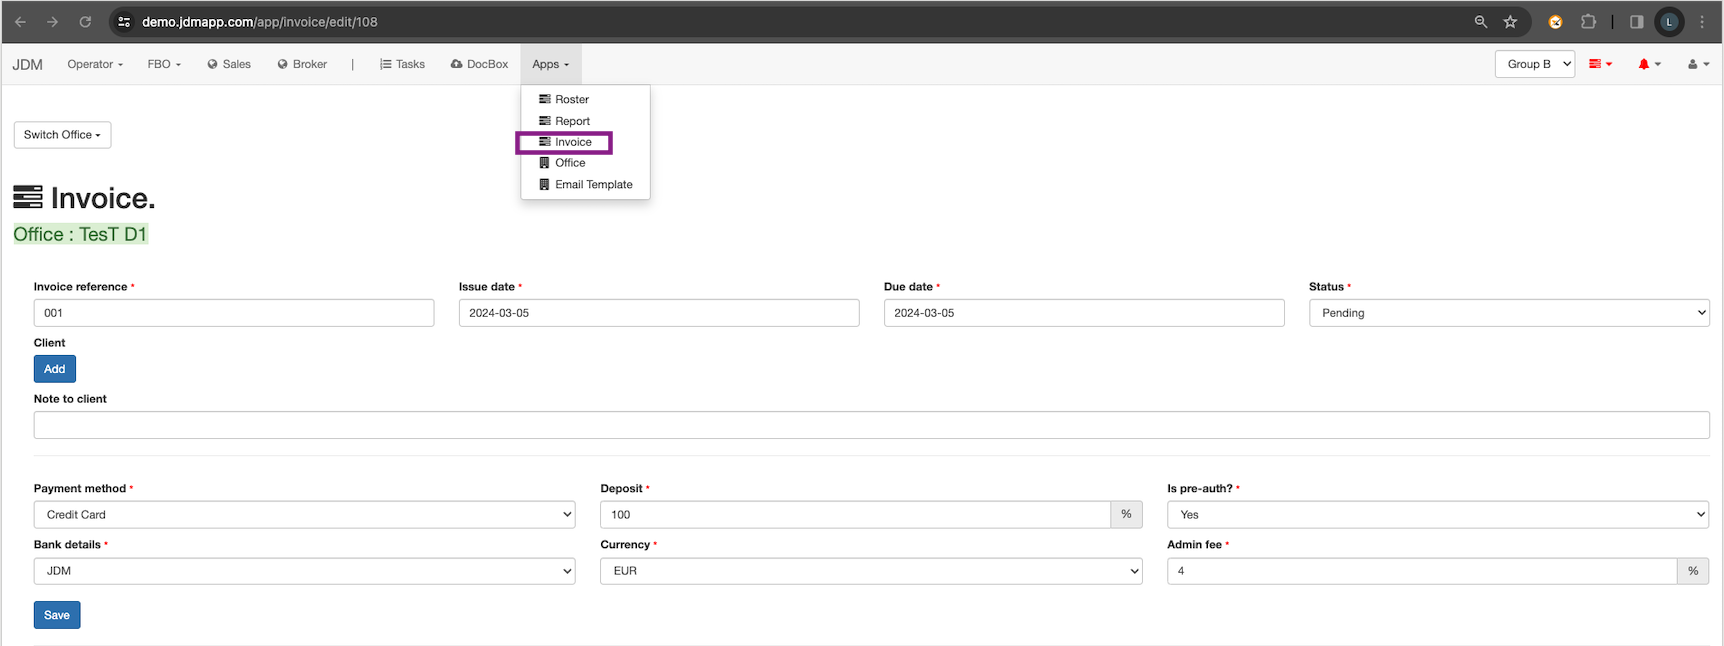
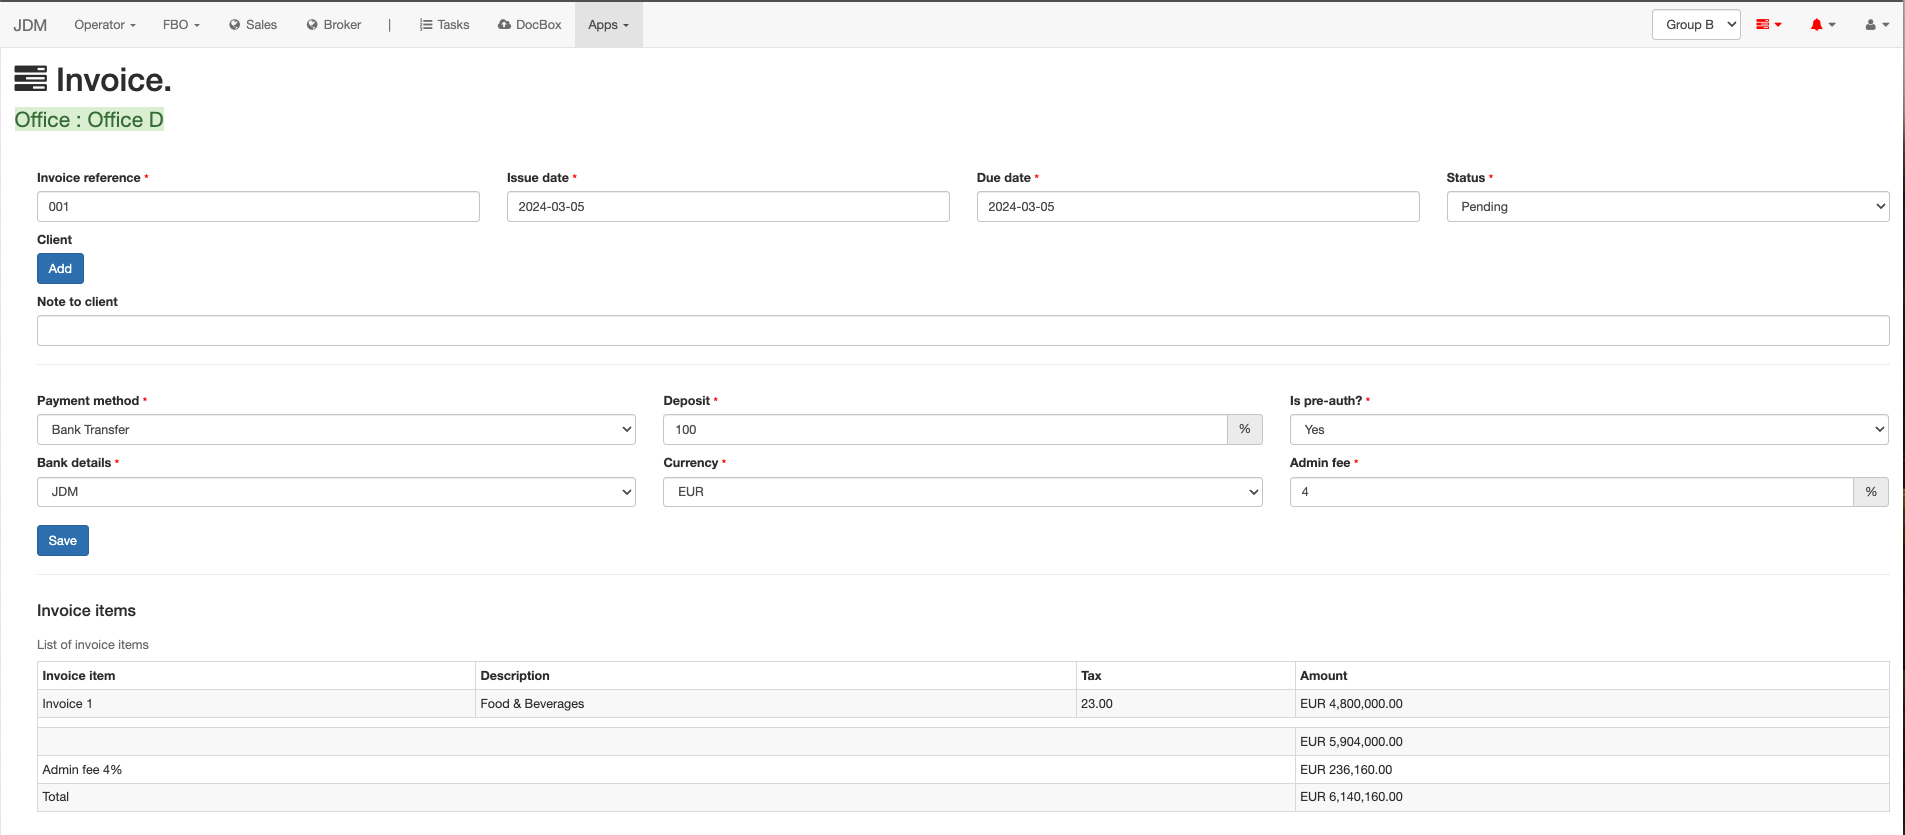
Free form invoices can be generated from the Apps section dropdown
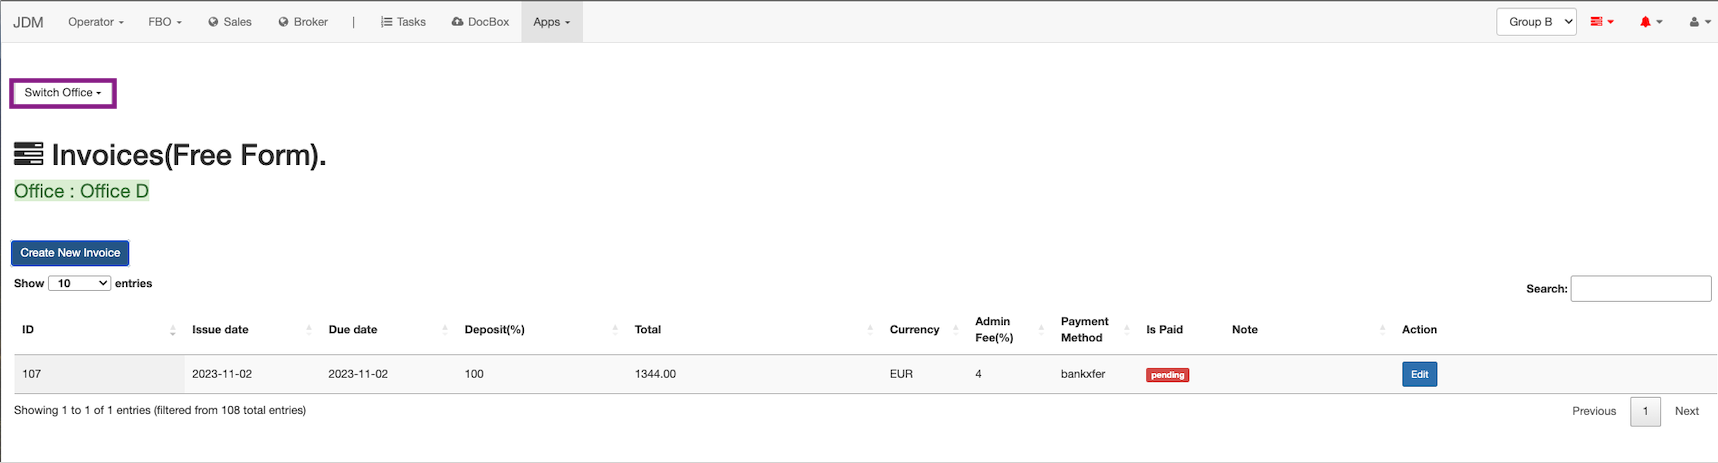
All the invoices are created against the group. Select the office from the top left corner.
A new invoice can be created by clicking on the Create New Invoice button on the top left corner
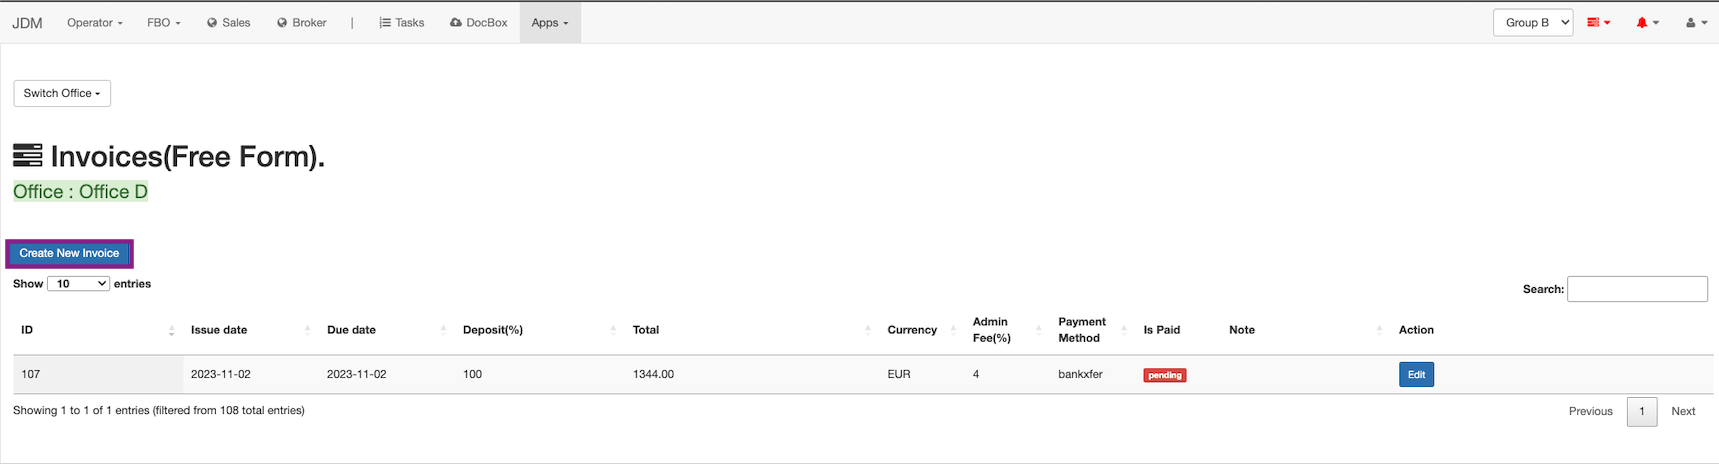

All the created invoices will be listed on the invoice items menu.
Offices can be created and managed in the Apps section.
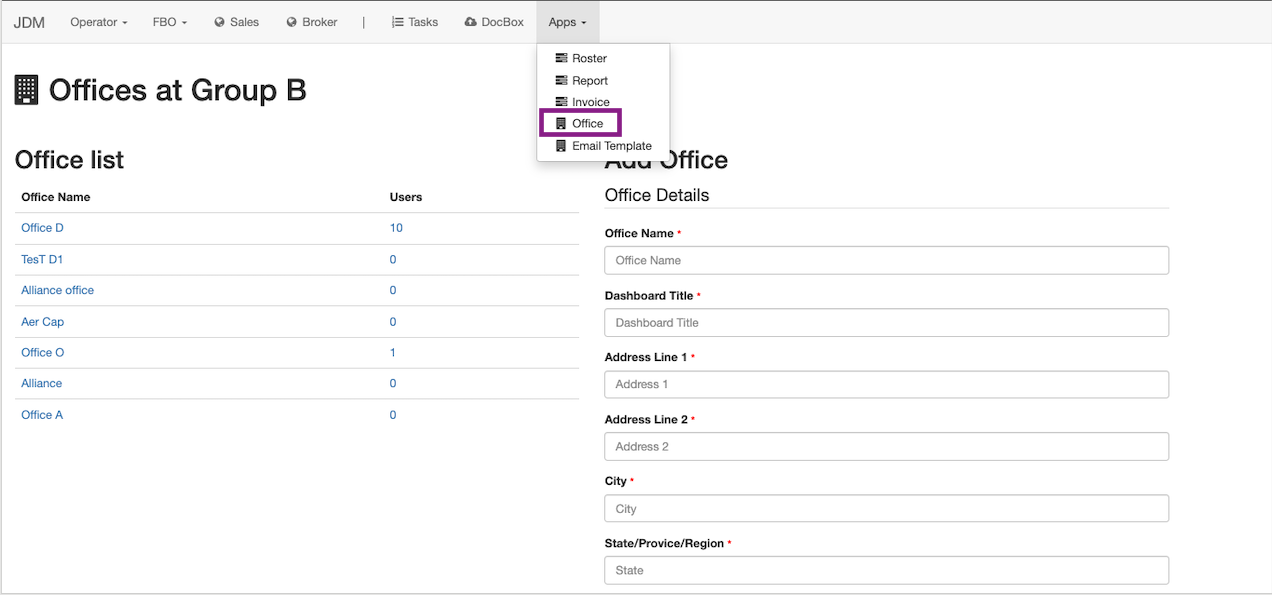
All the offices belonging to the group will be listed under Office List and a new office can be created from the Add Office section.
The leave management has two modules, Admin module and User Module. The admin module is for the authorized person who can approve the leaves, manage the leave types and so on. User module is for the employees. The users that are assigned as admins from the manager login, will have access to the Admin module in the leave management section
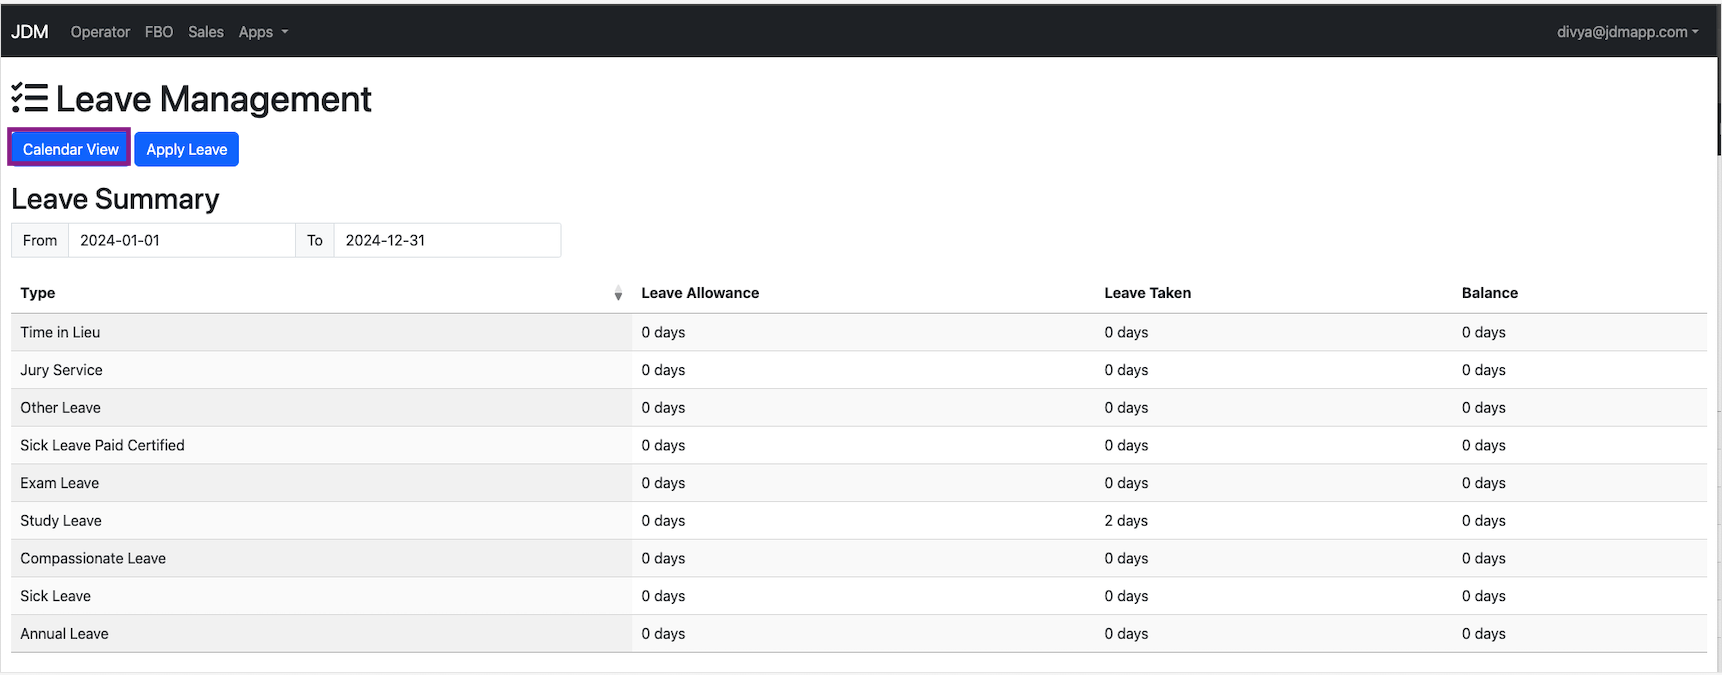
Leave Management can be accessed from the Apps section.
Employees can apply for the leave and track the status of the leave in user login. Employees can access the calendar view of the leaves by clicking on the Calendar View button on the top left most corner.
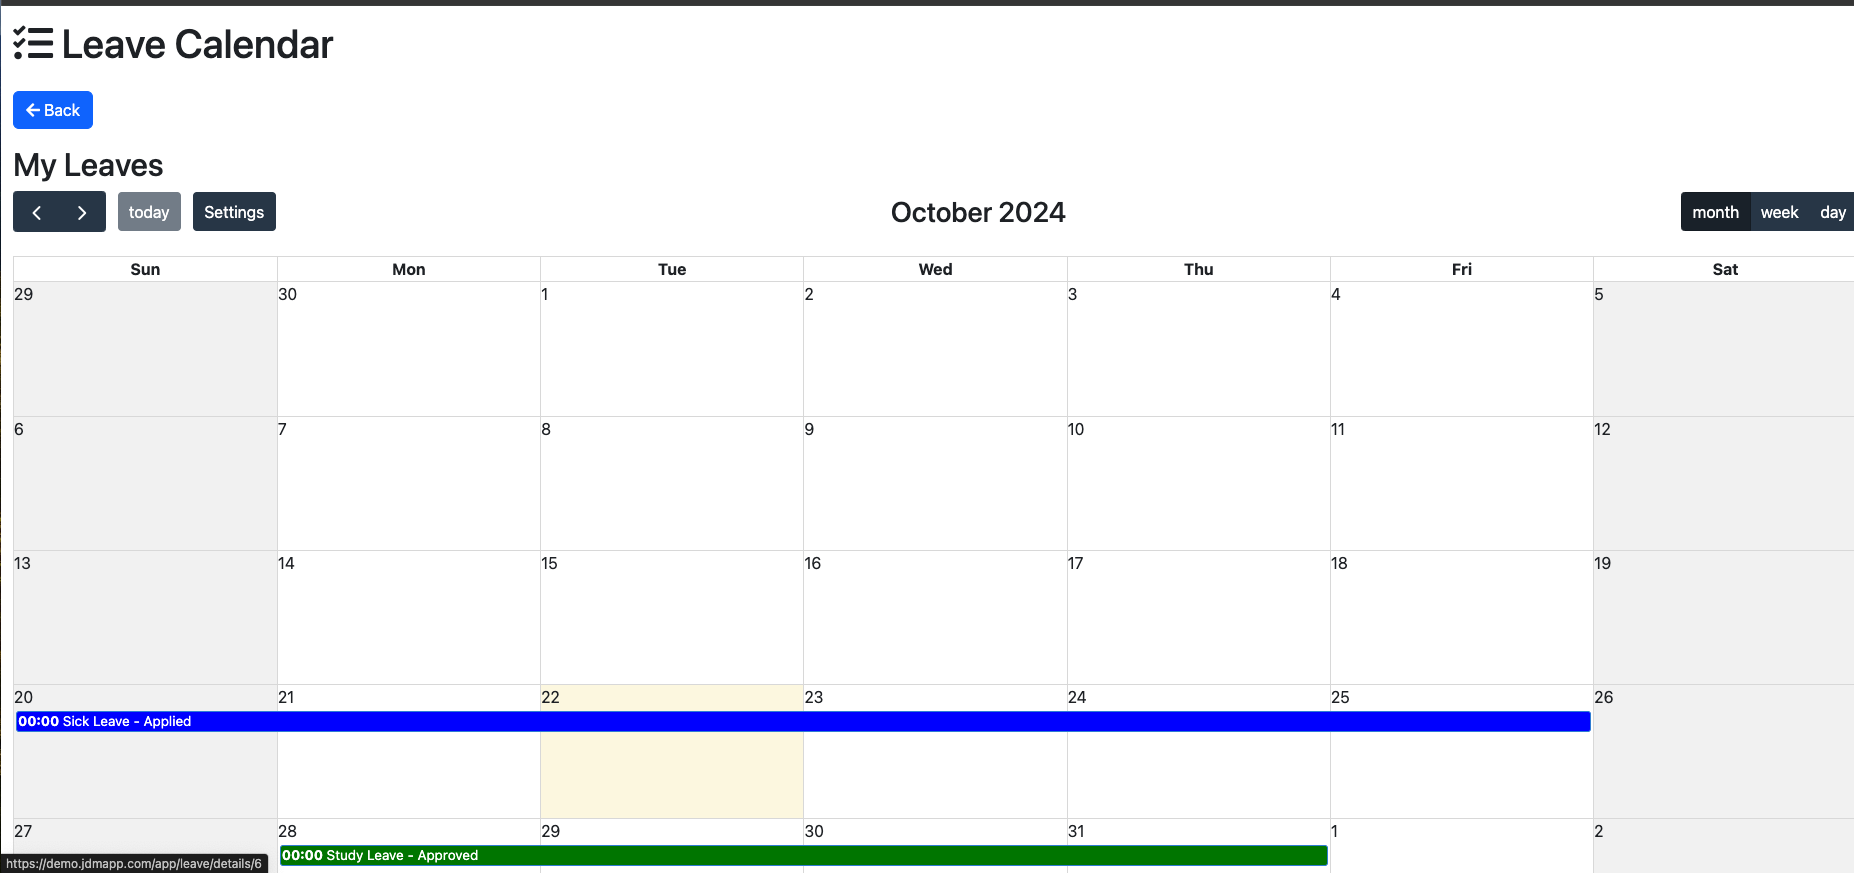
All the approved leaves for the user will be displayed on the scheduler.
All the leave types belonging to the user, that are added by admin from the admin view, are displayed under the leave summary.
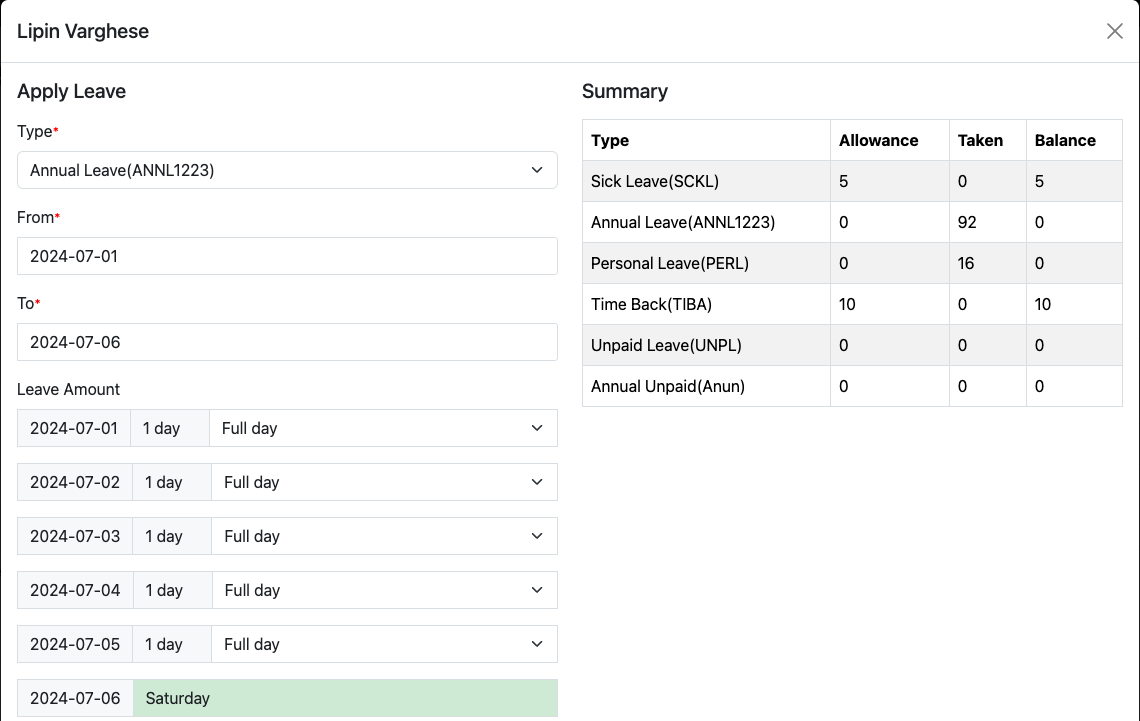
A new leave can be applied by clicking on the Apply Leave button.
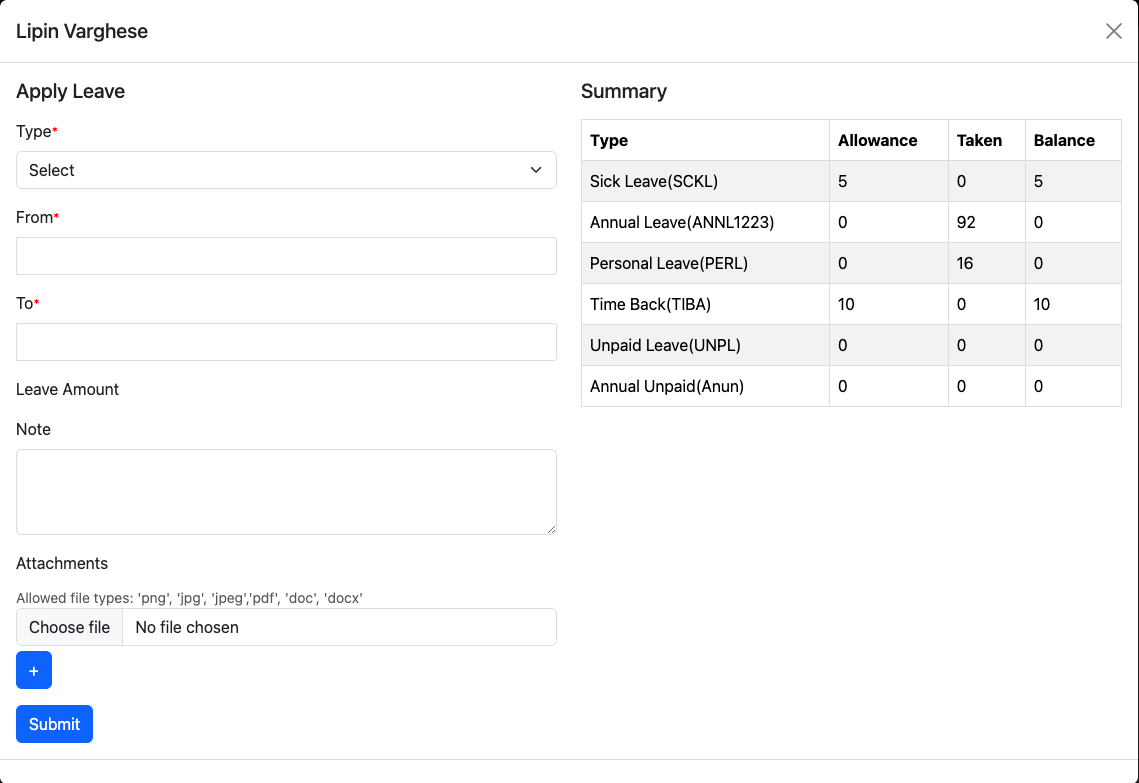
After filling the details, click on the submit button. The admin will get notification on the leave application.Here we are applying for an annual leave from 01/07/02024 to 06/07/2024.

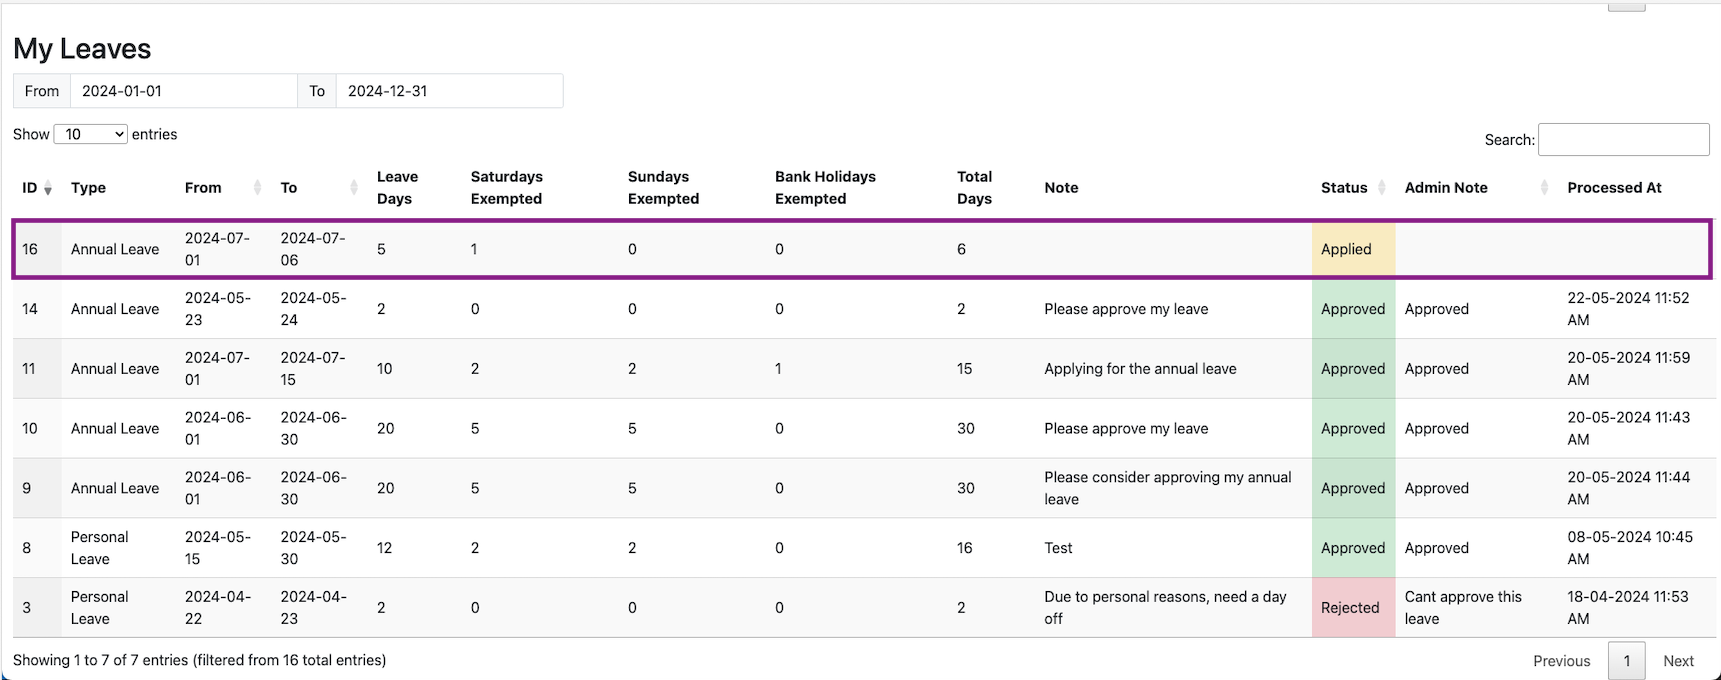
The leave application will be on Applied status, If the admin approves the leave application, then it comes as approved in the My Leaves section. If it's rejected, then the status will be rejected.
Now, if the admin approves the application, the status will be changed to Approved.
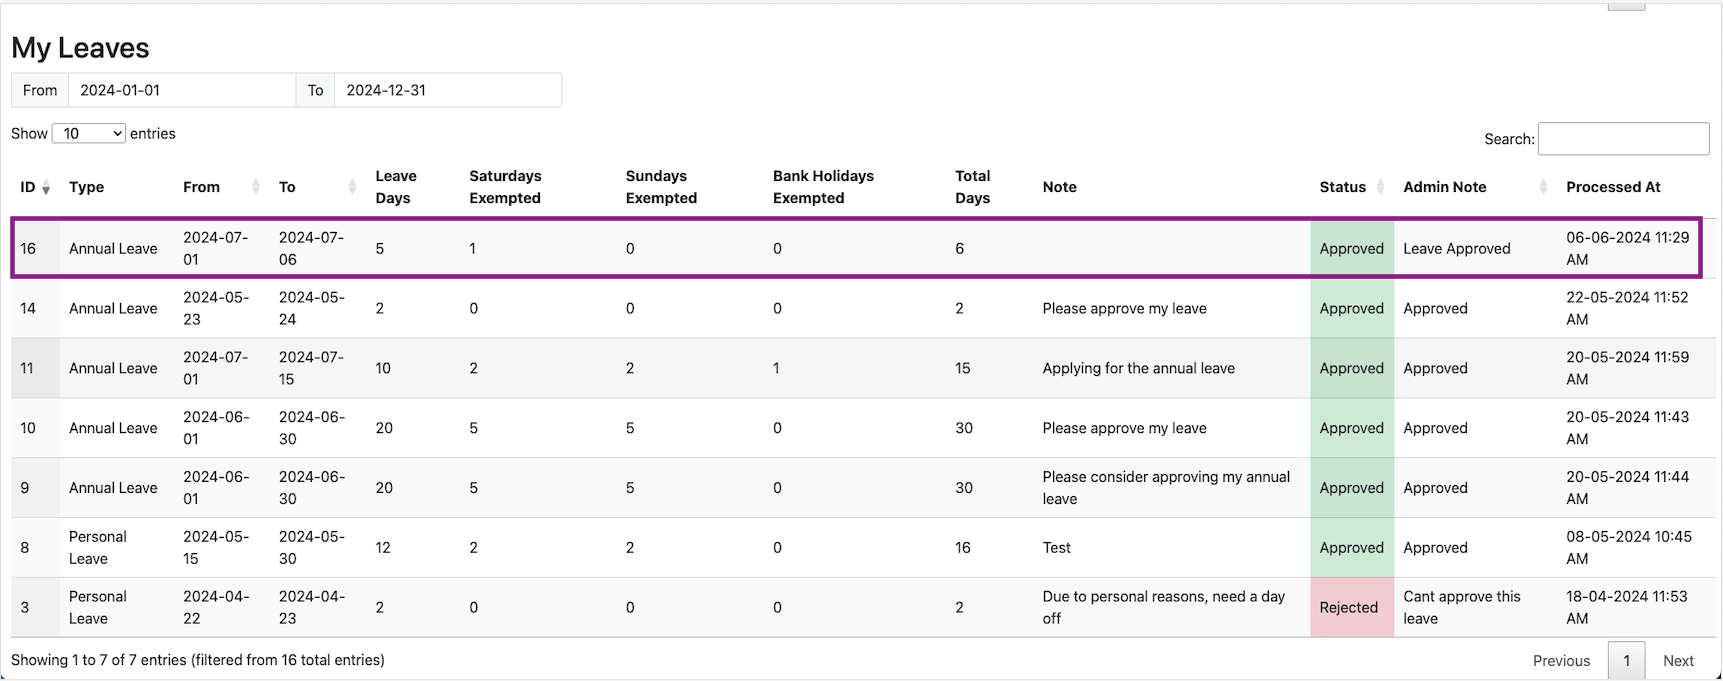
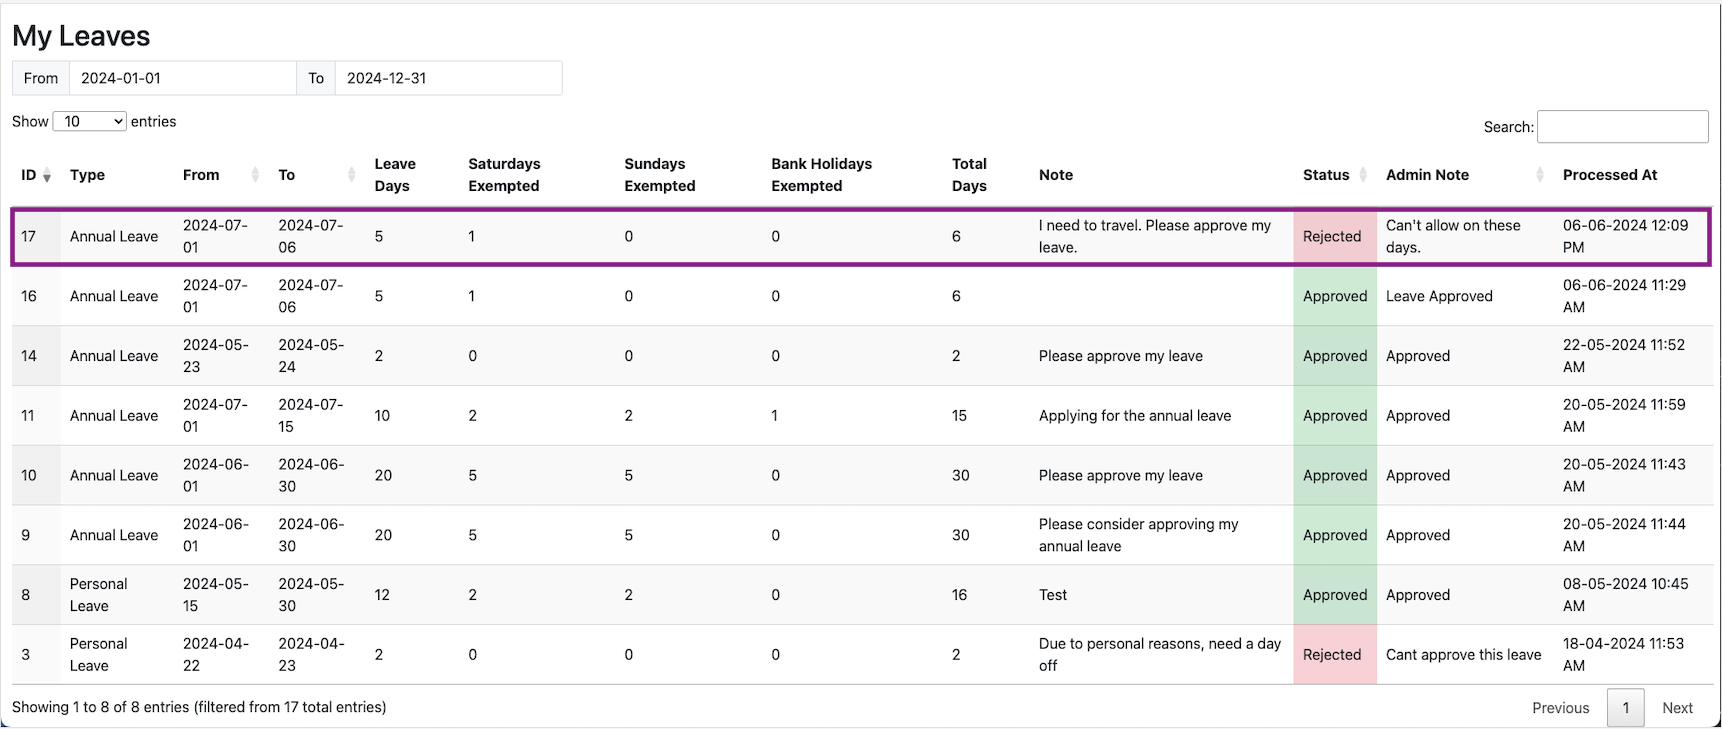
The leave status has been changed to Approved. Now, let's see what happens if the admin rejects the leave application.
The leave summary has a date filter. It can be used to view the leave summary based on date range.

The Admin can add the leave types, leave allowance, blocked dates, Leaves, staff management, staff positions, managing staff departments, managing staff locations, Calendar functions, bank holidays and so on.
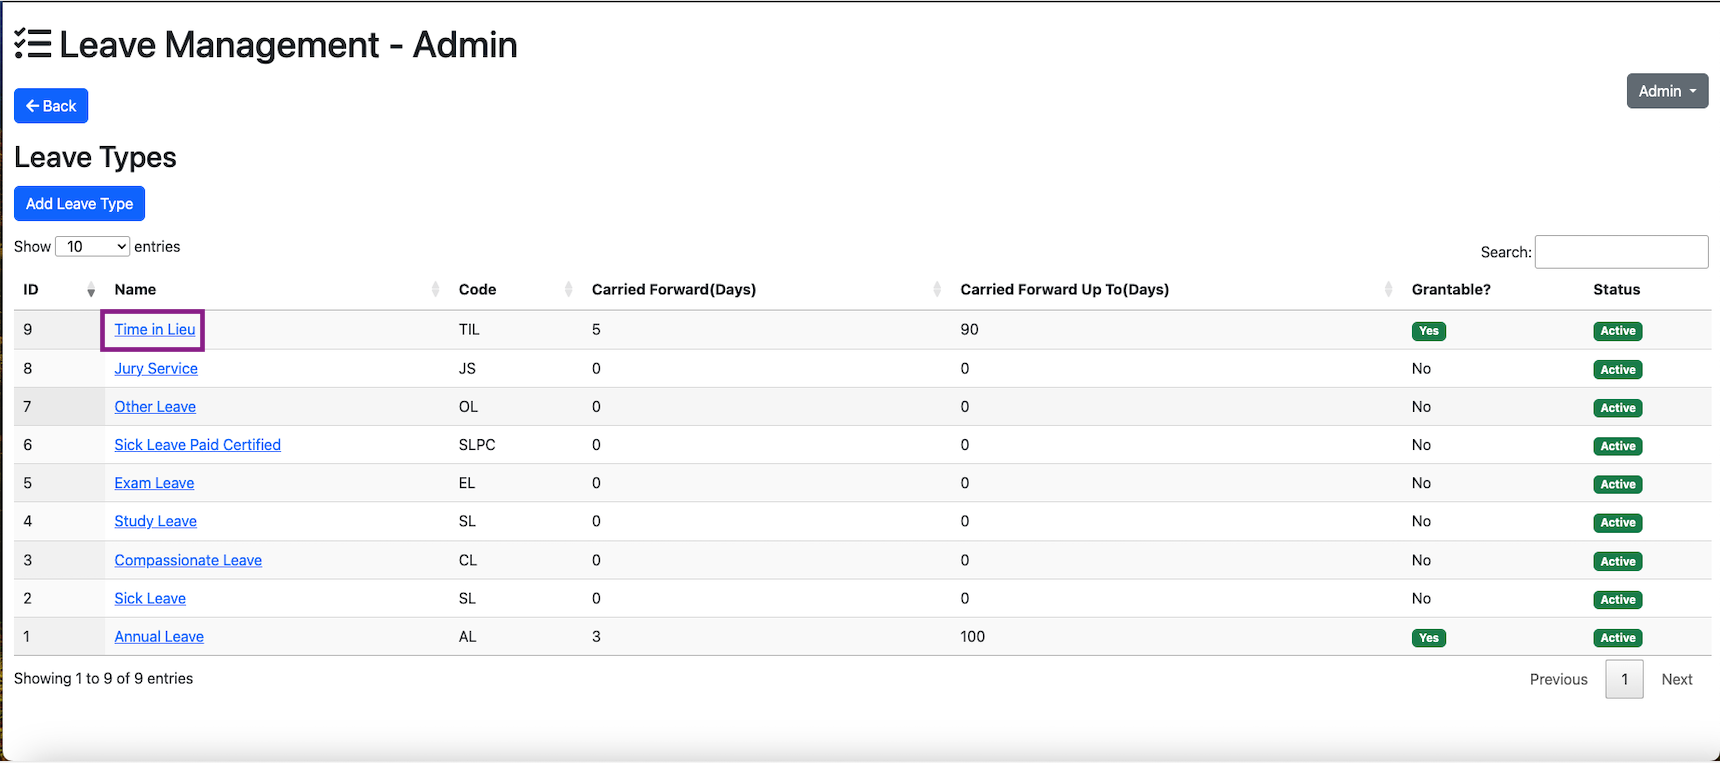
Leave types can be added from admin dropdown.
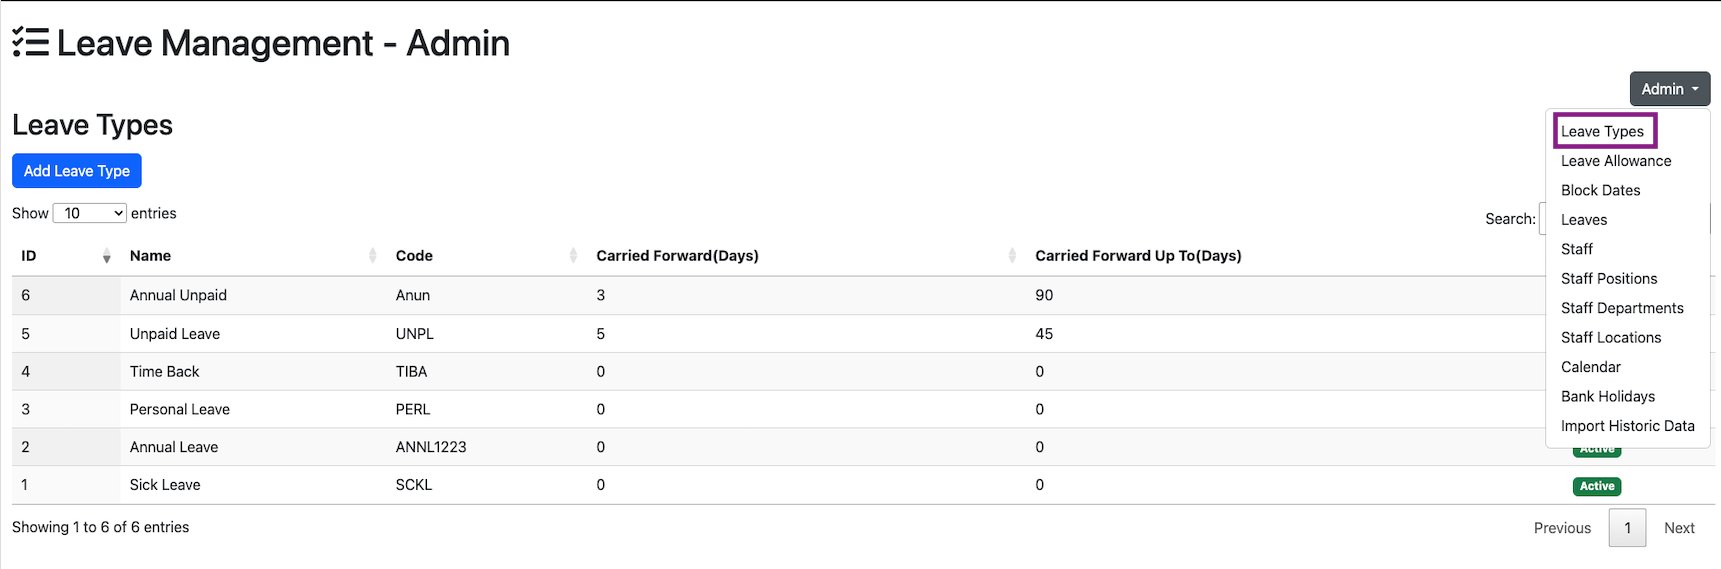
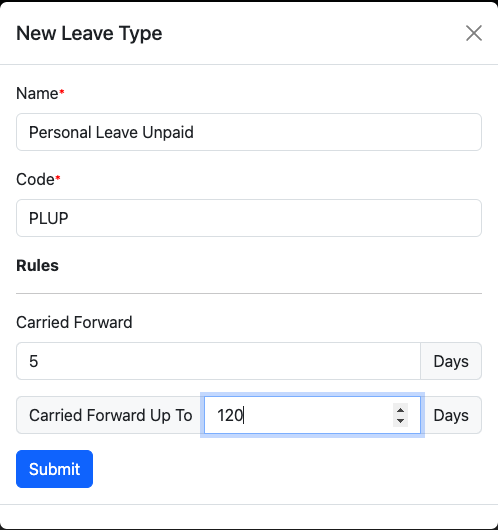
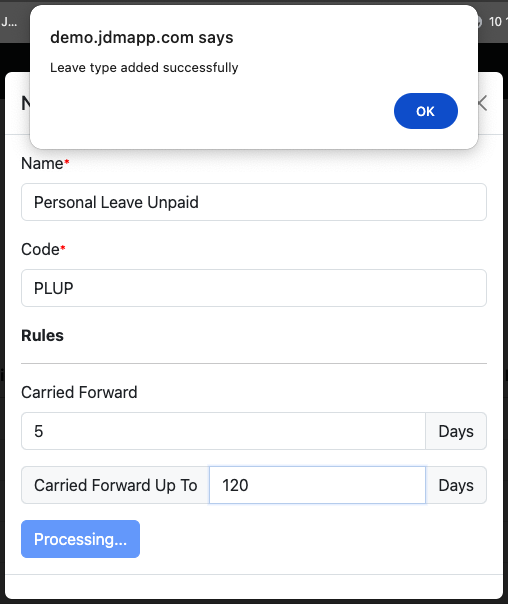
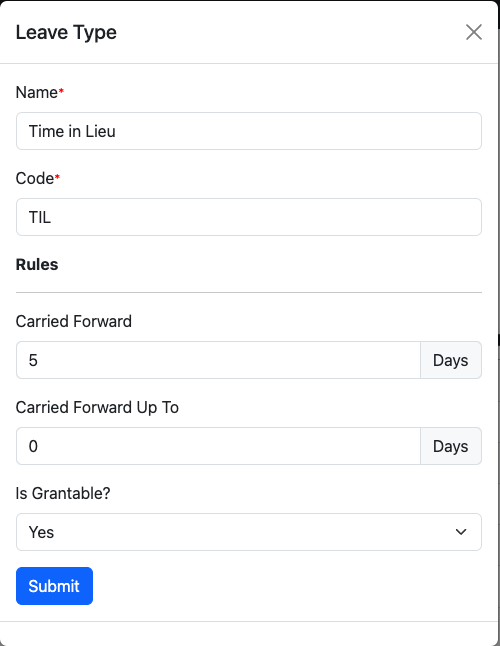
All the existing leave types are listed down on the leave types. A new leave type can be created by clicking on the Add Leave Type button on the top left most corner.
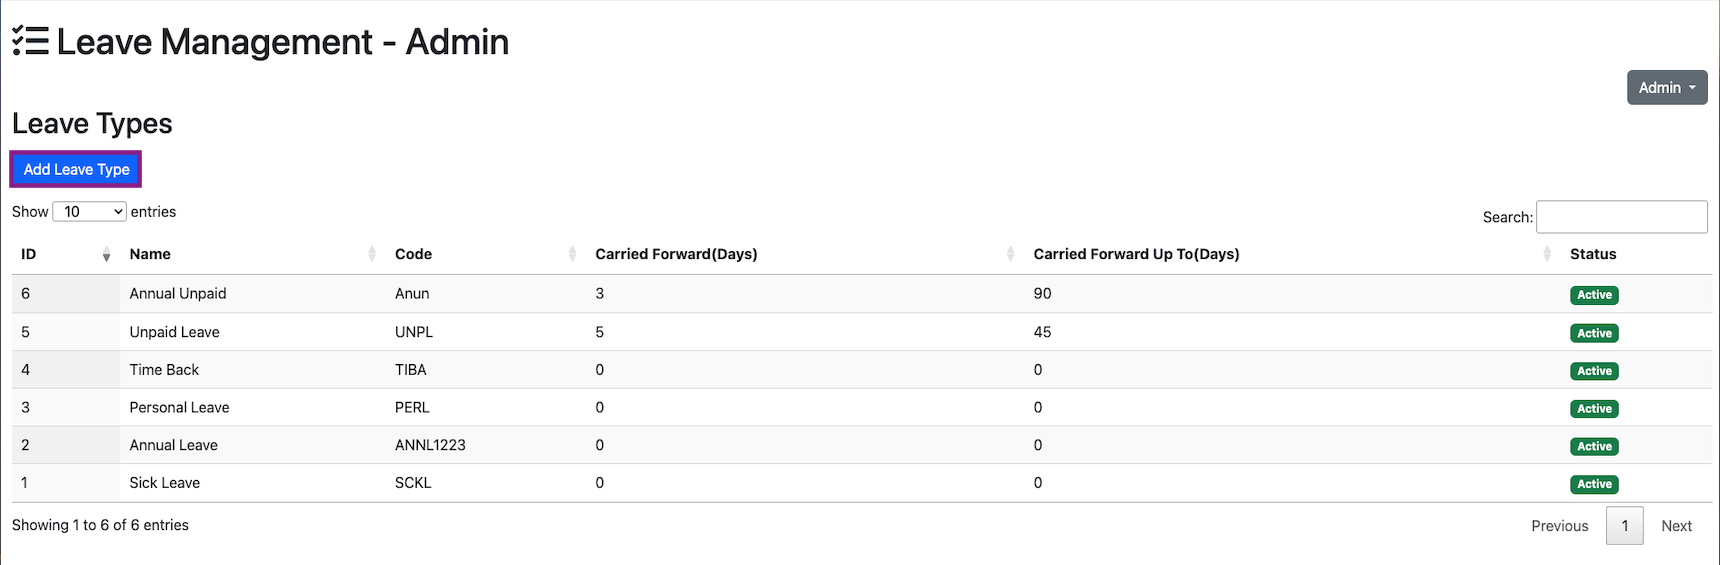
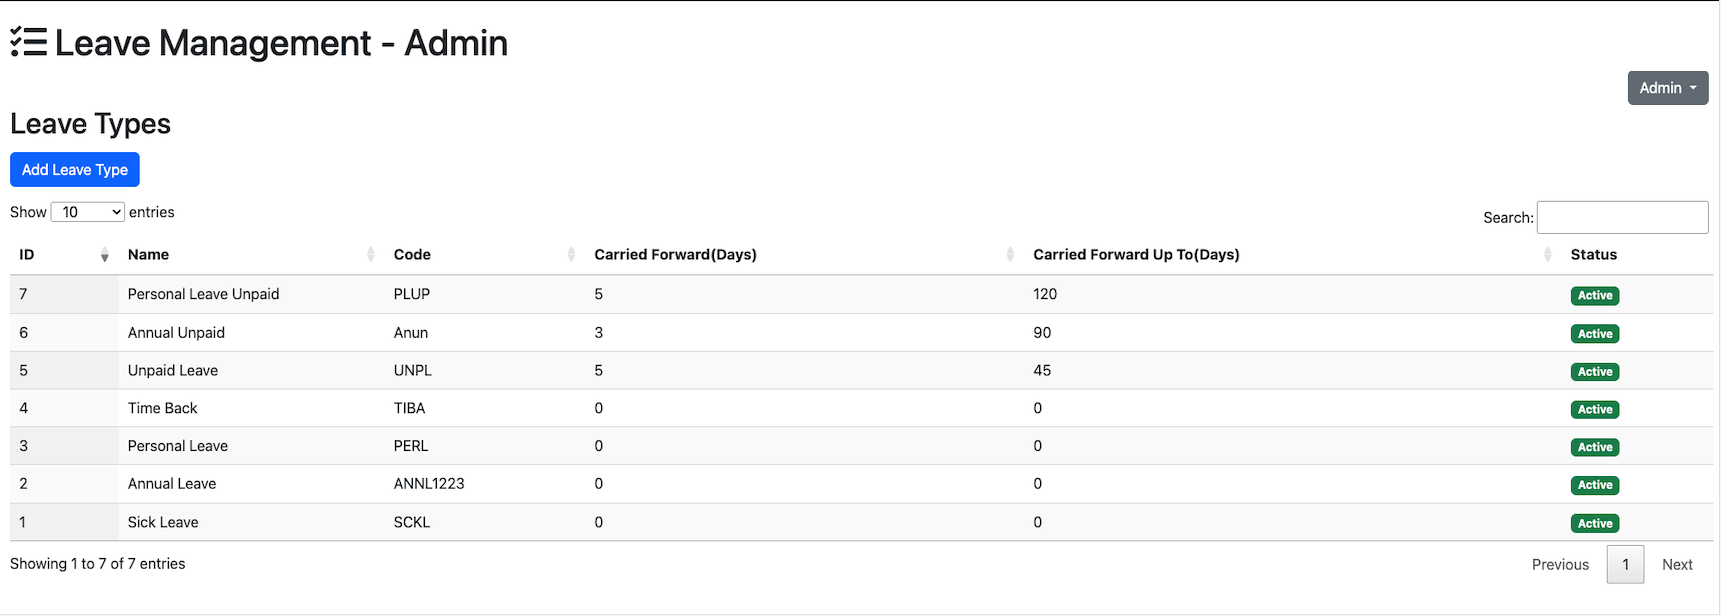
An existing Leave type can be modified by clicking on the leave type.
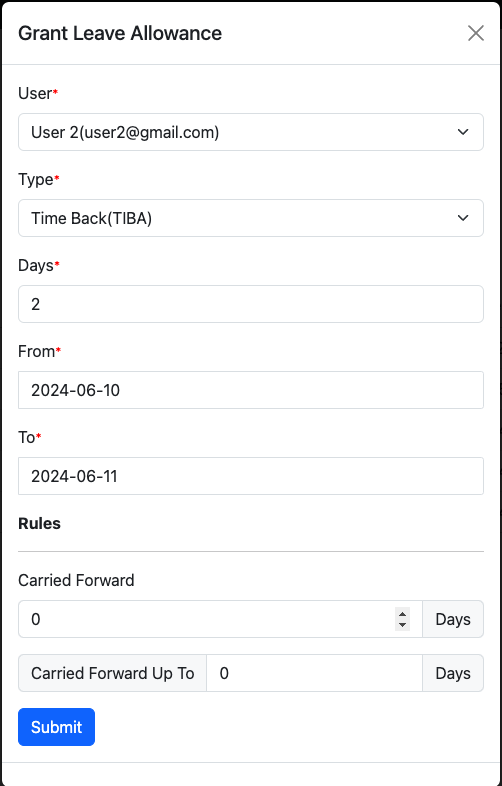
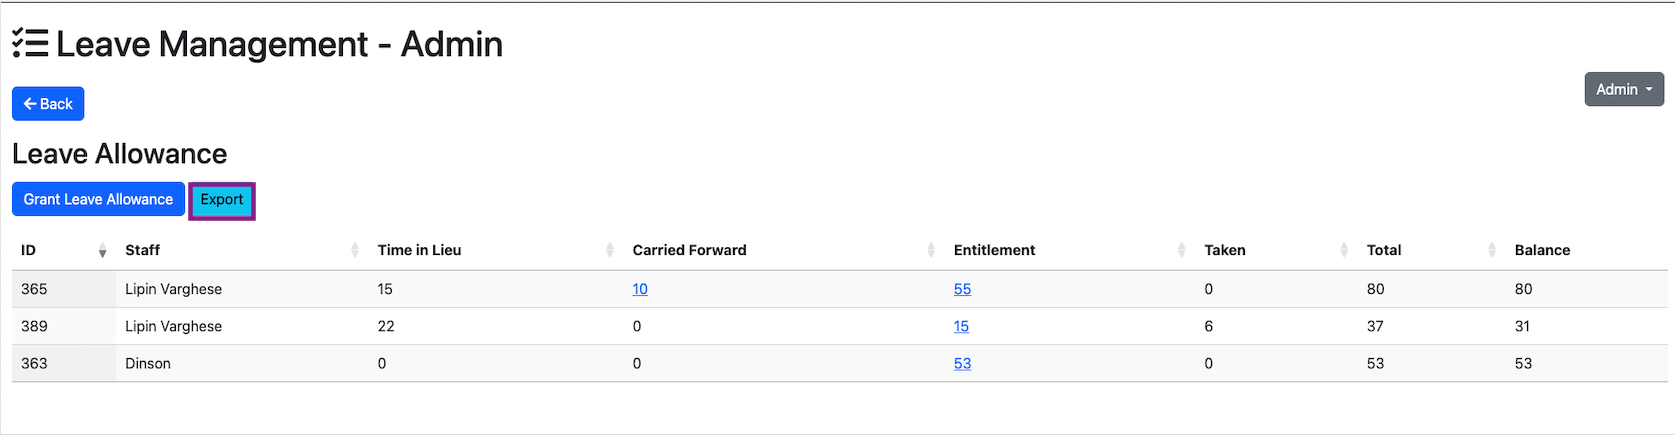
Admin can grant the leave allowance of each users by clicking on the Leave Allowance option in the admin drop down menu
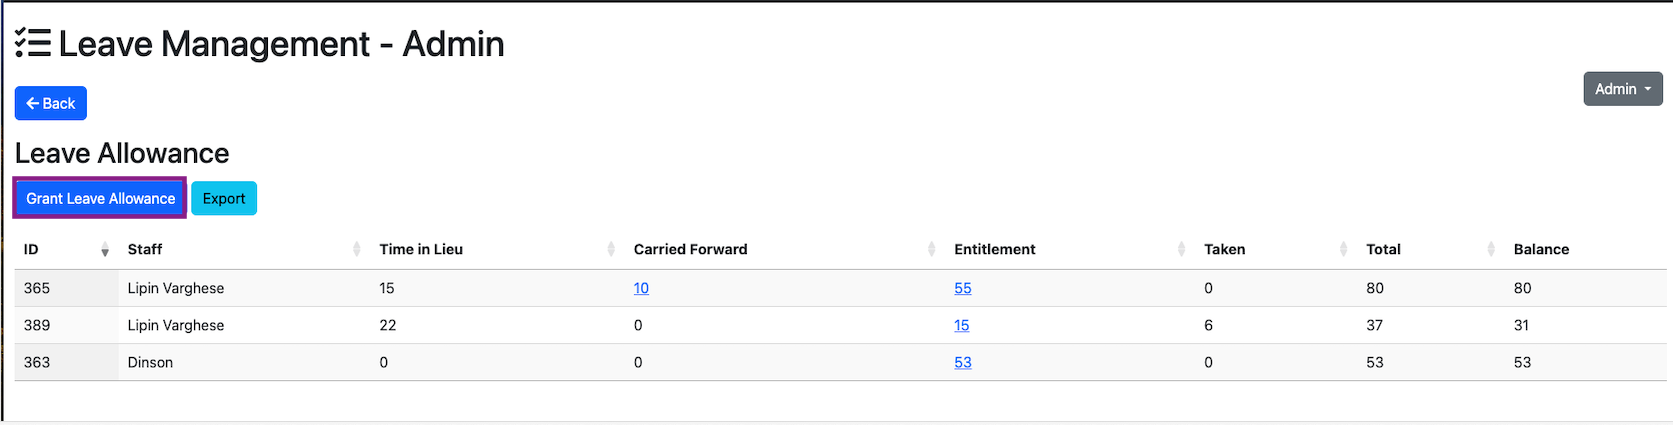
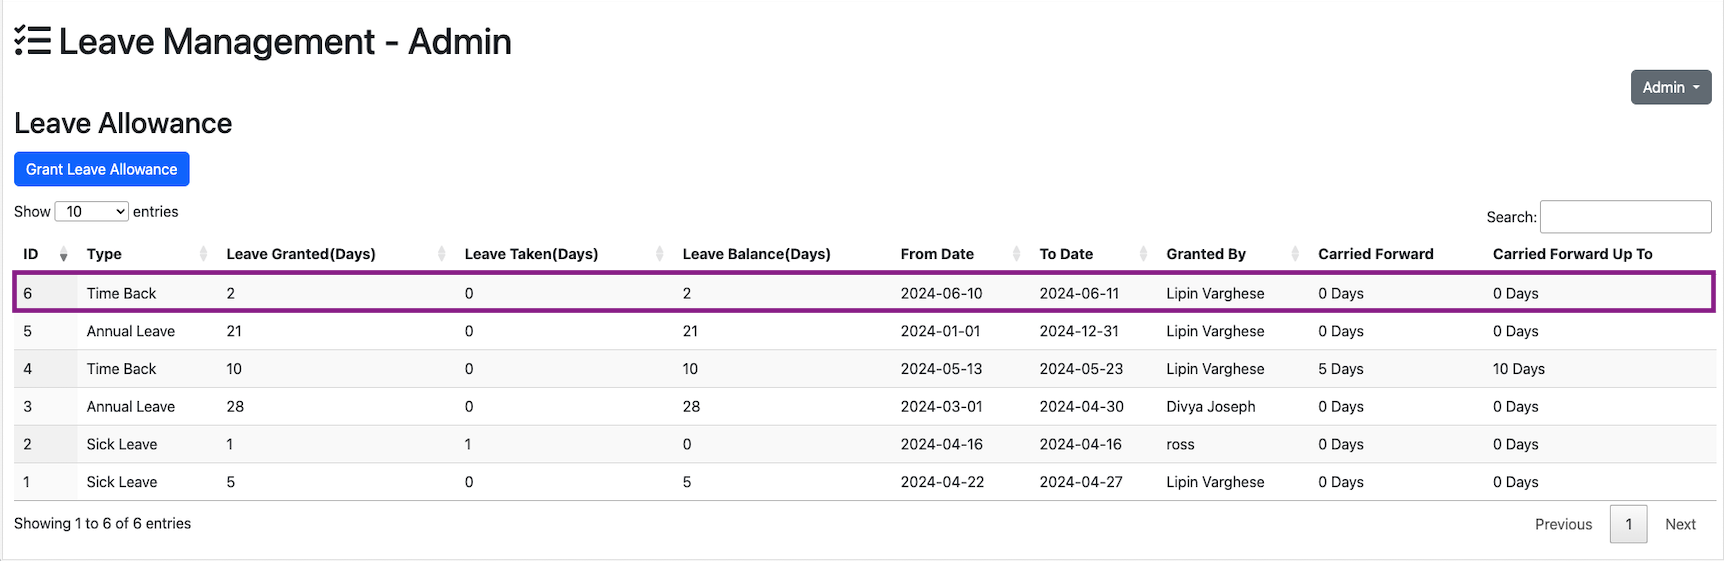
All the leave granted is displayed in the leave allowance section.
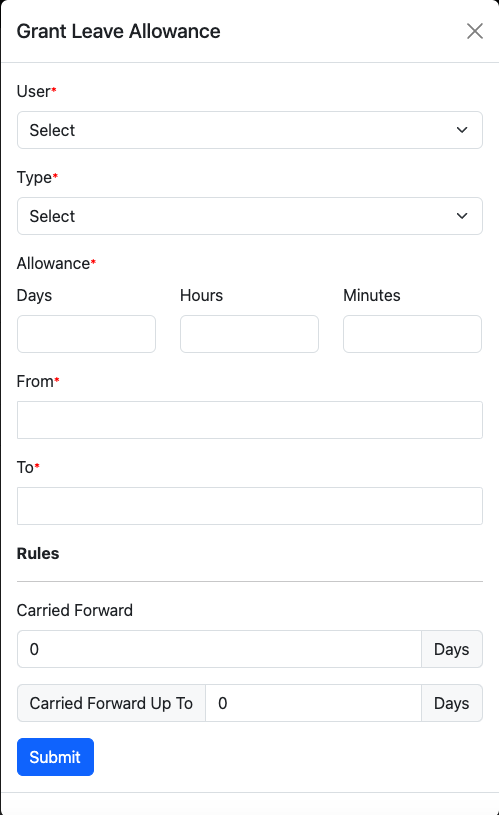
A new leave can be granted by clicking on the Grant Leave Allowance button.
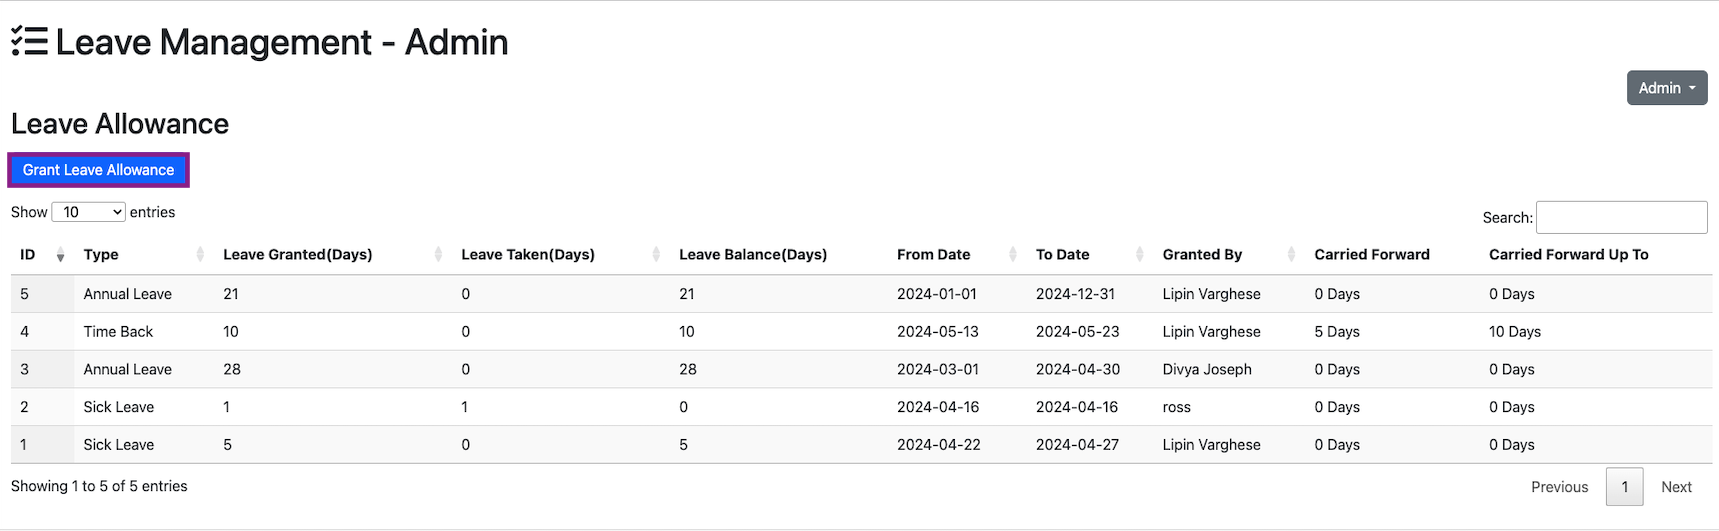
The leave allowances can be Exported by clicking on the Export button on the left hand side.
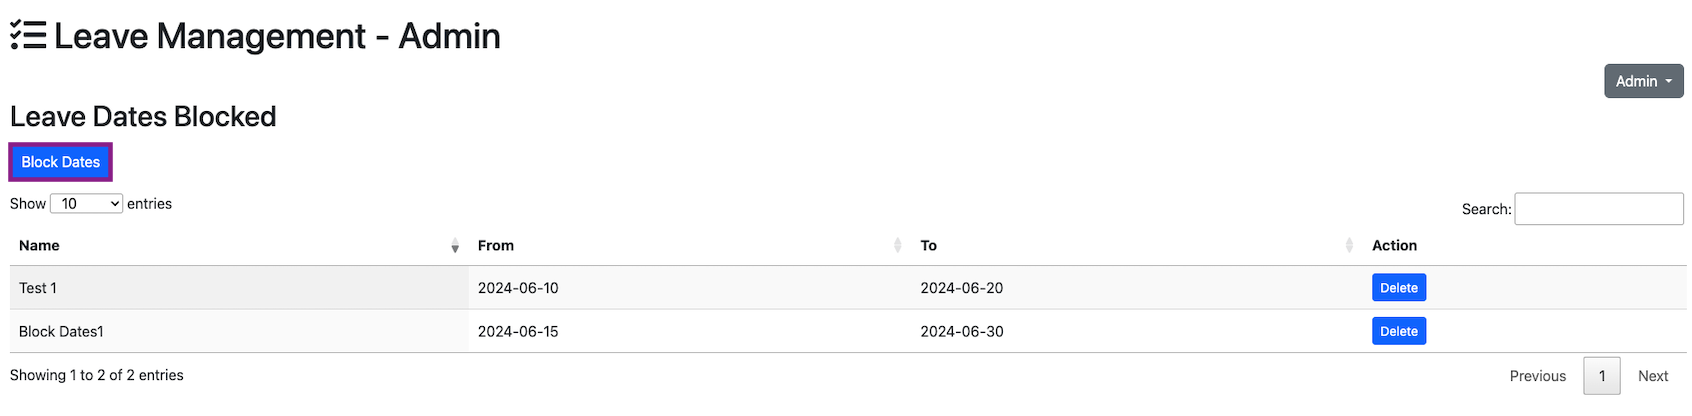
Block dates are the days that no-one is allowed to take leaves.If the dates are marked as blocked, then if someone applies for leaves for the corresponding dates, then it has to show as blocked. Blocked dates can be accessed from the Admin dropdown menu.
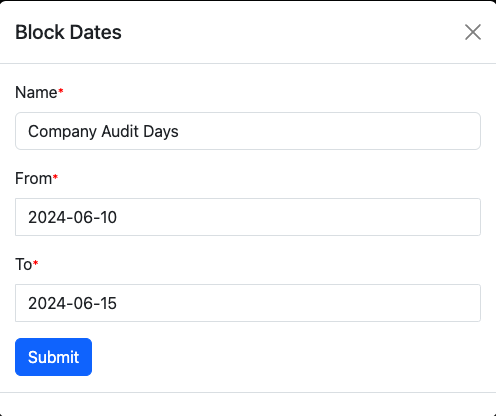
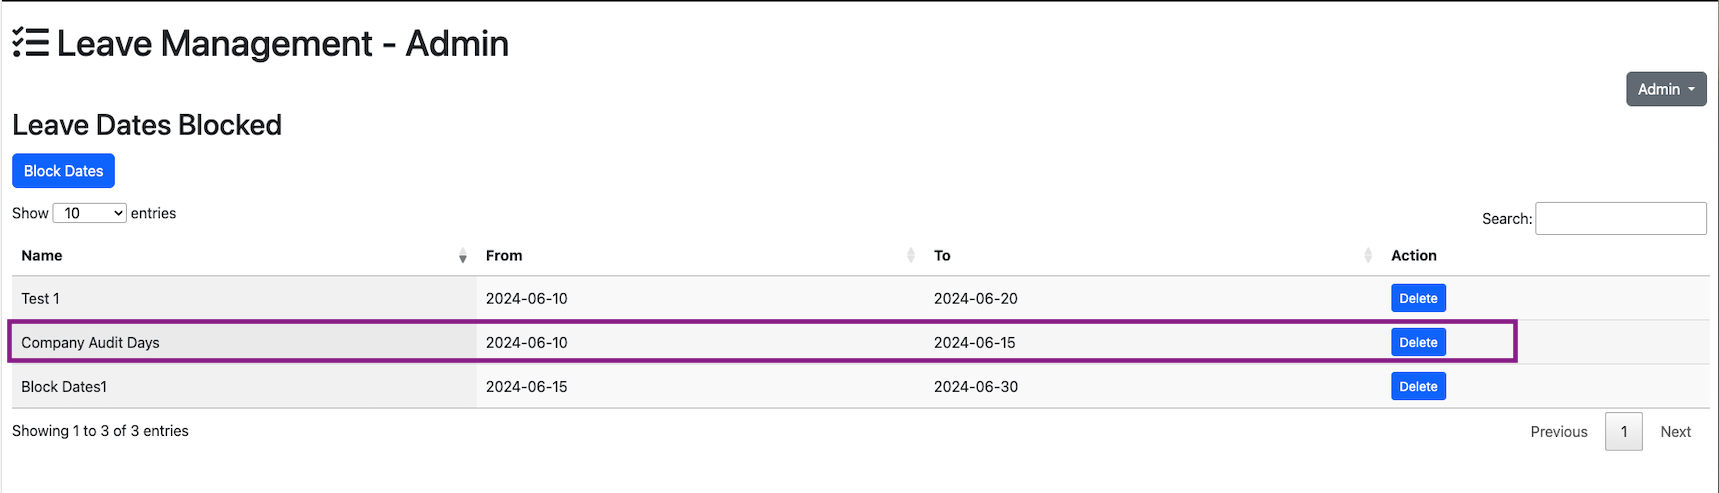
2024-06-10 to 2024-06-15 is added as Blocked days. Now a user is applying for leave on these days.
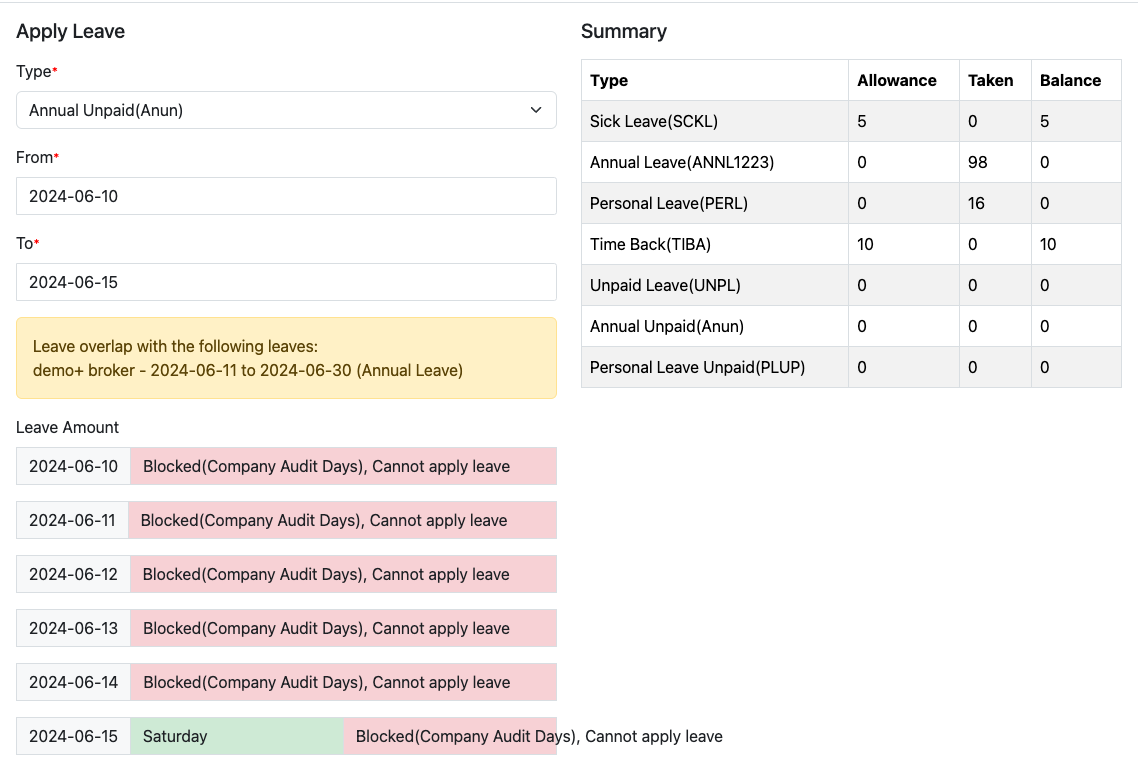
These days are marked as blocked when applying for leave.
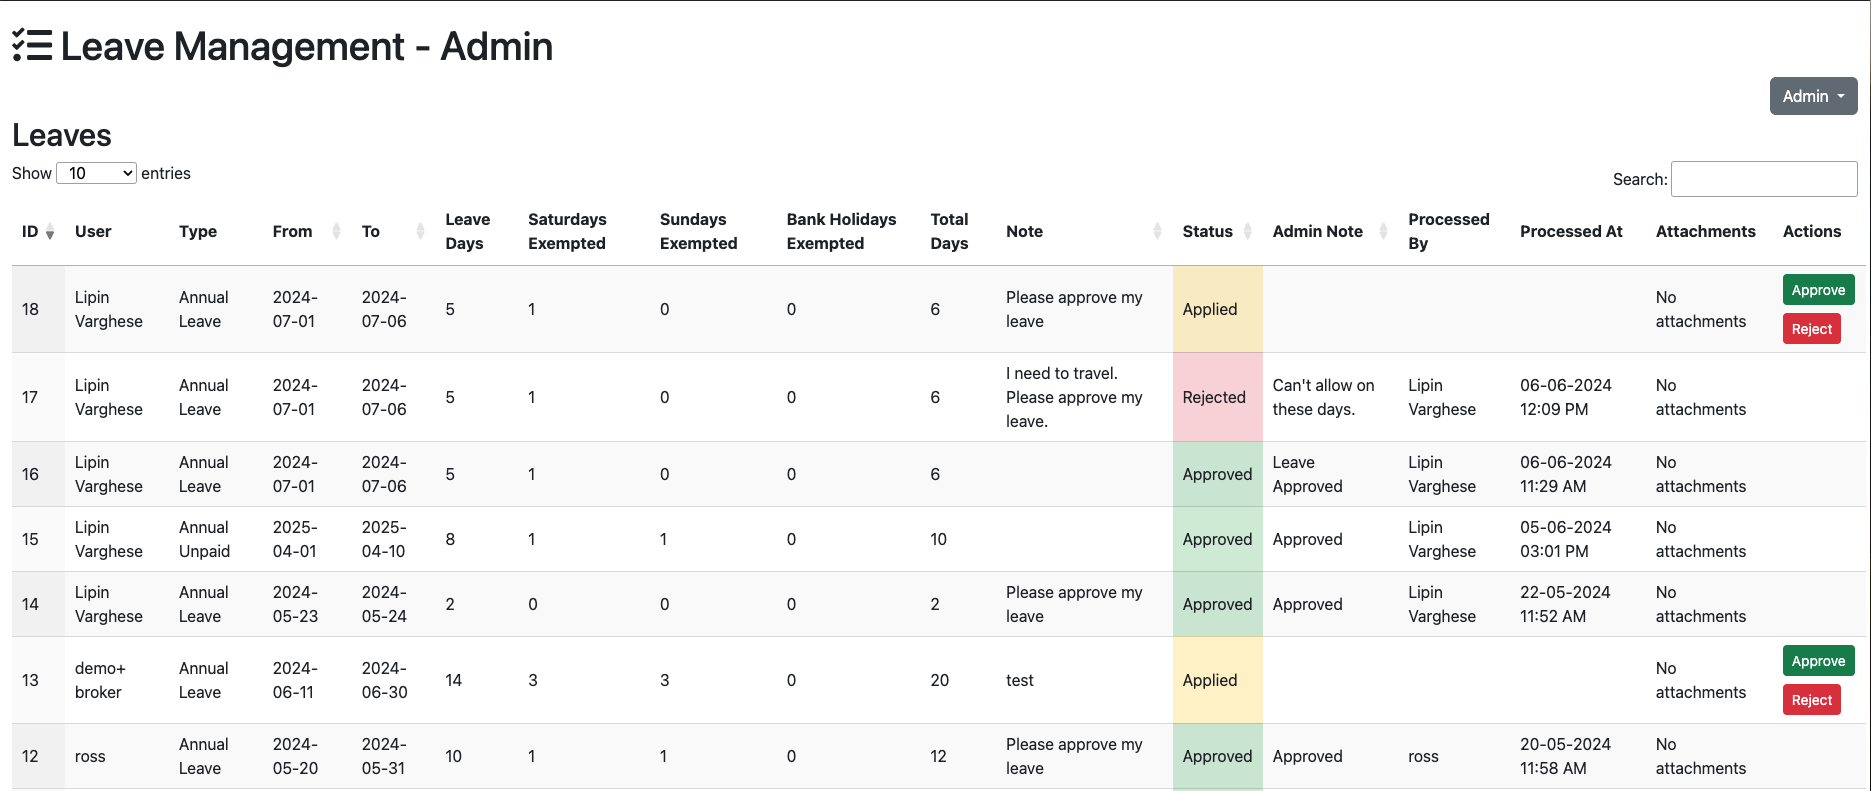
Admin can manage all the leaves from the leave management page. Admin can approve/reject a leave request. All the leave requests are listed on the leave management page. The leaves has 3 states, applied, approved and rejected.
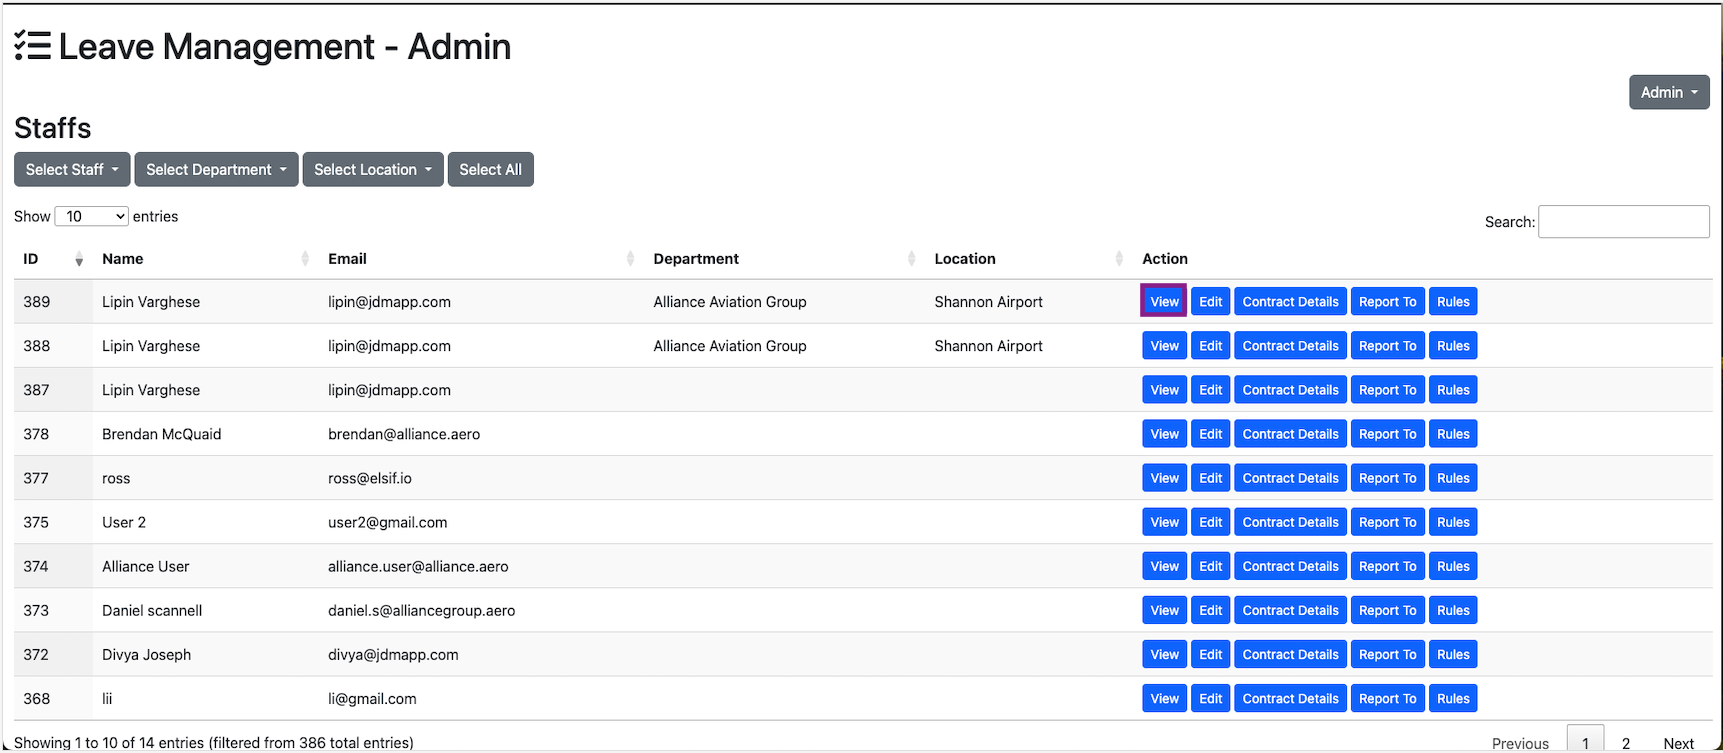
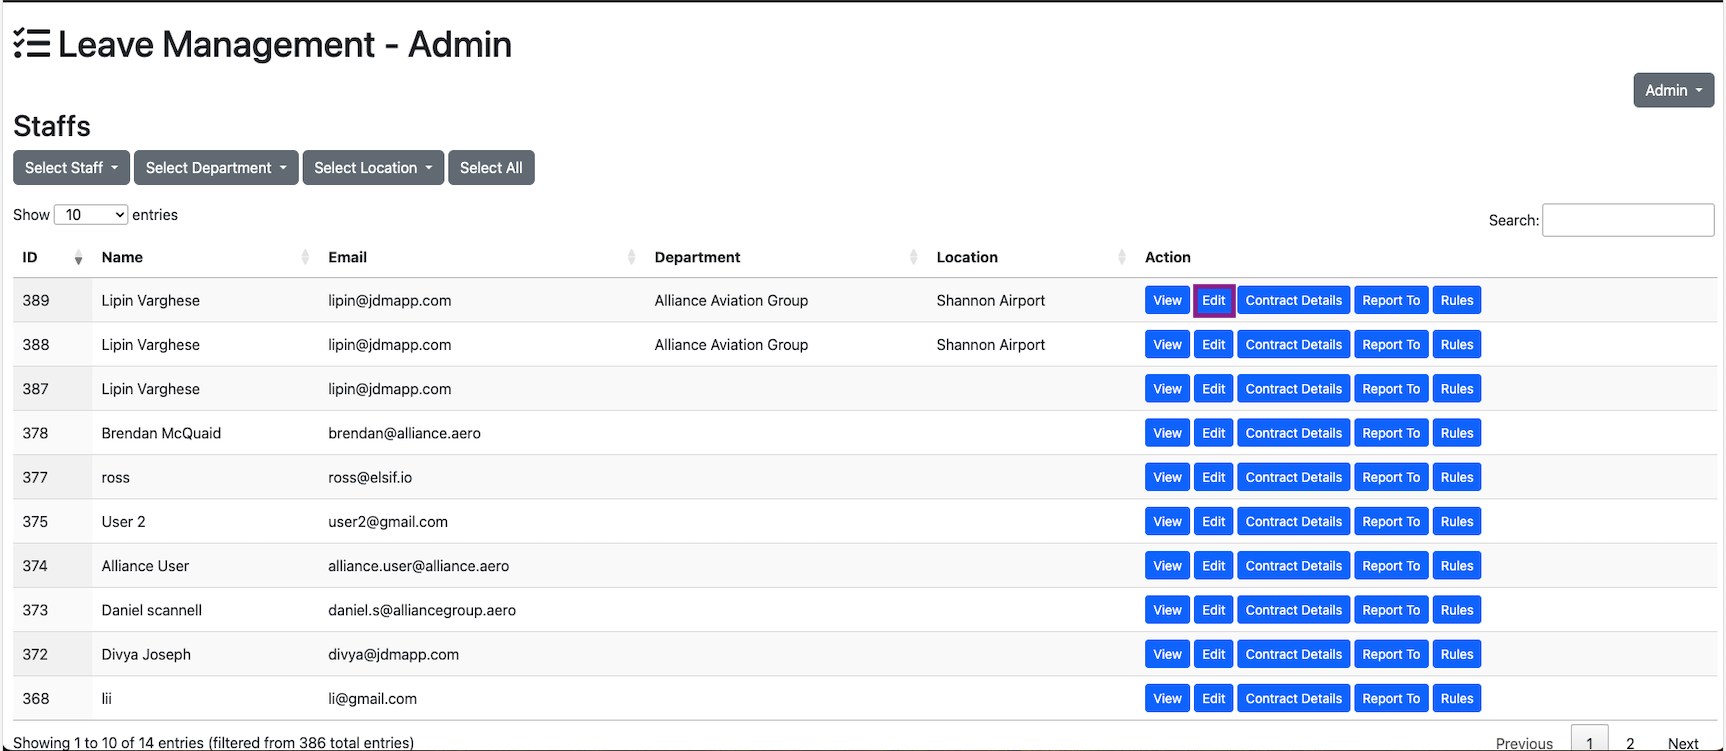
All the staff are managed in the Staffs sections from the Admin

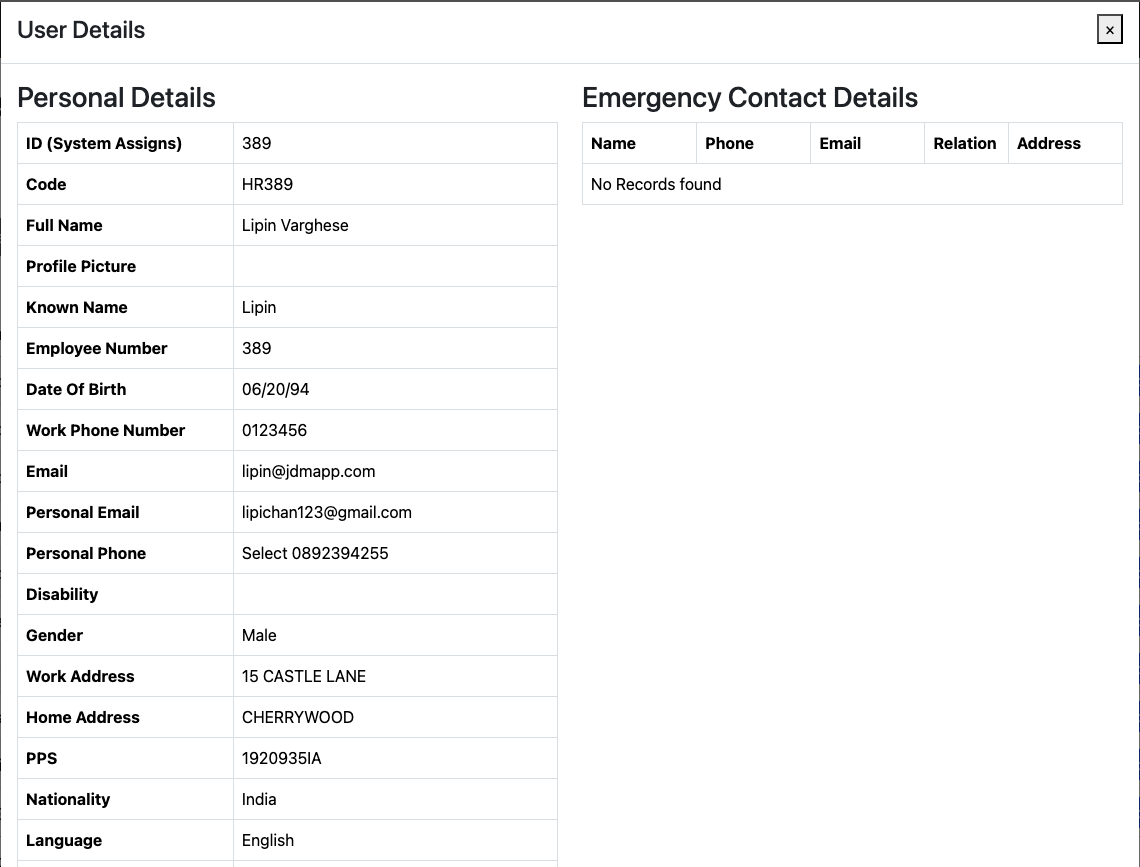
The staff details can be accessed by clicking on the View button.
A user can be edited and employment details and contract details can be added by clicking on the Edit button.
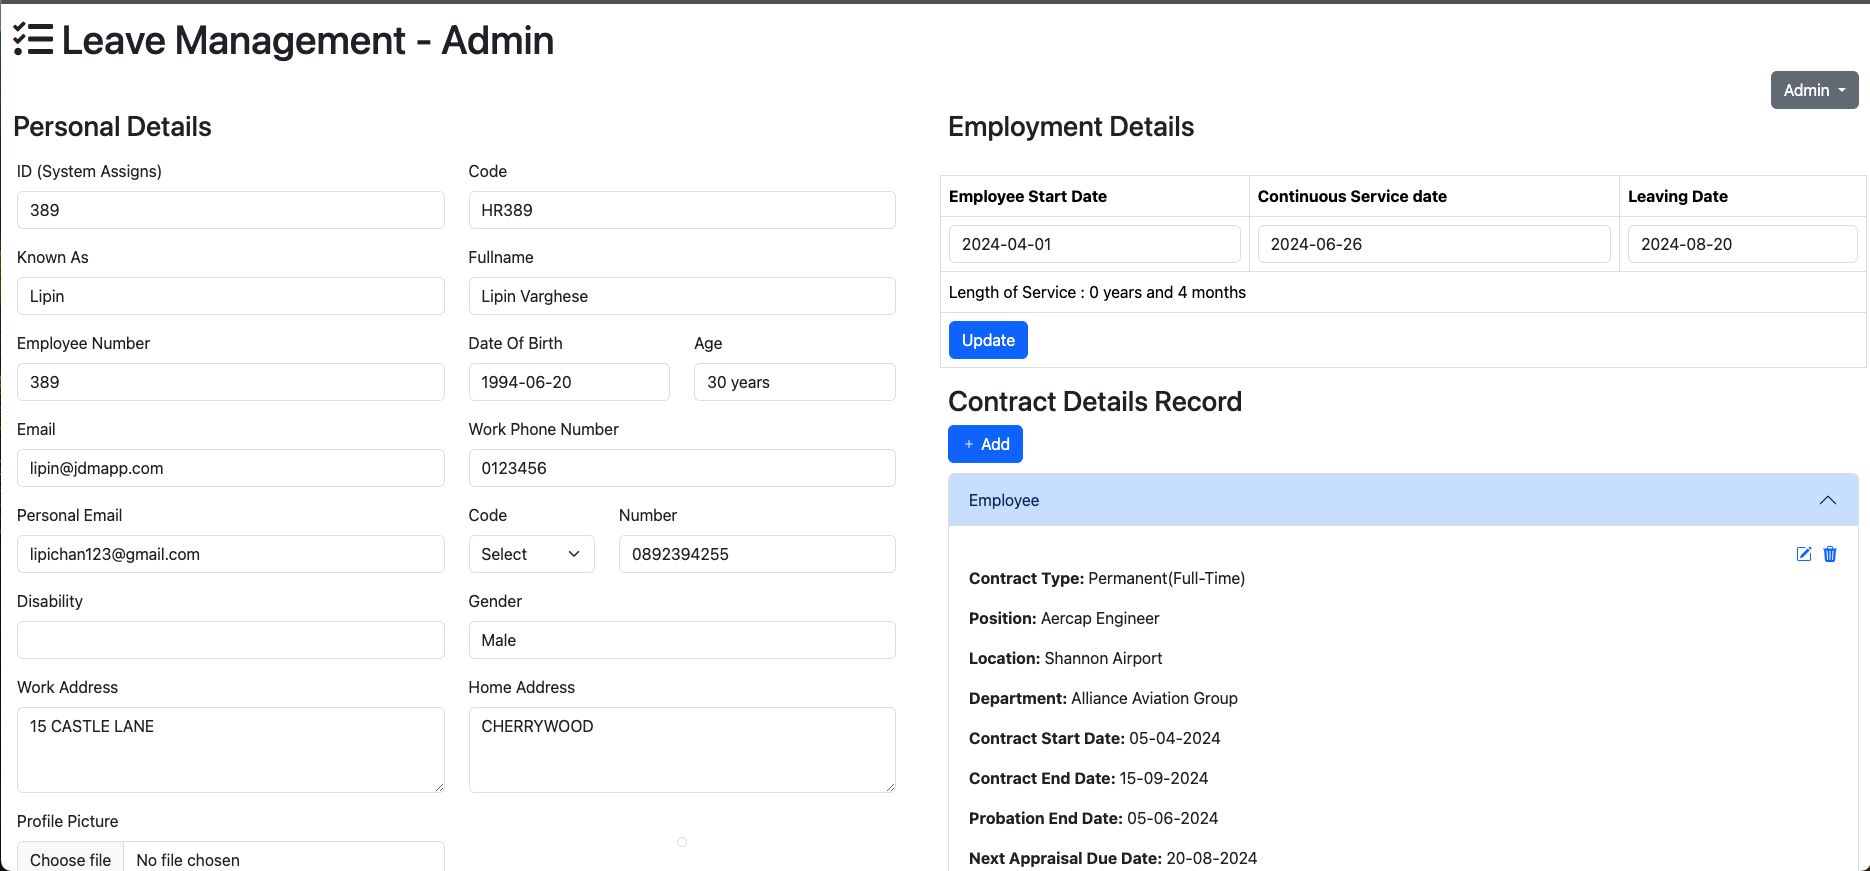
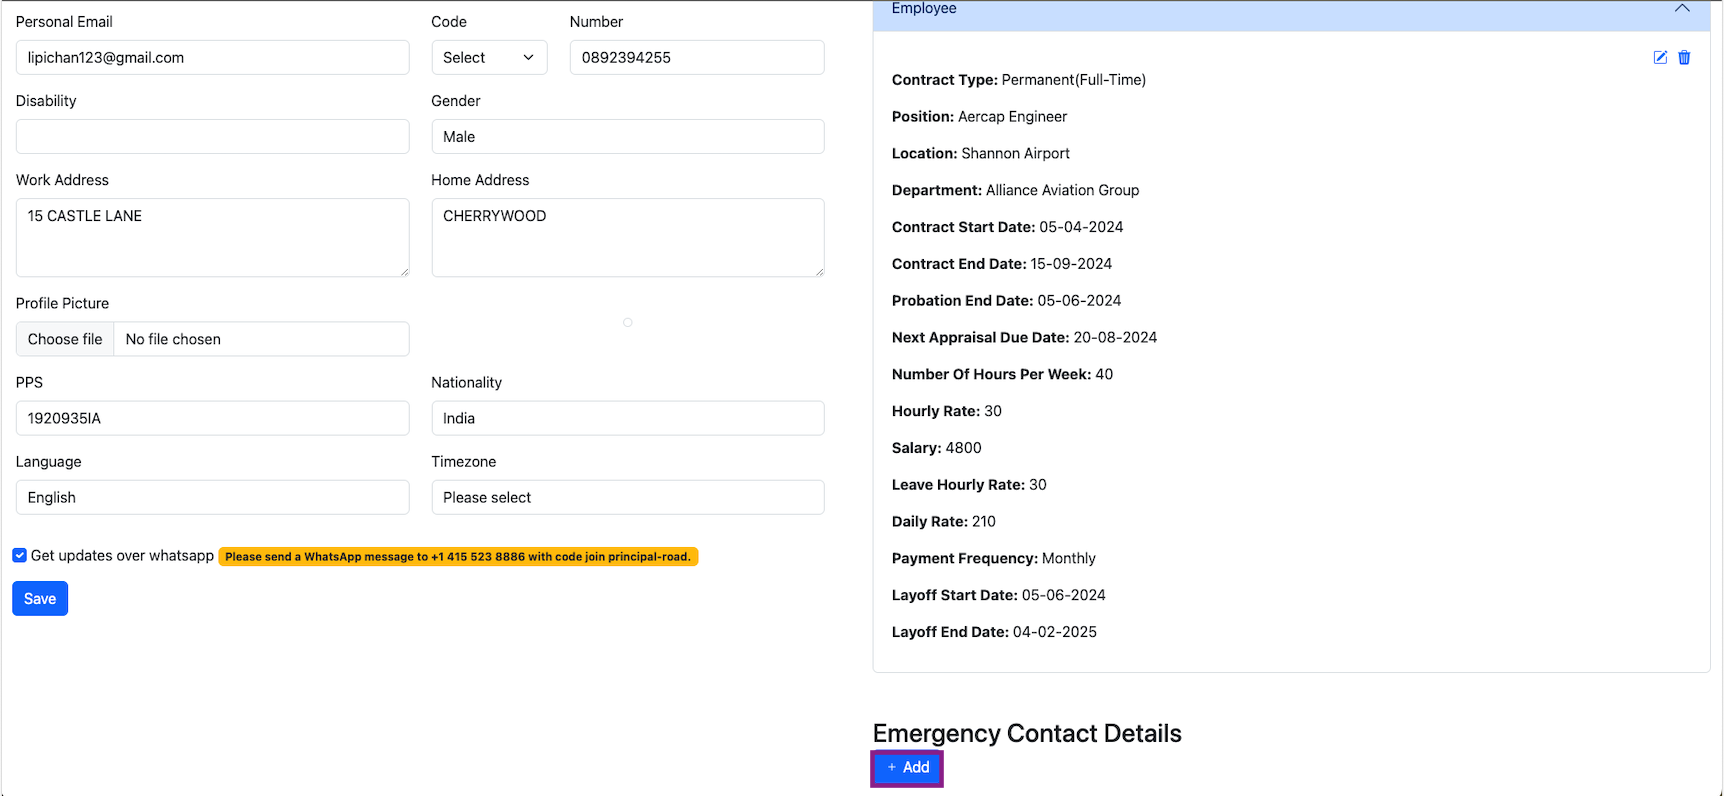
The personal details of a user can be modified on the left hand side.The employment details can be updated on the Employment Details section on the right hand top corner. After filling the details click on the update button for updating the employment details.
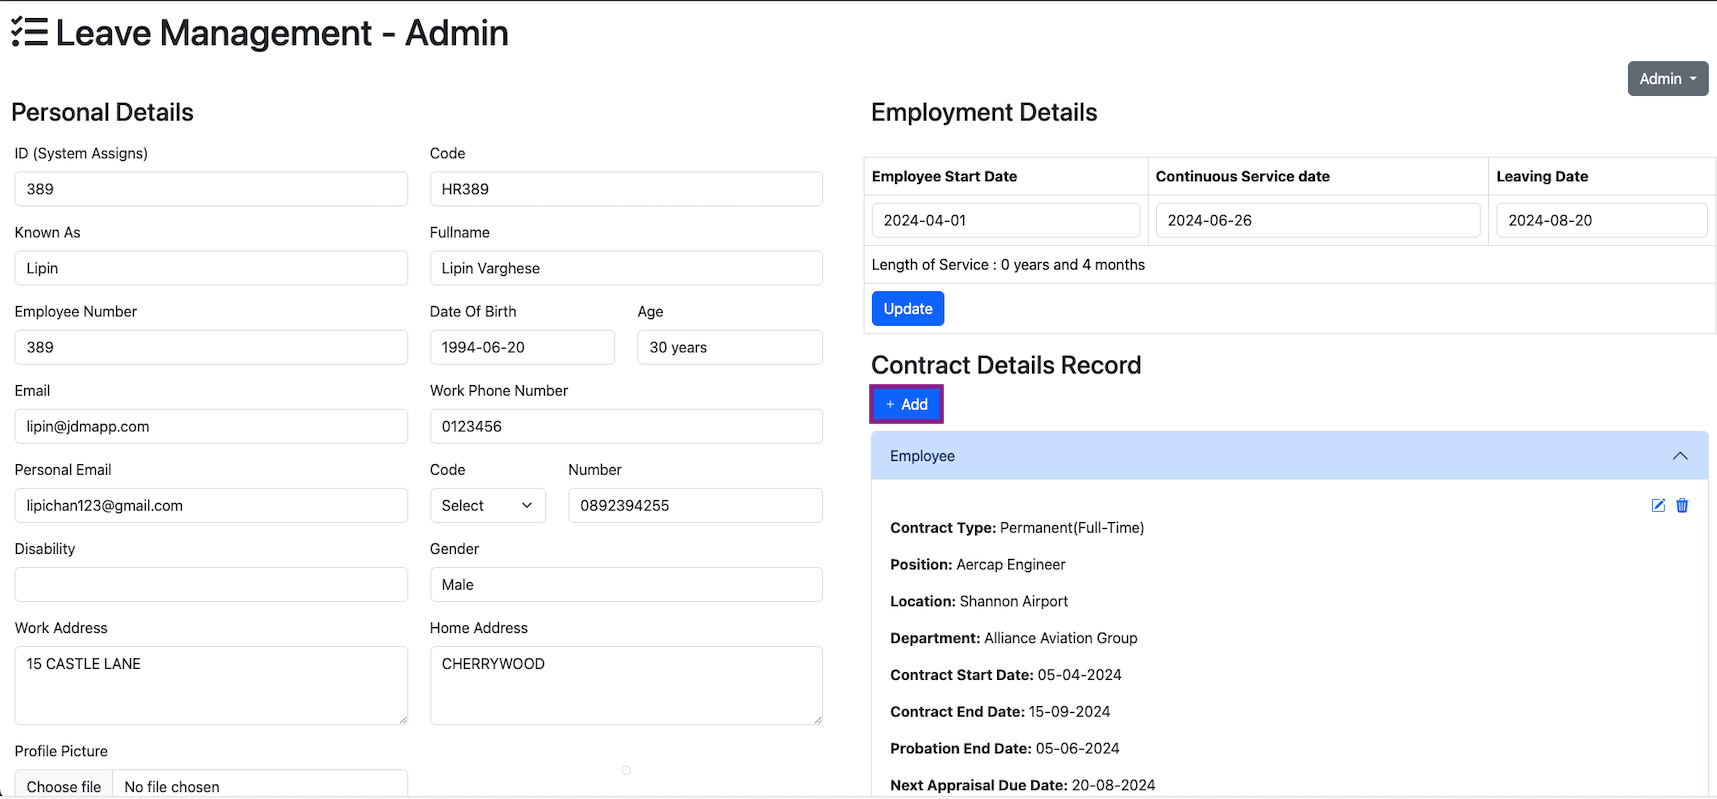
Contract details for a user can be added by clicking on the + Add button on the Contract Details Record section on the mid right hand side.
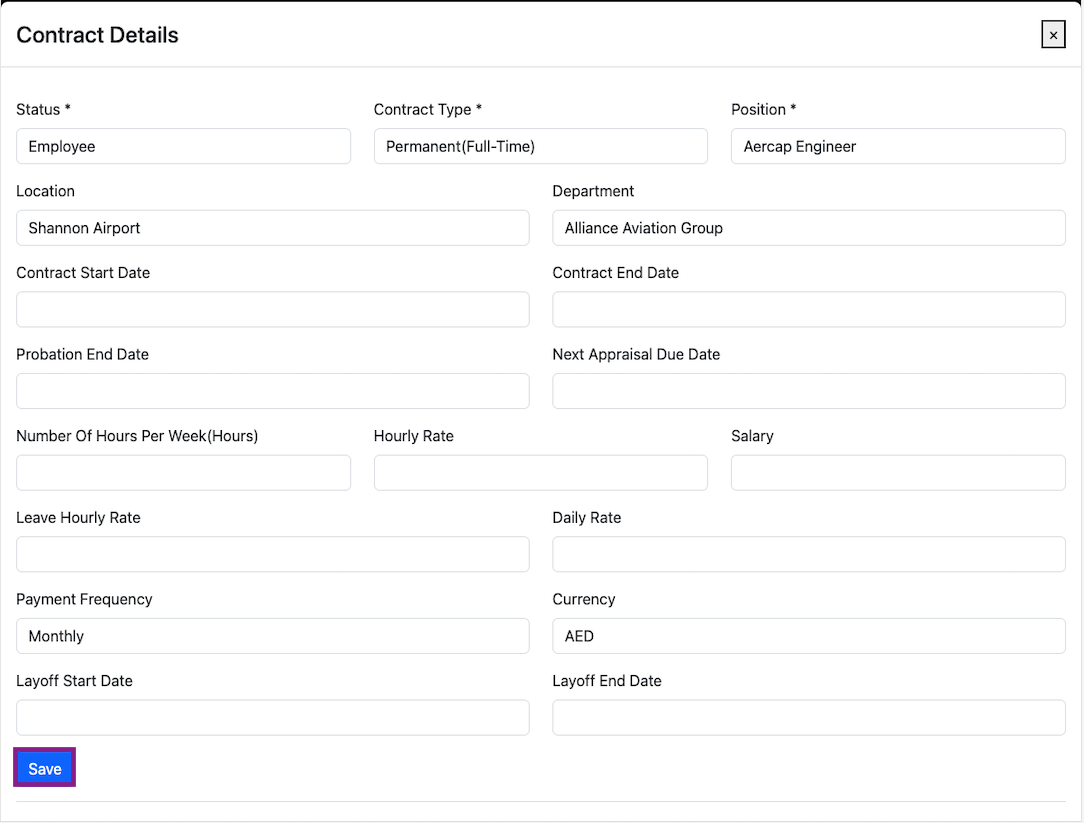
By clicking on the save button the contract details will be updated.
Quick leave can be added to a user by clicking on the Quick Leave button on the top right hand side in the staff section.


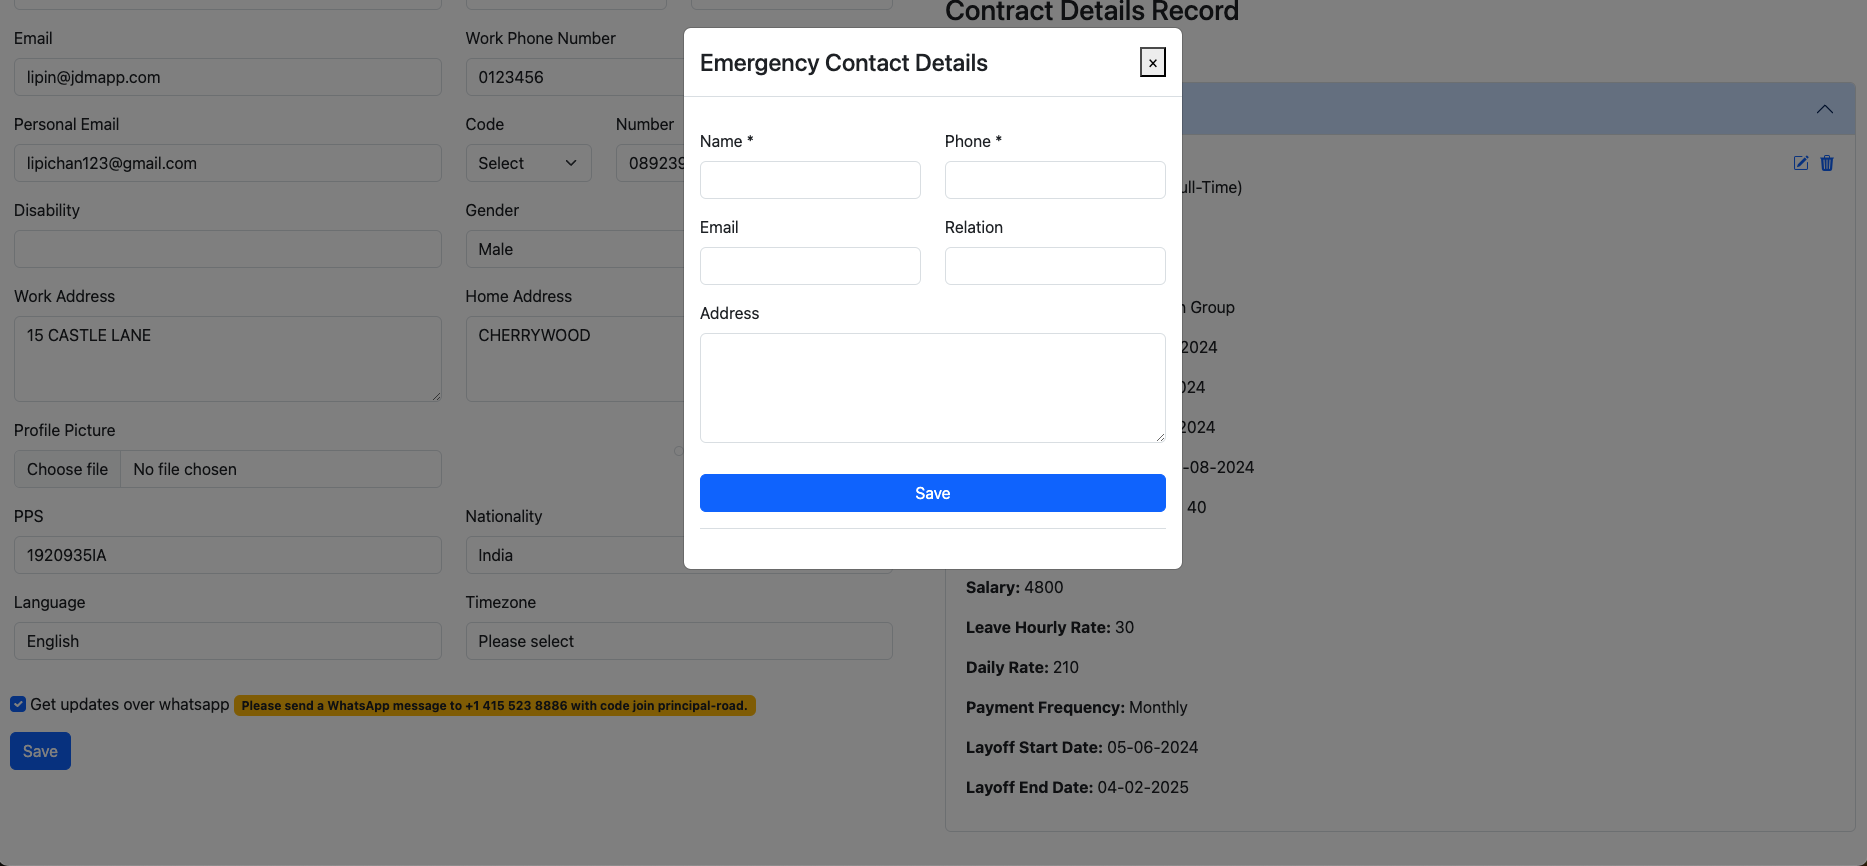
An emergenc contact can be added to a user by clicking on the + Add button on the Emergency Contact Details section on the very bottom right hand corner.
Staff positions are added from the Admin dropdown menu.
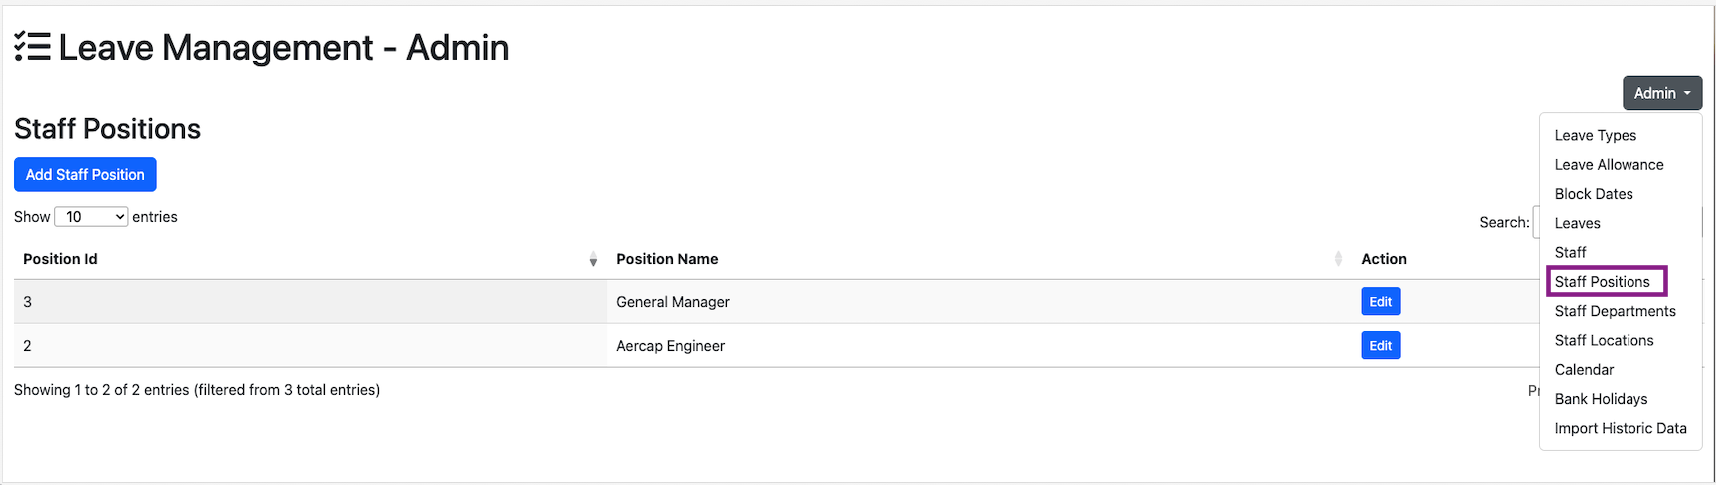
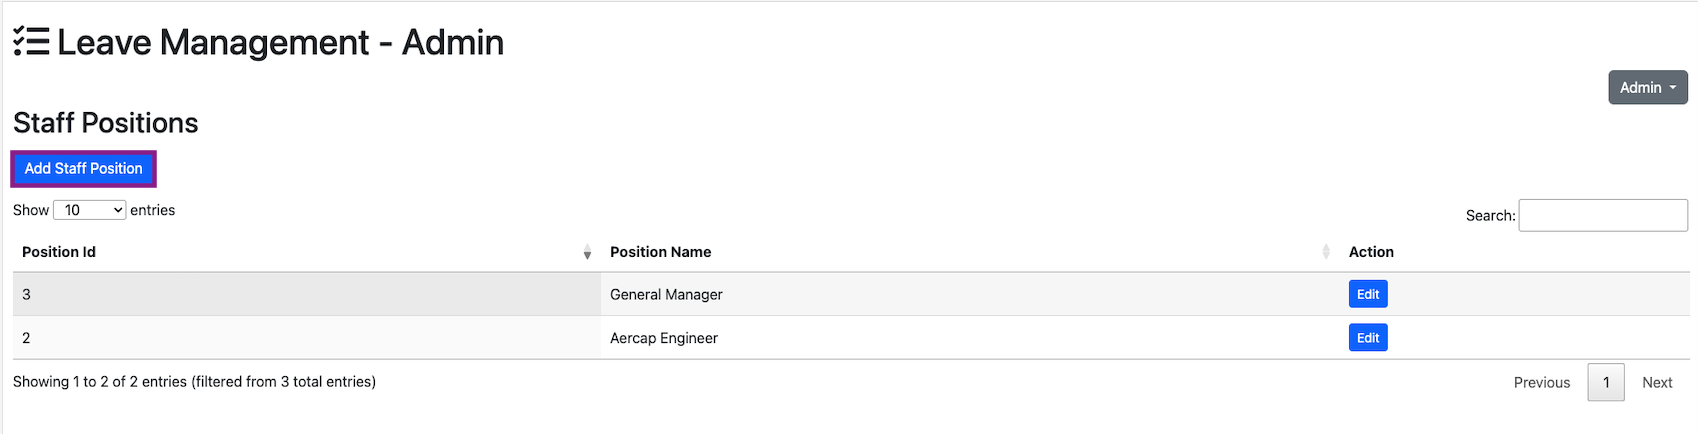
Now, click on the Add staff Positions to add a new staff position.
Staff Departments are added from the Admin dropdown menu, by clicking on the Staff Departments.
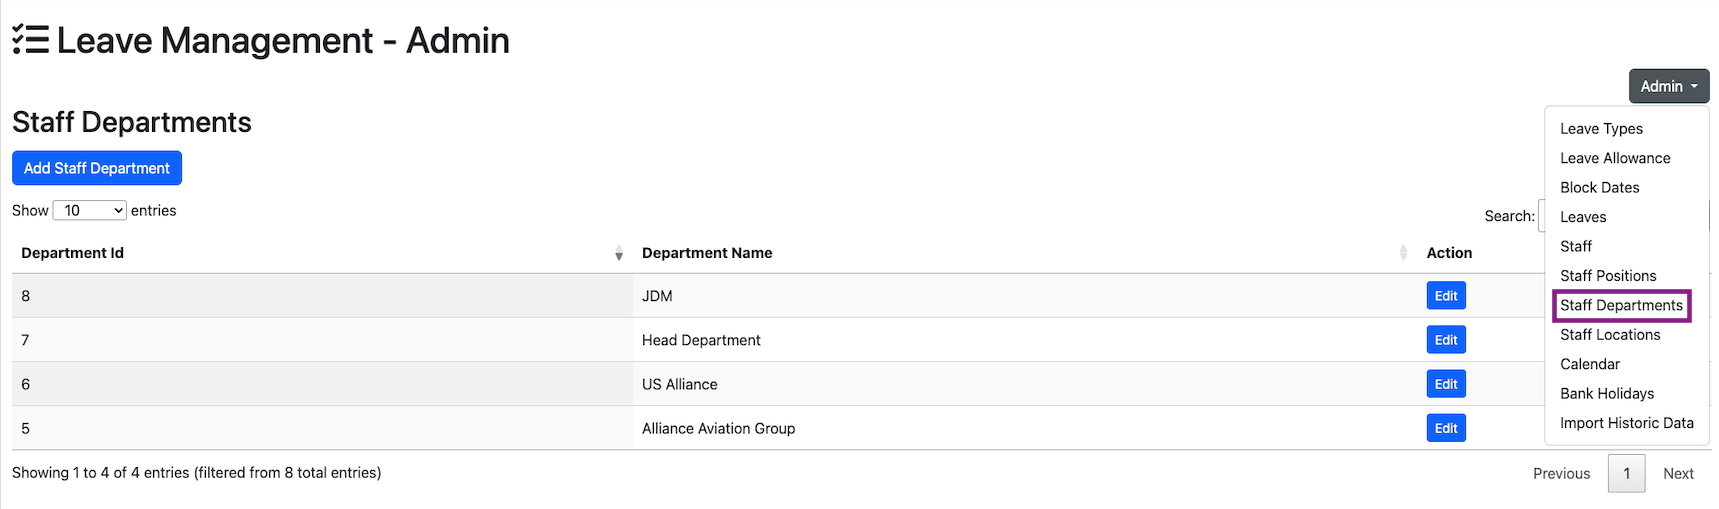
Now, click on the Add staff Department to add a new staff department.

Staff Location canbe added from the Admin dropdown menu,by clicking on the Staff Locations.
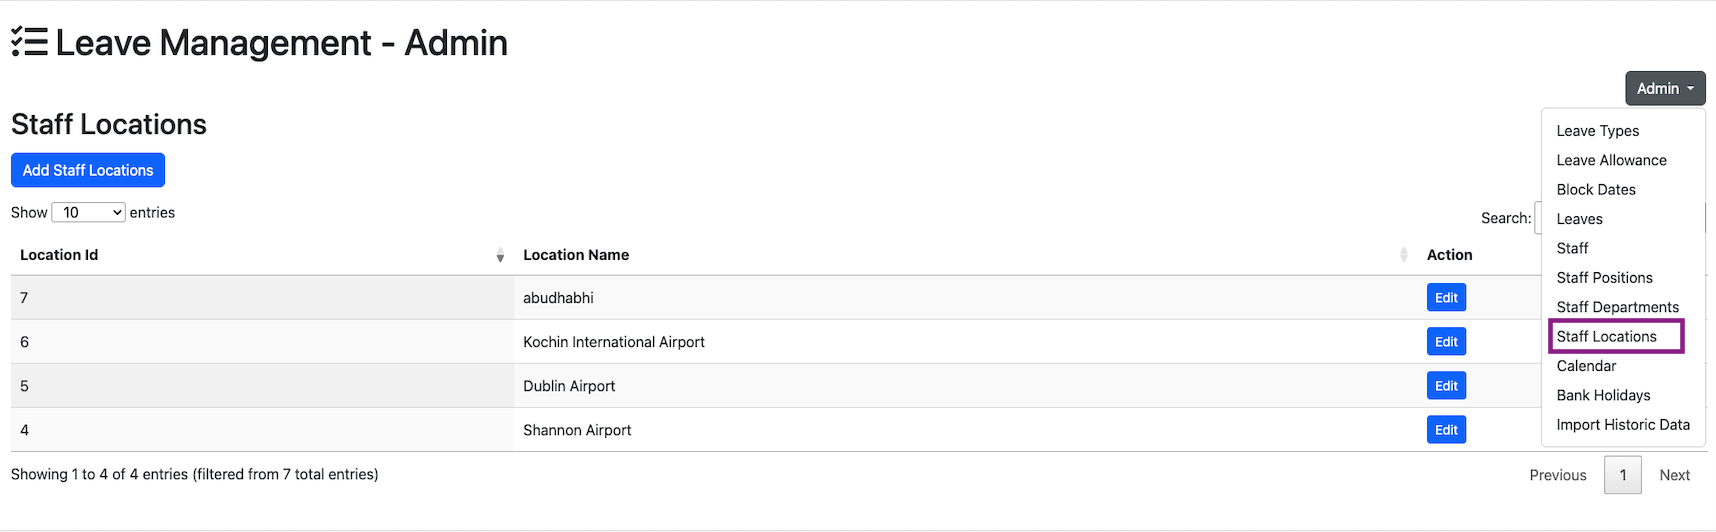
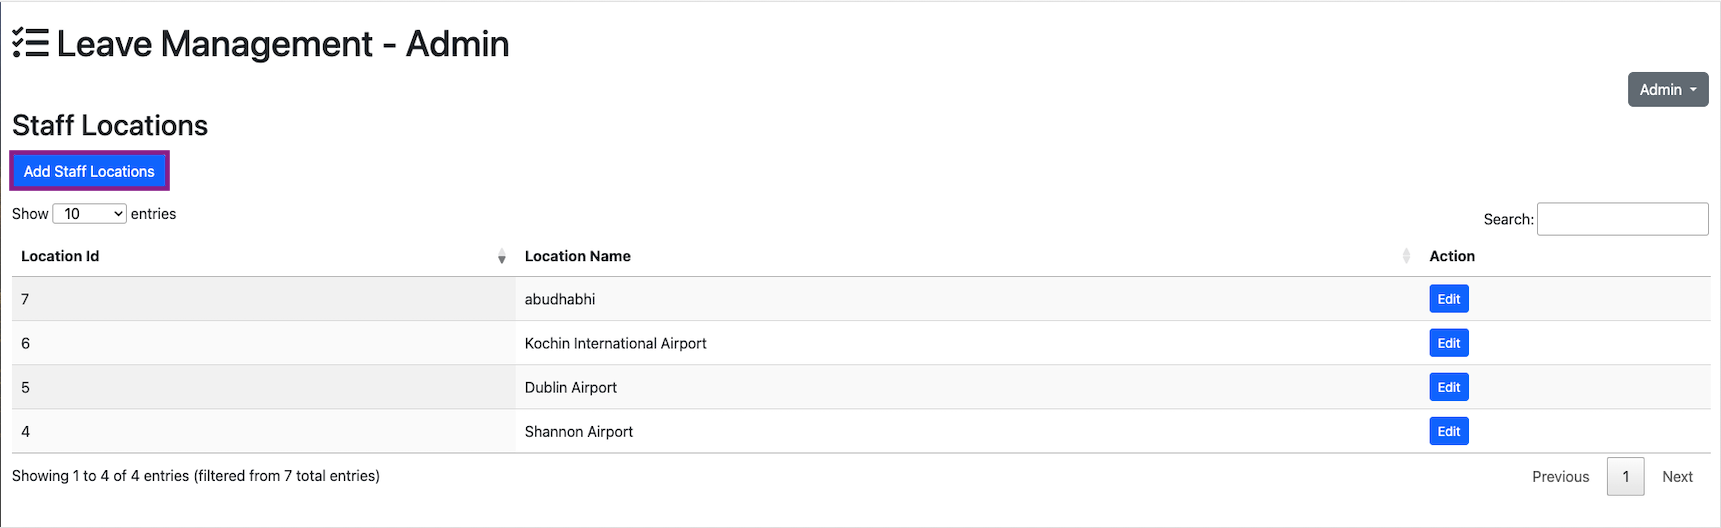
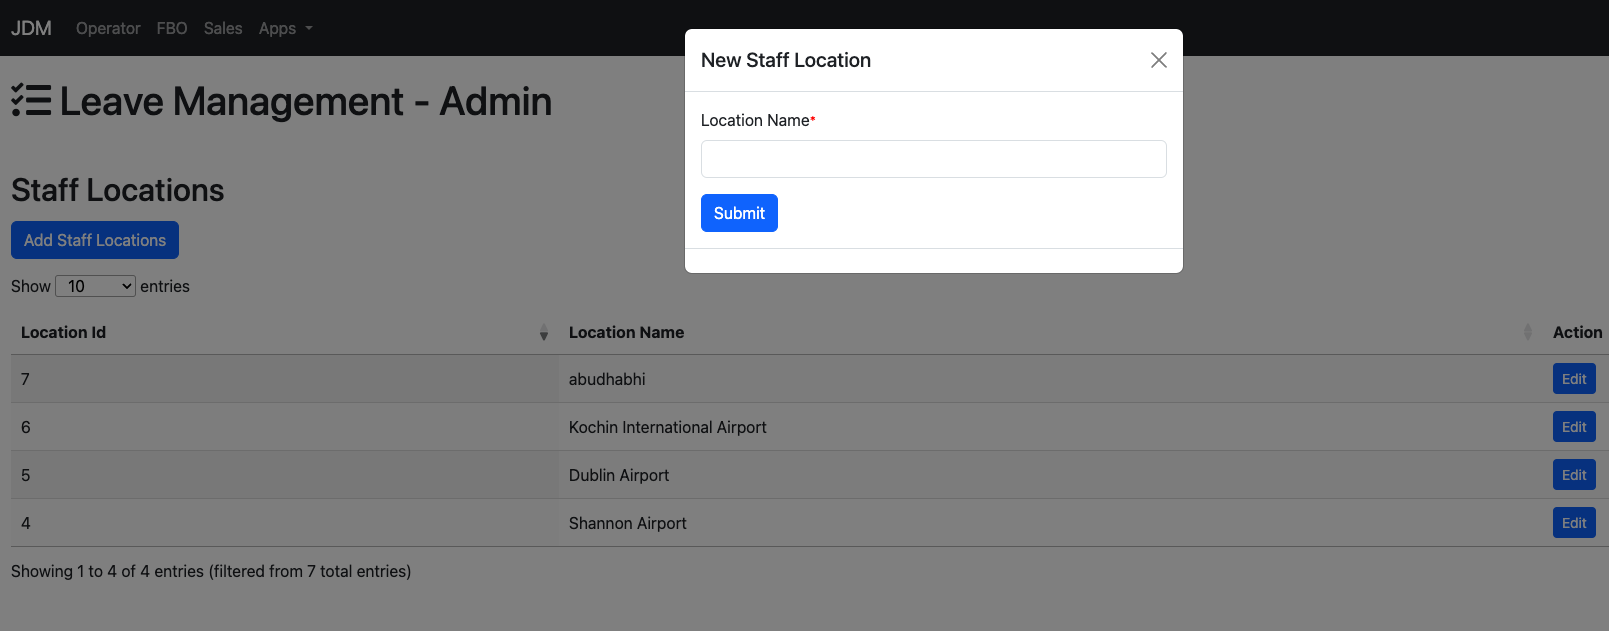
Click on the Add Staff Location button to add a new staff location.
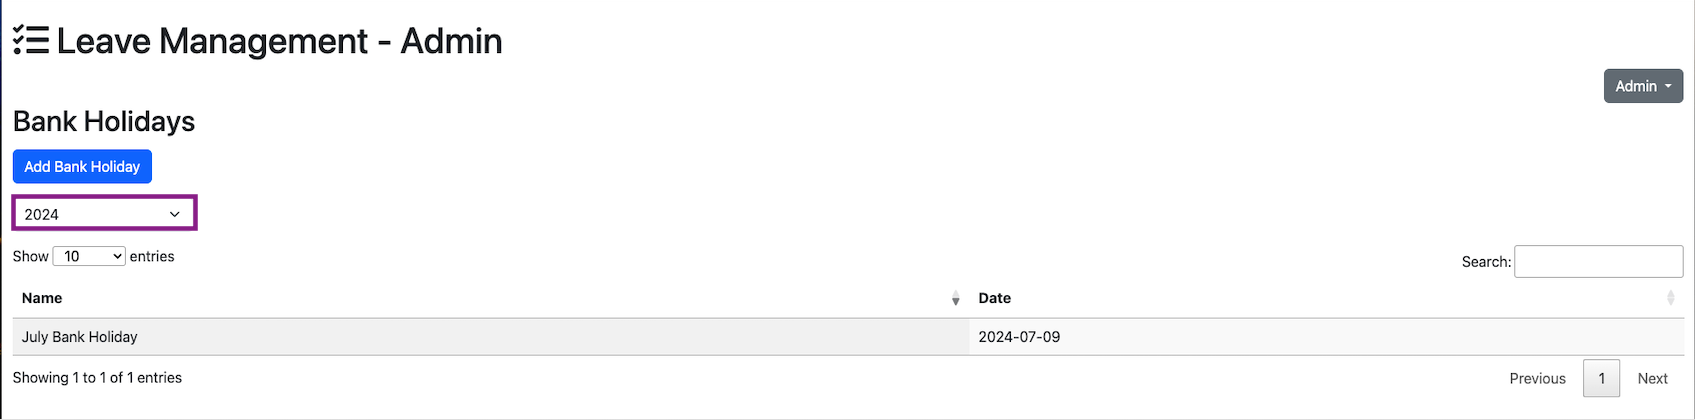
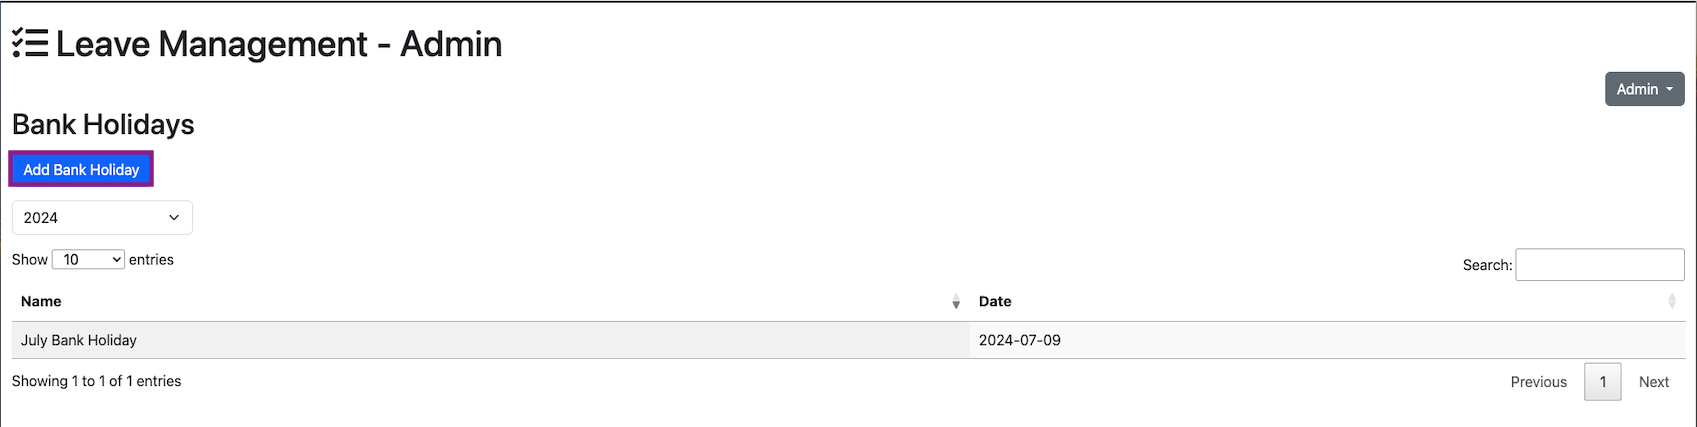
Bank holidays for a year is added from the Bank Holidays section in the admin dropdown.
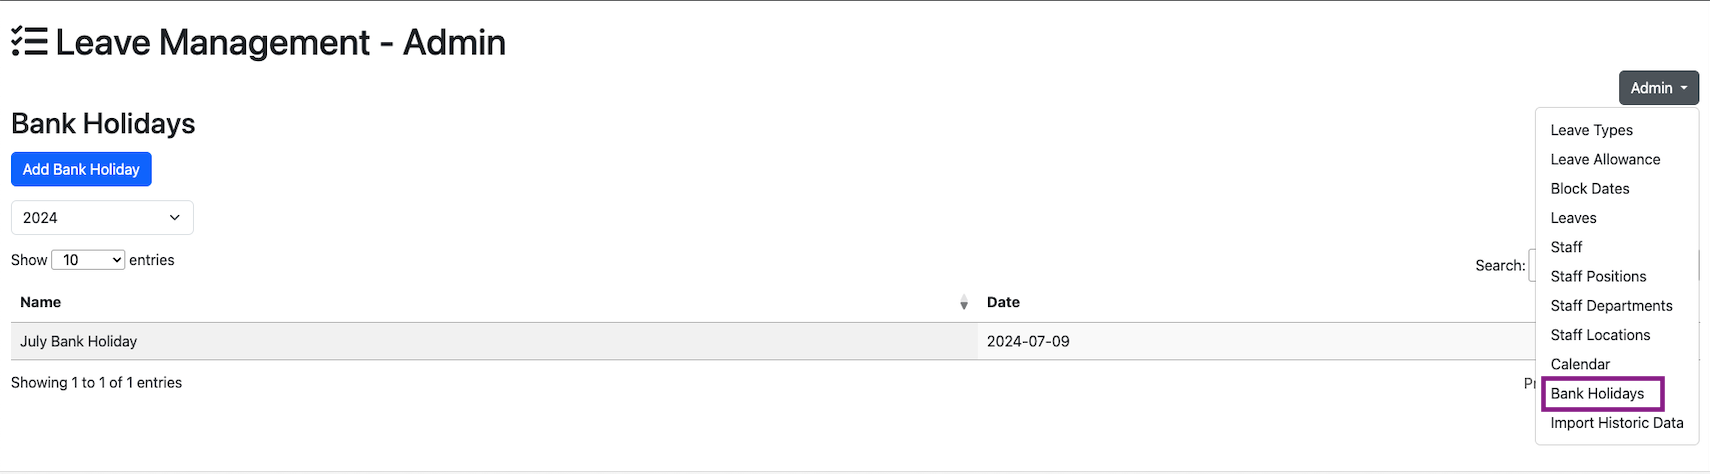
A new bank holiday can be added from the Admin dropdown.
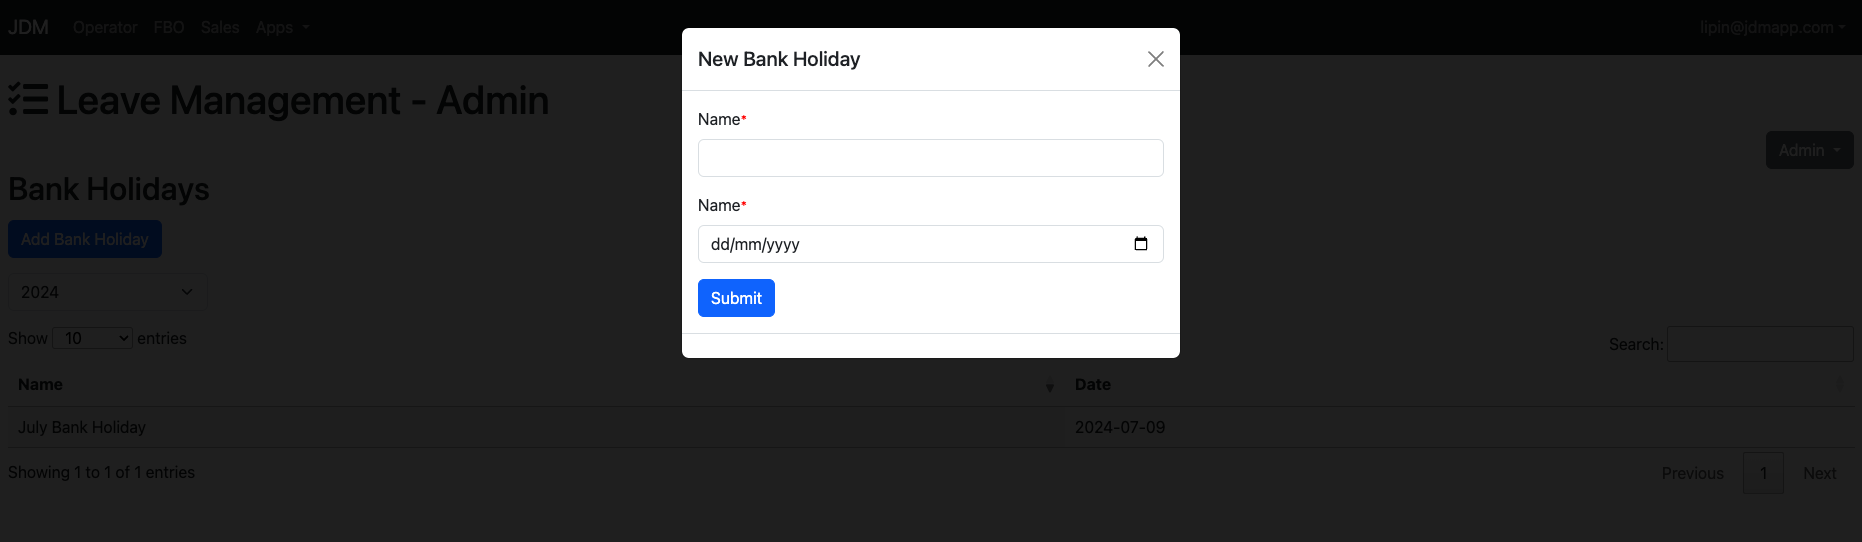
>Click on the Add Bank Holiday button to add a new bank holiday.
The year can be selected from the dropdown right below the Add Bank Holidaybutton.